


可否出个可视化操作数据库的组件
包括数据库连接、数据库增删改查等方法,可否有个可视化操作组件,只需要配置相关的属性和关联有关的组件,即可轻松操作数据库。
包括数据库连接、数据库增删改查等方法,可否有个可视化操作组件,只需要配置相关的属性和关联有关的组件,即可轻松操作数据库。
HBuilderX 3.3.2+ uni.getLocation 更新注意事项
HBuilderX 3.3.2 以下版本 App 端 uni.getLocation 存在 type 参数不生效的 bug。实际上返回的坐标类型依据打包时是否勾选了三方定位模块,当勾选了三方定位模块(如高德定位)时返回 gcj02 类型的,否则返回 wgs84 类型。
以上问题导致:部分开发者获取到了 gcj02 类型的坐标(国内一般均使用此类型)而误以为自己需要的是 wgs84 类型;部分开发者获未配置 SDK 取到了 wgs84 类型的坐标,误认为自己获取到的 gcj02 类型的坐标偏移。
更新 HBuilderX 到 3.3.2 后,修复了以上问题(type 参数将开始生效,也请注意定位 SDK 配置需要一致),如仍需获取 gcj02 类型,请在调用 uni.getLocation 时指定 type 参数以及勾选填写三方定位模块:
uni.getLocation({
    type: 'gcj02',
    success: function (res) {
        console.log('当前位置的经度:' + res.longitude);
        console.log('当前位置的纬度:' + res.latitude);
    }
});HBuilderX 3.3.2 以下版本 App 端 uni.getLocation 存在 type 参数不生效的 bug。实际上返回的坐标类型依据打包时是否勾选了三方定位模块,当勾选了三方定位模块(如高德定位)时返回 gcj02 类型的,否则返回 wgs84 类型。
以上问题导致:部分开发者获取到了 gcj02 类型的坐标(国内一般均使用此类型)而误以为自己需要的是 wgs84 类型;部分开发者获未配置 SDK 取到了 wgs84 类型的坐标,误认为自己获取到的 gcj02 类型的坐标偏移。
更新 HBuilderX 到 3.3.2 后,修复了以上问题(type 参数将开始生效,也请注意定位 SDK 配置需要一致),如仍需获取 gcj02 类型,请在调用 uni.getLocation 时指定 type 参数以及勾选填写三方定位模块:
uni.getLocation({
    type: 'gcj02',
    success: function (res) {
        console.log('当前位置的经度:' + res.longitude);
        console.log('当前位置的纬度:' + res.latitude);
    }
});什么叫组件丰富?什么叫真正的组件丰富?一起来看看FirstUI的答案
一、产品介绍
FirstUI(https://www.firstui.cn/)
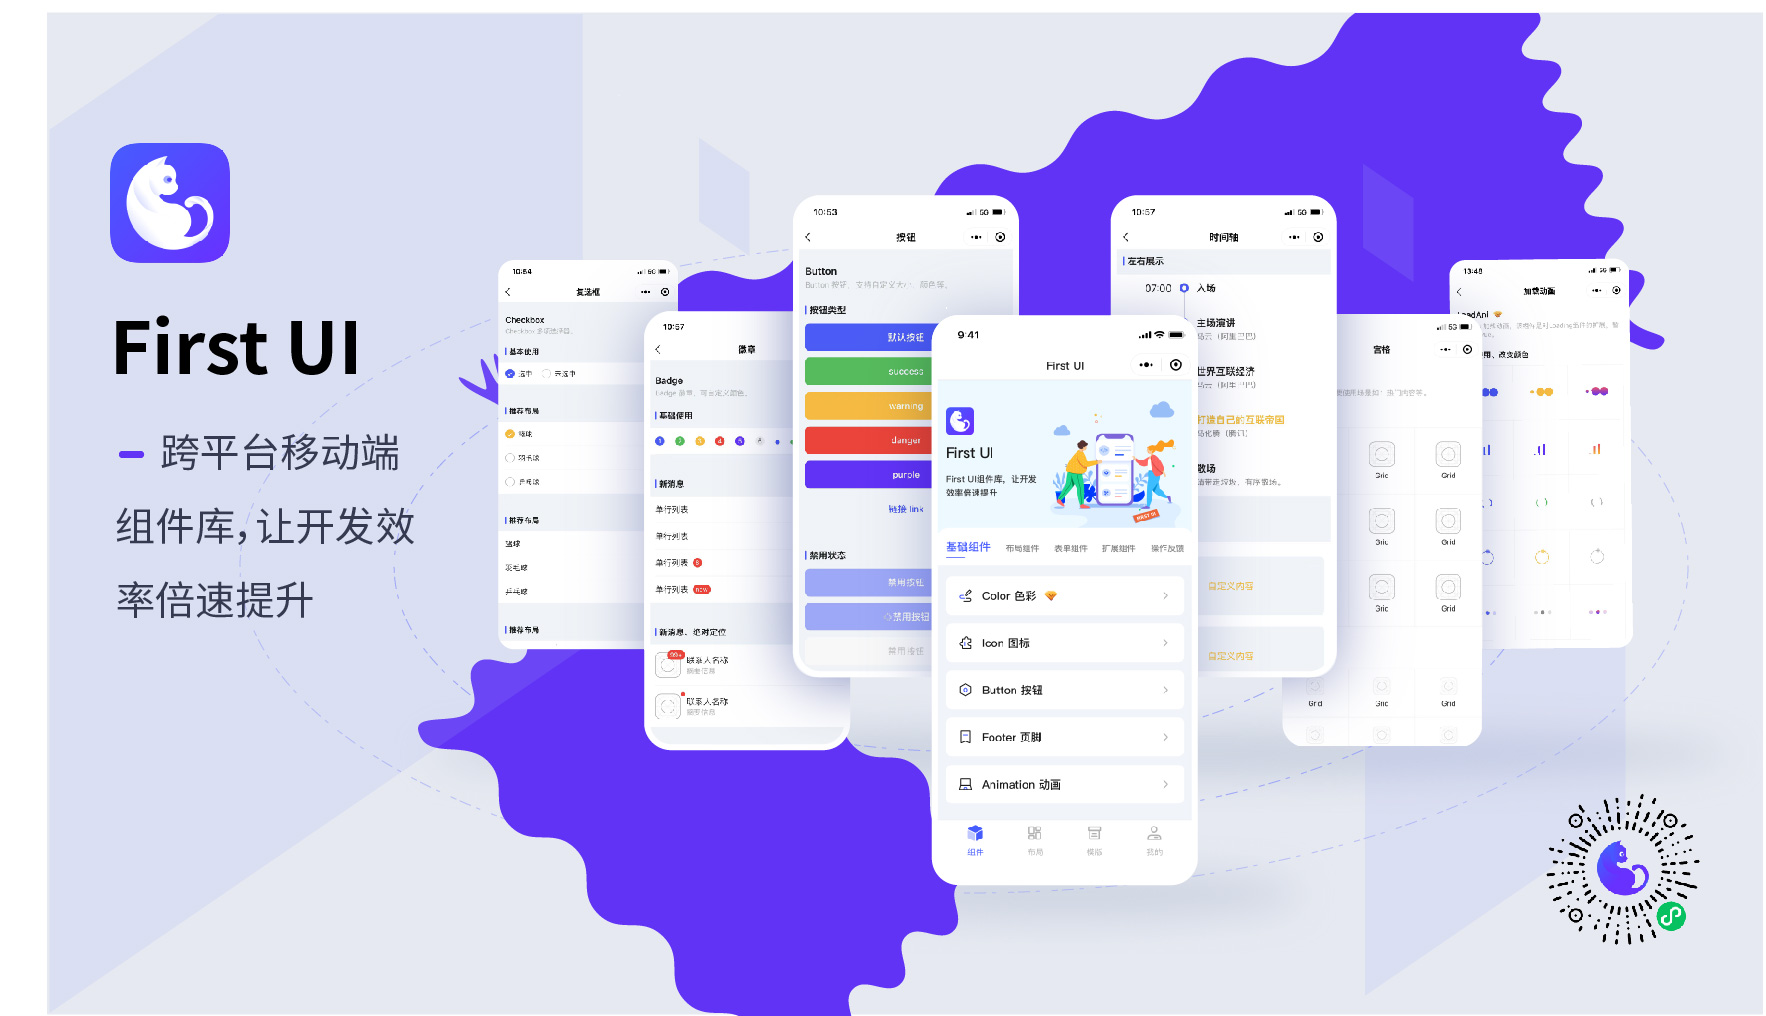
给大家推荐下我们做的FirstUI,它是基于uni-app开发的一款轻量、全面可靠的跨平台移动端组件库。包括框架、组件、模板、功能插件几个部分。高品质产品,可以更好的节约使用者的时间与成本。
FirstUI我们倾注了大量的精力,很期待大家的关注试用!
1、产品特征:
- 多端支持。一套代码,多端适用,支持iOS(vue和Nvue)、Android(vue和Nvue)、微信小程序、支付宝小程序、QQ小程序、百度小程序、字节跳动小程序、H5平台
- 完善的组件。目前共规划118款,已上线70款,涵盖基础组件、表单组件、导航组件、布局组件、常用布局、扩展组件、操作反馈、数据组件、JS、图表、画布。
- 丰富实用的布局、模板。基于FirstUI提供的组件,针对常用场景、行业,提供丰富实用的布局和模板。
- 专属社区。我们用flarum(ps:这个大家也可以试下,设计与功能方面好用,感觉用来做社区非常棒)打造了FirstU专属社区(https://forum.firstui.cn/),用户可以在社区交流分享FirstUI的使用经验、提问。有其他组件、模板需求,也可以在社区中反馈。
2、源码及文档:
- github: https://github.com/FirstUI/FirstUI (欢迎star :-D)
- gitee: https://gitee.com/firstui/FirstUI (欢迎star :-D)
- 文档地址: https://doc.firstui.cn
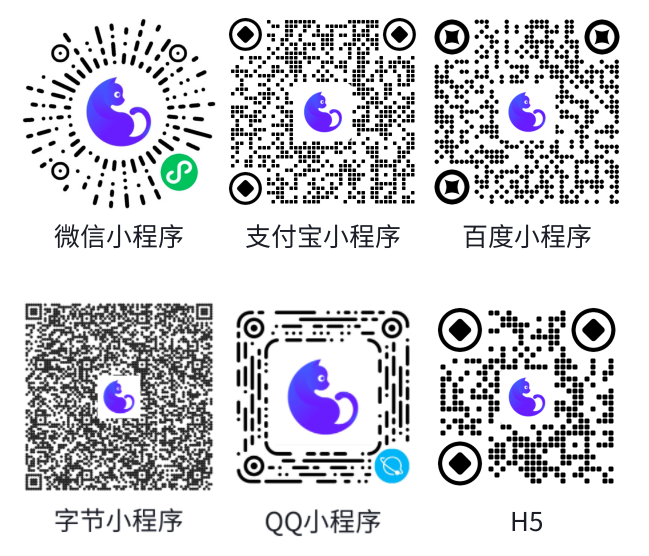
3、扫码体验:
大部分组件是操作性的,大家扫码操作可以有更真切的感受。目前发布了6个平台版本,大家可以扫码体验下。考虑快速预览,所以暂未上架App应用,后续待功能完善再进行上架。
4、丰富丰富还是丰富,已上线组件一览
> 全部都是精心打造,实打实的组件,不是为了充数量而拼凑组合来的!强烈建议大家扫码体验!
- 基础组件
- Color 色彩
- Icon 图标
- Button 按钮
- Footer 页脚
- Animation 动画
- 导航组件
- NavBar 导航栏
- Pagination 分页器
- SegmentedControl 分段器
- Tabbar 标签栏
- Tabs 标签页
- IndexList 索引列表
- NoticeBar 通告栏
- Sticky 吸顶容器
- Steps 步骤条
- Fab 浮动按钮
- Drawer 抽屉
- BottomPopup 底部弹出层
- TopPopup 顶部弹出层
- TimeAxis 时间轴
- 布局组件
- Layout 栅格布局
- Panel 面板
- Preview 表单预览
- List 列表
- Card 卡片
- 扩展组件
- ShareSheet 分享面板
- Result 结果页
- FilterBar 筛选栏
- DigitalRoller 数字滚轮
- DigitalKeyboard 数字键盘
- CountdownVerify 验证码倒计时
- SwiperDot 轮播图指示点
- LicensePlate 车牌号键盘
- SingleInput 单输入框
- 操作反馈
- ActionSheet 上拉菜单
- Toast 轻提示
- BackDrop 遮罩层
- Dialog 对话框
- DropdownMenu 下拉菜单
- Modal 模态框
- Landscape 压屏窗
- Loading 加载
- Message 消息提示
- SwipeAction 滑动菜单
- DropdownList 下拉菜单
- LoadAni 加载动画
- 数据组件
- Badge 徽章
- Alert 警告框
- Avatar 头像
- Tag 标签
- Progress 进度条
- Collapse 折叠面板
- Divider 分割线
- LoadMore 加载更多
- Empty 暂无数据
- 画布
- Poster 绘制分享海报
- 表单组件
- Picker 选择器
- DatePicker 日期时间选择器
- Form 表单校验
- Input 输入框
- InputNumber 数字输入框
- Radio 单选框
- Checkbox 复选框
- Switch 开关
- Textarea 多行输入框
- SearchBar 搜索栏
- JS
- Clipboard 复制文本
- Request 网络请求
- Utils 工具类
- Validator 表单验证
二、使用体验与建议
FirstUI刚刚开始成长,非常期待大家的体验使用和宝贵的建议!大家可以在文后留言,让我们有新的认识,谢谢!
一、产品介绍
FirstUI(https://www.firstui.cn/)
给大家推荐下我们做的FirstUI,它是基于uni-app开发的一款轻量、全面可靠的跨平台移动端组件库。包括框架、组件、模板、功能插件几个部分。高品质产品,可以更好的节约使用者的时间与成本。
FirstUI我们倾注了大量的精力,很期待大家的关注试用!
1、产品特征:
- 多端支持。一套代码,多端适用,支持iOS(vue和Nvue)、Android(vue和Nvue)、微信小程序、支付宝小程序、QQ小程序、百度小程序、字节跳动小程序、H5平台
- 完善的组件。目前共规划118款,已上线70款,涵盖基础组件、表单组件、导航组件、布局组件、常用布局、扩展组件、操作反馈、数据组件、JS、图表、画布。
- 丰富实用的布局、模板。基于FirstUI提供的组件,针对常用场景、行业,提供丰富实用的布局和模板。
- 专属社区。我们用flarum(ps:这个大家也可以试下,设计与功能方面好用,感觉用来做社区非常棒)打造了FirstU专属社区(https://forum.firstui.cn/),用户可以在社区交流分享FirstUI的使用经验、提问。有其他组件、模板需求,也可以在社区中反馈。
2、源码及文档:
- github: https://github.com/FirstUI/FirstUI (欢迎star :-D)
- gitee: https://gitee.com/firstui/FirstUI (欢迎star :-D)
- 文档地址: https://doc.firstui.cn
3、扫码体验:
大部分组件是操作性的,大家扫码操作可以有更真切的感受。目前发布了6个平台版本,大家可以扫码体验下。考虑快速预览,所以暂未上架App应用,后续待功能完善再进行上架。
4、丰富丰富还是丰富,已上线组件一览
> 全部都是精心打造,实打实的组件,不是为了充数量而拼凑组合来的!强烈建议大家扫码体验!
- 基础组件
- Color 色彩
- Icon 图标
- Button 按钮
- Footer 页脚
- Animation 动画
- 导航组件
- NavBar 导航栏
- Pagination 分页器
- SegmentedControl 分段器
- Tabbar 标签栏
- Tabs 标签页
- IndexList 索引列表
- NoticeBar 通告栏
- Sticky 吸顶容器
- Steps 步骤条
- Fab 浮动按钮
- Drawer 抽屉
- BottomPopup 底部弹出层
- TopPopup 顶部弹出层
- TimeAxis 时间轴
- 布局组件
- Layout 栅格布局
- Panel 面板
- Preview 表单预览
- List 列表
- Card 卡片
- 扩展组件
- ShareSheet 分享面板
- Result 结果页
- FilterBar 筛选栏
- DigitalRoller 数字滚轮
- DigitalKeyboard 数字键盘
- CountdownVerify 验证码倒计时
- SwiperDot 轮播图指示点
- LicensePlate 车牌号键盘
- SingleInput 单输入框
- 操作反馈
- ActionSheet 上拉菜单
- Toast 轻提示
- BackDrop 遮罩层
- Dialog 对话框
- DropdownMenu 下拉菜单
- Modal 模态框
- Landscape 压屏窗
- Loading 加载
- Message 消息提示
- SwipeAction 滑动菜单
- DropdownList 下拉菜单
- LoadAni 加载动画
- 数据组件
- Badge 徽章
- Alert 警告框
- Avatar 头像
- Tag 标签
- Progress 进度条
- Collapse 折叠面板
- Divider 分割线
- LoadMore 加载更多
- Empty 暂无数据
- 画布
- Poster 绘制分享海报
- 表单组件
- Picker 选择器
- DatePicker 日期时间选择器
- Form 表单校验
- Input 输入框
- InputNumber 数字输入框
- Radio 单选框
- Checkbox 复选框
- Switch 开关
- Textarea 多行输入框
- SearchBar 搜索栏
- JS
- Clipboard 复制文本
- Request 网络请求
- Utils 工具类
- Validator 表单验证
二、使用体验与建议
FirstUI刚刚开始成长,非常期待大家的体验使用和宝贵的建议!大家可以在文后留言,让我们有新的认识,谢谢!
收起阅读 »
uniapp支付 打包苹果上架包过
如果需要上架苹果商店的伙伴,由于支付卡住上不了的,欢迎评论,加微信:15735106725,包过
如果需要上架苹果商店的伙伴,由于支付卡住上不了的,欢迎评论,加微信:15735106725,包过
创建uni-id的数据表一再失败,最终找到解决办法
最近我想试安装uni-id示例项目,可是却在创建数据表的时候一再失败。
我最初也没多想,只是在“使用OpenDB表模板创建数据表”的时候,选中了uni-id类别下面的所有的表,然后点击“创建选中的表”。

可是后来我发现老是创建失败,创建失败的原因提示一闪而过,也来不及看清。
但是我反复琢磨,总算找到了解决办法。办法是:不要一次性选中所有的表创建,而要分批创建,先选中uni-id-permissions、uni-id-roles这两个表,创建成功之后,再创建uni-id-users这个表,然后再逐个创建其余的表。
为什么会这样我也不了解,总之我反复琢磨地创建成了。另外,我还发现一处小问题,
uniCloud/cloudfunctions/uni-id-test/index.js的第23行,msg需要改成message。
最近我想试安装uni-id示例项目,可是却在创建数据表的时候一再失败。
我最初也没多想,只是在“使用OpenDB表模板创建数据表”的时候,选中了uni-id类别下面的所有的表,然后点击“创建选中的表”。
可是后来我发现老是创建失败,创建失败的原因提示一闪而过,也来不及看清。
但是我反复琢磨,总算找到了解决办法。办法是:不要一次性选中所有的表创建,而要分批创建,先选中uni-id-permissions、uni-id-roles这两个表,创建成功之后,再创建uni-id-users这个表,然后再逐个创建其余的表。
为什么会这样我也不了解,总之我反复琢磨地创建成了。另外,我还发现一处小问题,
uniCloud/cloudfunctions/uni-id-test/index.js的第23行,msg需要改成message。
收起阅读 »uniapp 清理存储数据(用户数据)、缓存、内部存储文件
uniapp 打包生成的apk有的时候升级安装的时候,之前的一些旧数据还会保存下面,可能会导致新版本出错。
这个时候就需要清理存储数据(用户数据)或则缓存等数据。
第一种方式:彻底清理存储数据(用户数据),包括用户权限和缓存,但是这种方式清理之后当前的app会闪退出去,只有等待用户重新拉起。
plus.android.importClass("android.app.ActivityManager");
var Context = plus.android.importClass("android.content.Context");
var am = plus.android.runtimeMainActivity().getSystemService(Context.ACTIVITY_SERVICE);
am.clearApplicationUserData();
第二种方式:清理内存存储文件(部分用户数据),不会清理用户权限,也不会闪退,一些静态的图片会被清理掉。
let main = plus.android.runtimeMainActivity();
let sdRoot1 = main.getFilesDir();
let filesOne = plus.android.invoke(sdRoot1, "listFiles");
let lenOne = filesOne.length;
for (let i = 0; i < lenOne; i++) {
let filePath = '' + filesOne[i]; // 没有找到合适的方法获取路径,这样写可以转成文件路径
plus.io.resolveLocalFileSystemURL(filePath, function(entry) {
if (entry.isDirectory) {
entry.removeRecursively(function(entry) { //递归删除其下的所有文件及子目录
console.log('清理文件数据完成')
}, function(e) {
console.log(e.message)
});
} else {
entry.remove(function(entry) { //递归删除其下的所有文件及子目录
console.log('清理文件数据完成')
}, function(e) {
console.log(e.message)
});
}
}, function(e) {
console.log('清理文件数据失败')
});
};
附加:清理app缓存,在第二种方式中把getFilesDir修改为getCacheDir就是清理缓存。
收起阅读 »FirstUI组件库:始于颜值、陷于品质、忠于服务
一、产品介绍
FirstUI(https://www.firstui.cn/)
给大家推荐下我们做的FirstUI(https://www.firstui.cn/),它是基于uni-app开发的一款轻量、全面可靠的跨平台移动端组件库。包括框架、组件、模板、功能插件几个部分。我们前后花了大概6个月的时间,目前组件、布局部分基本完成了,还做了几款简单的模板,后续会着力做模板这一块,多提供一些成熟常用的场景模板。可以实现快速上手,更好的节约使用者的时间与成本。
FirstUI我们倾注了大量的精力,很期待大家的关注试用,谢谢!
1、产品特征:
- 多端支持。一套代码,多端适用,支持iOS(vue和Nvue)、Android(vue和Nvue)、微信小程序、支付宝小程序、QQ小程序、百度小程序、字节跳动小程序、H5平台
- 完善的组件。目前共规划118款,已上线70款,涵盖基础组件、表单组件、导航组件、布局组件、常用布局、扩展组件、操作反馈、数据组件、JS、图表、画布。
- 丰富实用的布局、模板。基于FirstUI提供的组件,针对常用场景、行业,提供丰富实用的布局和模板。
- 专属社区。我们用flarum(ps:这个大家也可以试下,设计与功能方面好用,感觉用来做社区非常棒)打造了FirstU专属社区(https://forum.firstui.cn/),用户可以在社区交流分享FirstUI的使用经验、提问。有其他组件、模板需求,也可以在社区中反馈。
2、源码及文档:
- github: https://github.com/FirstUI/FirstUI (欢迎star :-D)
- gitee: https://gitee.com/firstui/FirstUI (欢迎star :-D)
- 文档地址: https://doc.firstui.cn
3、扫码体验:
大部分组件是操作性的,大家扫码操作可以有更真切的感受。目前发布了6个平台版本,大家可以扫码体验下。考虑快速预览,所以暂未上架App应用,后续待功能完善再进行上架。
4、部分效果:


5、进展与已上线功能清单:
进展情况:

已上线功能清单:
- 框架
- FirstUI组件库(uni-app版)
- 模板
- 登录(A)模板
- 登录(B)模板
- 登录(C)模板
- 登录(D)模板
- 门户模板
- 组件
- 基础组件
- Color 色彩
- Icon 图标
- Button 按钮
- Footer 页脚
- Animation 动画
- 导航组件
- NavBar 导航栏
- Pagination 分页器
- SegmentedControl 分段器
- Tabbar 标签栏
- Tabs 标签页
- IndexList 索引列表
- NoticeBar 通告栏
- Sticky 吸顶容器
- Steps 步骤条
- Fab 浮动按钮
- Drawer 抽屉
- BottomPopup 底部弹出层
- TopPopup 顶部弹出层
- TimeAxis 时间轴
- 布局组件
- Layout 栅格布局
- Panel 面板
- Preview 表单预览
- List 列表
- Card 卡片
- 扩展组件
- ShareSheet 分享面板
- Result 结果页
- FilterBar 筛选栏
- DigitalRoller 数字滚轮
- DigitalKeyboard 数字键盘
- CountdownVerify 验证码倒计时
- SwiperDot 轮播图指示点
- LicensePlate 车牌号键盘
- SingleInput 单输入框
- 操作反馈
- ActionSheet 上拉菜单
- Toast 轻提示
- BackDrop 遮罩层
- Dialog 对话框
- DropdownMenu 下拉菜单
- Modal 模态框
- Landscape 压屏窗
- Loading 加载
- Message 消息提示
- SwipeAction 滑动菜单
- DropdownList 下拉菜单
- LoadAni 加载动画
- 数据组件
- Badge 徽章
- Alert 警告框
- Avatar 头像
- Tag 标签
- Progress 进度条
- Collapse 折叠面板
- Divider 分割线
- LoadMore 加载更多
- Empty 暂无数据
- 画布
- Poster 绘制分享海报
- 表单组件
- Picker 选择器
- DatePicker 日期时间选择器
- Form 表单校验
- Input 输入框
- InputNumber 数字输入框
- Radio 单选框
- Checkbox 复选框
- Switch 开关
- Textarea 多行输入框
- SearchBar 搜索栏
- JS
- Clipboard 复制文本
- Request 网络请求
- Utils 工具类
- Validator 表单验证
二、商业版与开源版
FirstUI分为开源版与商业版,部分组件为商业版可用,目前商业版的费用是¥150元(原价300元,优惠价2021-1-31截止),一次性费用,支持后续更新。
VIP会员权益:
- 完整版源码
- 全部组件
- 物料商城享VIP折扣
- 专属会员群指导、答疑
- 新特性优先体验
- VIP专属文档
会员权益详情: https://www.firstui.cn/right
三、使用体验与建议
FirstUI刚刚开始成长,非常期待大家的体验使用和宝贵的建议!大家可以在文后留言,让我们有新的认识,谢谢!
一、产品介绍
FirstUI(https://www.firstui.cn/)
给大家推荐下我们做的FirstUI(https://www.firstui.cn/),它是基于uni-app开发的一款轻量、全面可靠的跨平台移动端组件库。包括框架、组件、模板、功能插件几个部分。我们前后花了大概6个月的时间,目前组件、布局部分基本完成了,还做了几款简单的模板,后续会着力做模板这一块,多提供一些成熟常用的场景模板。可以实现快速上手,更好的节约使用者的时间与成本。
FirstUI我们倾注了大量的精力,很期待大家的关注试用,谢谢!
1、产品特征:
- 多端支持。一套代码,多端适用,支持iOS(vue和Nvue)、Android(vue和Nvue)、微信小程序、支付宝小程序、QQ小程序、百度小程序、字节跳动小程序、H5平台
- 完善的组件。目前共规划118款,已上线70款,涵盖基础组件、表单组件、导航组件、布局组件、常用布局、扩展组件、操作反馈、数据组件、JS、图表、画布。
- 丰富实用的布局、模板。基于FirstUI提供的组件,针对常用场景、行业,提供丰富实用的布局和模板。
- 专属社区。我们用flarum(ps:这个大家也可以试下,设计与功能方面好用,感觉用来做社区非常棒)打造了FirstU专属社区(https://forum.firstui.cn/),用户可以在社区交流分享FirstUI的使用经验、提问。有其他组件、模板需求,也可以在社区中反馈。
2、源码及文档:
- github: https://github.com/FirstUI/FirstUI (欢迎star :-D)
- gitee: https://gitee.com/firstui/FirstUI (欢迎star :-D)
- 文档地址: https://doc.firstui.cn
3、扫码体验:
大部分组件是操作性的,大家扫码操作可以有更真切的感受。目前发布了6个平台版本,大家可以扫码体验下。考虑快速预览,所以暂未上架App应用,后续待功能完善再进行上架。
4、部分效果:
5、进展与已上线功能清单:
进展情况:
已上线功能清单:
- 框架
- FirstUI组件库(uni-app版)
- 模板
- 登录(A)模板
- 登录(B)模板
- 登录(C)模板
- 登录(D)模板
- 门户模板
- 组件
- 基础组件
- Color 色彩
- Icon 图标
- Button 按钮
- Footer 页脚
- Animation 动画
- 导航组件
- NavBar 导航栏
- Pagination 分页器
- SegmentedControl 分段器
- Tabbar 标签栏
- Tabs 标签页
- IndexList 索引列表
- NoticeBar 通告栏
- Sticky 吸顶容器
- Steps 步骤条
- Fab 浮动按钮
- Drawer 抽屉
- BottomPopup 底部弹出层
- TopPopup 顶部弹出层
- TimeAxis 时间轴
- 布局组件
- Layout 栅格布局
- Panel 面板
- Preview 表单预览
- List 列表
- Card 卡片
- 扩展组件
- ShareSheet 分享面板
- Result 结果页
- FilterBar 筛选栏
- DigitalRoller 数字滚轮
- DigitalKeyboard 数字键盘
- CountdownVerify 验证码倒计时
- SwiperDot 轮播图指示点
- LicensePlate 车牌号键盘
- SingleInput 单输入框
- 操作反馈
- ActionSheet 上拉菜单
- Toast 轻提示
- BackDrop 遮罩层
- Dialog 对话框
- DropdownMenu 下拉菜单
- Modal 模态框
- Landscape 压屏窗
- Loading 加载
- Message 消息提示
- SwipeAction 滑动菜单
- DropdownList 下拉菜单
- LoadAni 加载动画
- 数据组件
- Badge 徽章
- Alert 警告框
- Avatar 头像
- Tag 标签
- Progress 进度条
- Collapse 折叠面板
- Divider 分割线
- LoadMore 加载更多
- Empty 暂无数据
- 画布
- Poster 绘制分享海报
- 表单组件
- Picker 选择器
- DatePicker 日期时间选择器
- Form 表单校验
- Input 输入框
- InputNumber 数字输入框
- Radio 单选框
- Checkbox 复选框
- Switch 开关
- Textarea 多行输入框
- SearchBar 搜索栏
- JS
- Clipboard 复制文本
- Request 网络请求
- Utils 工具类
- Validator 表单验证
二、商业版与开源版
FirstUI分为开源版与商业版,部分组件为商业版可用,目前商业版的费用是¥150元(原价300元,优惠价2021-1-31截止),一次性费用,支持后续更新。
VIP会员权益:
- 完整版源码
- 全部组件
- 物料商城享VIP折扣
- 专属会员群指导、答疑
- 新特性优先体验
- VIP专属文档
会员权益详情: https://www.firstui.cn/right
三、使用体验与建议
FirstUI刚刚开始成长,非常期待大家的体验使用和宝贵的建议!大家可以在文后留言,让我们有新的认识,谢谢!
收起阅读 »友盟统计事件埋点分享
因业务需要,我们的app需要继承友盟并且进行事件埋点,涉及电商场景的埋点。
首先,需要在manifest.json文件中勾选统计选项

然后在源码视图中配置从友盟那边申请的appkey,并且输入渠道标识
                    "umeng" : {
                        "idfa" : true,
                        "appkey_ios" : "ios的appkey",
                        "channelid_ios" : "ios的标识",
                        "appkey_android" : "安卓的appkey",
                        "channelid_android" : "安卓的标识,可任意输入,用于区分打出来的包,建议用英文"
}经过测试,plus.statistic.eventTrig可以埋自定义事件的点,但对于电商事件的埋点(友盟规定的事件ID,如:register、finish_payment等)似乎无效。
所以选择用NJS的方式定义了一个函数去调用,使用方式: eventTrig( String类型的事件ID,Object类型的data ) , 以下NJS的代码:
function eventTrig( eventId , data ){
    // #ifdef APP-PLUS
        let isios = uni.getSystemInfoSync().platform == 'ios'
        if( isios ) plus.ios.invoke('MobClick','event:attributes:',eventId,data)
        else{
            let HashMap = plus.android.importClass('java.util.HashMap')
            let hashData = new HashMap()
            for(let key in data ){
                hashData.put( String(key),String(data[key]) )
            }
            let main = plus.android.runtimeMainActivity()
            let MobclickAgent = plus.android.importClass('com.umeng.analytics.MobclickAgent')
            MobclickAgent.onEvent(main,String(eventId),hashData)
        }
    // #endif
    // #ifndef APP-PLUS
    console.log(...arguments)
    // #endif
}
经过不严谨的测试,目前使用起来是没有发现问题的,有其他需要或是有发现bug的小伙伴可自行改造哈。
因业务需要,我们的app需要继承友盟并且进行事件埋点,涉及电商场景的埋点。
首先,需要在manifest.json文件中勾选统计选项
然后在源码视图中配置从友盟那边申请的appkey,并且输入渠道标识
                    "umeng" : {
                        "idfa" : true,
                        "appkey_ios" : "ios的appkey",
                        "channelid_ios" : "ios的标识",
                        "appkey_android" : "安卓的appkey",
                        "channelid_android" : "安卓的标识,可任意输入,用于区分打出来的包,建议用英文"
}经过测试,plus.statistic.eventTrig可以埋自定义事件的点,但对于电商事件的埋点(友盟规定的事件ID,如:register、finish_payment等)似乎无效。
所以选择用NJS的方式定义了一个函数去调用,使用方式: eventTrig( String类型的事件ID,Object类型的data ) , 以下NJS的代码:
function eventTrig( eventId , data ){
    // #ifdef APP-PLUS
        let isios = uni.getSystemInfoSync().platform == 'ios'
        if( isios ) plus.ios.invoke('MobClick','event:attributes:',eventId,data)
        else{
            let HashMap = plus.android.importClass('java.util.HashMap')
            let hashData = new HashMap()
            for(let key in data ){
                hashData.put( String(key),String(data[key]) )
            }
            let main = plus.android.runtimeMainActivity()
            let MobclickAgent = plus.android.importClass('com.umeng.analytics.MobclickAgent')
            MobclickAgent.onEvent(main,String(eventId),hashData)
        }
    // #endif
    // #ifndef APP-PLUS
    console.log(...arguments)
    // #endif
}
经过不严谨的测试,目前使用起来是没有发现问题的,有其他需要或是有发现bug的小伙伴可自行改造哈。
收起阅读 »高颜值、高品质组件库——FirstUI,快来体验一把!
1、产品特征:
FirstUI(https://www.firstui.cn/)
- 多端支持。一套代码,多端适用,支持iOS(vue和Nvue)、Android(vue和Nvue)、微信小程序、支付宝小程序、QQ小程序、百度小程序、字节跳动小程序、H5平台
- 完善的组件。目前共规划118款,已上线70款,涵盖基础组件、表单组件、导航组件、布局组件、常用布局、扩展组件、操作反馈、数据组件、JS、图表、画布。
- 丰富实用的布局、模板。基于FirstUI提供的组件,针对常用场景、行业,提供丰富实用的布局和模板。
- 专属社区。我们用flarum(ps:这个大家也可以试下,设计与功能方面好用,感觉用来做社区非常棒)打造了FirstU专属社区(https://forum.firstui.cn/),用户可以在社区交流分享FirstUI的使用经验、提问。有其他组件、模板需求,也可以在社区中反馈。
2、源码及文档:
- github: https://github.com/FirstUI/FirstUI (欢迎star :-D)
- gitee: https://gitee.com/firstui/FirstUI (欢迎star :-D)
- 文档地址: https://doc.firstui.cn
3、扫码体验:
大部分组件是操作性的,大家扫码操作可以有更真切的感受。目前发布了6个平台版本,大家可以扫码体验下。考虑快速预览,所以暂未上架App应用,后续待功能完善再进行上架。
已上线功能清单:
- 框架
- FirstUI组件库(uni-app版)
- 模板
- 登录(A)模板
- 登录(B)模板
- 登录(C)模板
- 登录(D)模板
- 门户模板
- 组件
- 基础组件
- Color 色彩
- Icon 图标
- Button 按钮
- Footer 页脚
- Animation 动画
- 导航组件
- NavBar 导航栏
- Pagination 分页器
- SegmentedControl 分段器
- Tabbar 标签栏
- Tabs 标签页
- IndexList 索引列表
- NoticeBar 通告栏
- Sticky 吸顶容器
- Steps 步骤条
- Fab 浮动按钮
- Drawer 抽屉
- BottomPopup 底部弹出层
- TopPopup 顶部弹出层
- TimeAxis 时间轴
- 布局组件
- Layout 栅格布局
- Panel 面板
- Preview 表单预览
- List 列表
- Card 卡片
- 扩展组件
- ShareSheet 分享面板
- Result 结果页
- FilterBar 筛选栏
- DigitalRoller 数字滚轮
- DigitalKeyboard 数字键盘
- CountdownVerify 验证码倒计时
- SwiperDot 轮播图指示点
- LicensePlate 车牌号键盘
- SingleInput 单输入框
- 操作反馈
- ActionSheet 上拉菜单
- Toast 轻提示
- BackDrop 遮罩层
- Dialog 对话框
- DropdownMenu 下拉菜单
- Modal 模态框
- Landscape 压屏窗
- Loading 加载
- Message 消息提示
- SwipeAction 滑动菜单
- DropdownList 下拉菜单
- LoadAni 加载动画
- 数据组件
- Badge 徽章
- Alert 警告框
- Avatar 头像
- Tag 标签
- Progress 进度条
- Collapse 折叠面板
- Divider 分割线
- LoadMore 加载更多
- Empty 暂无数据
- 画布
- Poster 绘制分享海报
- 表单组件
- Picker 选择器
- DatePicker 日期时间选择器
- Form 表单校验
- Input 输入框
- InputNumber 数字输入框
- Radio 单选框
- Checkbox 复选框
- Switch 开关
- Textarea 多行输入框
- SearchBar 搜索栏
- JS
- Clipboard 复制文本
- Request 网络请求
- Utils 工具类
- Validator 表单验证

uniapp引入arcgis for js
uniapp引入arcgis for js
在前段时间,我刚开始接触uniapp,并接到了在uniapp项目中使用arcgis for js的任务。搜遍了所有的经验帖子也没有一个具体的方法步骤,只有几位大佬分享了可行的结果截图。所以今天写一个小白教程,如有错误,欢迎大家指出。
首先在一个空项目中,引入esri-loader。
npm install--save esri-loader 成功后,在页面中通过renderjs引入esri-loader,注意地图部分需要给出具体高度。
<template>
    <view >
        <view id="myMapView" style=" height: 623px " />
    </view>
</template>

<script module="myMapViews" lang="renderjs">
    //renderjs部分
    import {
        loadModules
    } from 'esri-loader'
    export default {
        name: 'myMapView',
        data() {
            return {};
        },
        mounted() {
            this.createMapView()
        },
        methods: {
            createMapView() {
                const options = {
                    url: 'https://js.arcgis.com/4.14/init.js',
                    css: 'https://js.arcgis.com/4.14/esri/themes/light/main.css'
                };
                loadModules([
                    "esri/Map",
                    "esri/views/MapView"
                ], options).then(([Map, MapView]) => {
                    var map = new Map({
                        basemap: "topo-vector"
                    });
                    var view = new MapView({
                        container: "myMapView",
                        map: map,
                        center: [-118.80500, 34.02700], // longitude, latitude
                        zoom: 13
                    });
                })
            }
        }
    }
</script>

<scrip>
// service 层
</scrip>

<style>
</style>
效果图如下:

同时,在renderjs的script中,是无法获取到service层的数据的,也无法使用uni的相关接口(注意:H5是可以正常使用的,但是APP端就会报错,比如uni.request等),所以要通过一定的方式从service层去传输。
如果要进行网络请求目前有两种思路:
1.自己写一个原生ajax请求,在renderjs部分使用。
2.在service层给后台发请求后,将数据传回renderjs部分
下面简单给出个renderjs和service层通讯例子: <template>
<view>
<!-- service层mapdata改变就会调用renderjs部分的mapDataChanged方法 -->
<view id="myMapView" :change:mapData="myMapViews.mapDataChanged" :mapData="mapData" style=" height: 500px " />
<view>
<uni-button @click="changeMapData">service点击</uni-button>
</view>
</view>
</template>
<script module="myMapViews" lang="renderjs">
//renderjs部分
import {
loadModules
} from 'esri-loader'
export default {
name: 'myMapView',
data() {
return {};
},
mounted() {
this.createMapView()
},
methods: {
createMapView() {
const options = {
url: 'https://js.arcgis.com/4.14/init.js',
css: 'https://js.arcgis.com/4.14/esri/themes/light/main.css'
};
loadModules([
"esri/Map",
"esri/views/MapView"
], options).then(([Map, MapView]) => {
var map = new Map({
basemap: "topo-vector"
});
var view = new MapView({
container: "myMapView",
map: map,
center: [-118.80500, 34.02700], // longitude, latitude
zoom: 13
});
})
},
mapDataChanged(newValue, oldValue, ownerVm, vm) {
//mapData改变触发
console.log("newValue:", newValue)
console.log("oldValue:", oldValue)
//调用service层的getFromRenderJs方法,并传值
ownerVm.callMethod('getFromRenderJs', {
type: 'polyline'
})
//这种方法也可以主动调用service层方法
/*UniViewJSBridge.publishHandler('onWxsInvokeCallMethod', {
cid: this._$id,
method: 'loadingClose',
args: {
}
})*/
}
}
}
</script>
<script>
//service层
export default {
data() {
return {
mapData: {}
}
},
mounted() {},
methods: {
changeMapData() {
//click事件触发的service层方法
this.mapData = {
type: 'point'
}
},
getFromRenderJs(params) {
//renderjs调用的service层方法
console.log('getFromRenderJs:', params)
}
},
}
</script>
<style>
</style>结果如下:

uniapp引入arcgis for js
在前段时间,我刚开始接触uniapp,并接到了在uniapp项目中使用arcgis for js的任务。搜遍了所有的经验帖子也没有一个具体的方法步骤,只有几位大佬分享了可行的结果截图。所以今天写一个小白教程,如有错误,欢迎大家指出。
首先在一个空项目中,引入esri-loader。
npm install--save esri-loader 成功后,在页面中通过renderjs引入esri-loader,注意地图部分需要给出具体高度。
<template>
    <view >
        <view id="myMapView" style=" height: 623px " />
    </view>
</template>

<script module="myMapViews" lang="renderjs">
    //renderjs部分
    import {
        loadModules
    } from 'esri-loader'
    export default {
        name: 'myMapView',
        data() {
            return {};
        },
        mounted() {
            this.createMapView()
        },
        methods: {
            createMapView() {
                const options = {
                    url: 'https://js.arcgis.com/4.14/init.js',
                    css: 'https://js.arcgis.com/4.14/esri/themes/light/main.css'
                };
                loadModules([
                    "esri/Map",
                    "esri/views/MapView"
                ], options).then(([Map, MapView]) => {
                    var map = new Map({
                        basemap: "topo-vector"
                    });
                    var view = new MapView({
                        container: "myMapView",
                        map: map,
                        center: [-118.80500, 34.02700], // longitude, latitude
                        zoom: 13
                    });
                })
            }
        }
    }
</script>

<scrip>
// service 层
</scrip>

<style>
</style>
效果图如下:
同时,在renderjs的script中,是无法获取到service层的数据的,也无法使用uni的相关接口(注意:H5是可以正常使用的,但是APP端就会报错,比如uni.request等),所以要通过一定的方式从service层去传输。
如果要进行网络请求目前有两种思路:
1.自己写一个原生ajax请求,在renderjs部分使用。
2.在service层给后台发请求后,将数据传回renderjs部分
下面简单给出个renderjs和service层通讯例子: <template>
<view>
<!-- service层mapdata改变就会调用renderjs部分的mapDataChanged方法 -->
<view id="myMapView" :change:mapData="myMapViews.mapDataChanged" :mapData="mapData" style=" height: 500px " />
<view>
<uni-button @click="changeMapData">service点击</uni-button>
</view>
</view>
</template>
<script module="myMapViews" lang="renderjs">
//renderjs部分
import {
loadModules
} from 'esri-loader'
export default {
name: 'myMapView',
data() {
return {};
},
mounted() {
this.createMapView()
},
methods: {
createMapView() {
const options = {
url: 'https://js.arcgis.com/4.14/init.js',
css: 'https://js.arcgis.com/4.14/esri/themes/light/main.css'
};
loadModules([
"esri/Map",
"esri/views/MapView"
], options).then(([Map, MapView]) => {
var map = new Map({
basemap: "topo-vector"
});
var view = new MapView({
container: "myMapView",
map: map,
center: [-118.80500, 34.02700], // longitude, latitude
zoom: 13
});
})
},
mapDataChanged(newValue, oldValue, ownerVm, vm) {
//mapData改变触发
console.log("newValue:", newValue)
console.log("oldValue:", oldValue)
//调用service层的getFromRenderJs方法,并传值
ownerVm.callMethod('getFromRenderJs', {
type: 'polyline'
})
//这种方法也可以主动调用service层方法
/*UniViewJSBridge.publishHandler('onWxsInvokeCallMethod', {
cid: this._$id,
method: 'loadingClose',
args: {
}
})*/
}
}
}
</script>
<script>
//service层
export default {
data() {
return {
mapData: {}
}
},
mounted() {},
methods: {
changeMapData() {
//click事件触发的service层方法
this.mapData = {
type: 'point'
}
},
getFromRenderJs(params) {
//renderjs调用的service层方法
console.log('getFromRenderJs:', params)
}
},
}
</script>
<style>
</style>结果如下:


