


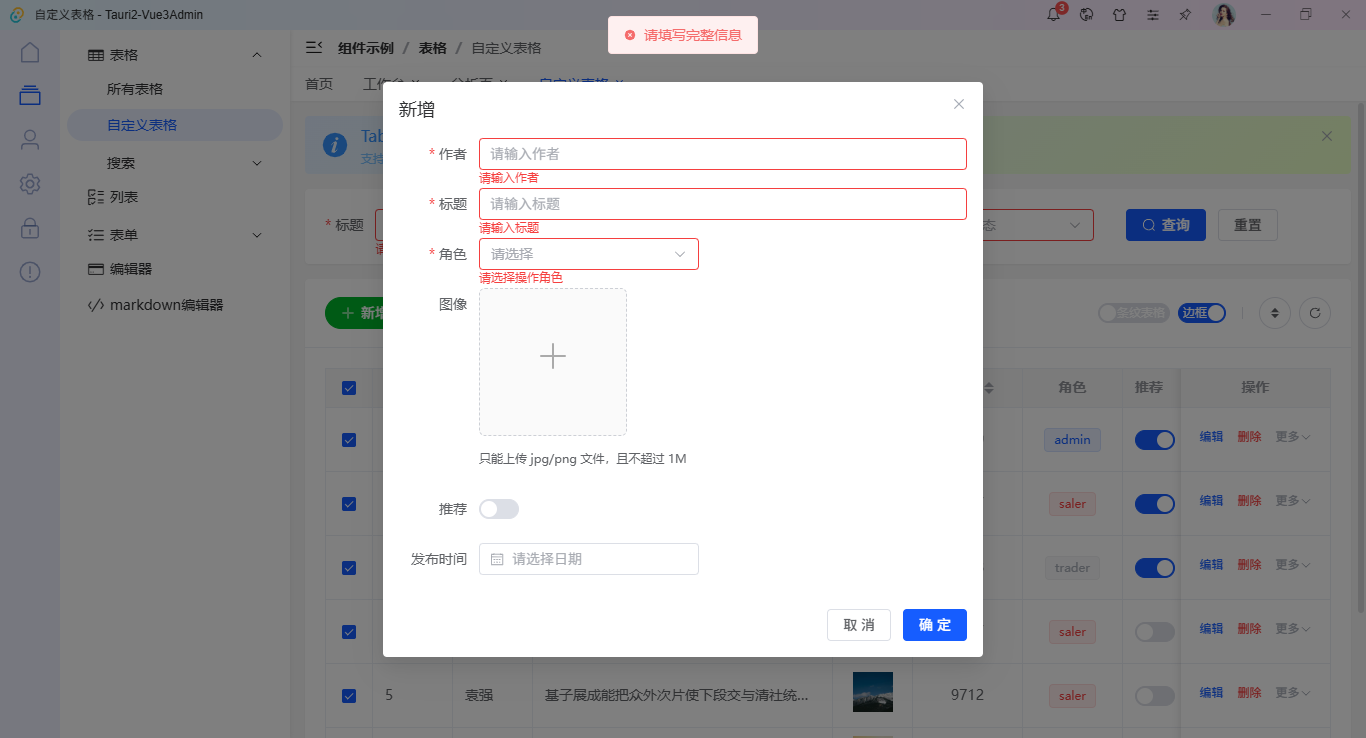
如何解决Navigation路由调用pop后onPop回调代码不执行的问题
问题现象
使用Navigation构建路由,从pageOne通过pushPath跳转到pageTwo,期望pageOne的onPop回调在pageTwo返回时被触发,但效果未达预期。
问题代码示例参考如下:
class ParamWithOp {
operation: number = 1
count: number = 10
}
@Entry
@Component
struct PageOne {
pageInfo: NavPathStack = new NavPathStack();
@State message: string = 'Hello World'
@Builder
pageMap(name: string, params: Object) {
if (name === 'pageTwo') {
PageTwo()
}
}
build() {
Navigation(this.pageInfo) {
Column() {
Text(this.message)
.width('80%')
.height(50)
.margin(10)
    Button('pushPath', { stateEffect: true, type: ButtonType.Capsule })
      .width('80%')
      .height(40)
      .margin(10)
      .onClick(() => {
        // 将name指定的NavDestination页面信息入栈,传递的数据为param,添加接收处理结果的onPop回调。
        this.pageInfo.pushPath({
          name: 'pageTwo', param: new ParamWithOp(), onPop: (popInfo: PopInfo) => {
            this.message = `[pushPath]last page is: ${popInfo.info.name} result: ${JSON.stringify(popInfo.result)}`
          }
        });
      })
  }.width('100%').height('100%')
}.navDestination(this.pageMap)
.title('pageOne')
}
}
@Component
struct PageTwo {
pathStack: NavPathStack = new NavPathStack()
build() {
NavDestination() {
Column() {
Button('pop', { stateEffect: true, type: ButtonType.Capsule })
.width('80%')
.height(40)
.margin(20)
.onClick(() => {
// 回退到上一个页面,此处代码,在pop回pageOne页面时,未传参数
this.pathStack.pop();
})
}.width('100%').height('100%')
}.title('pageTwo')
.onReady((context: NavDestinationContext) => {
this.pathStack = context.pathStack
})
}
}
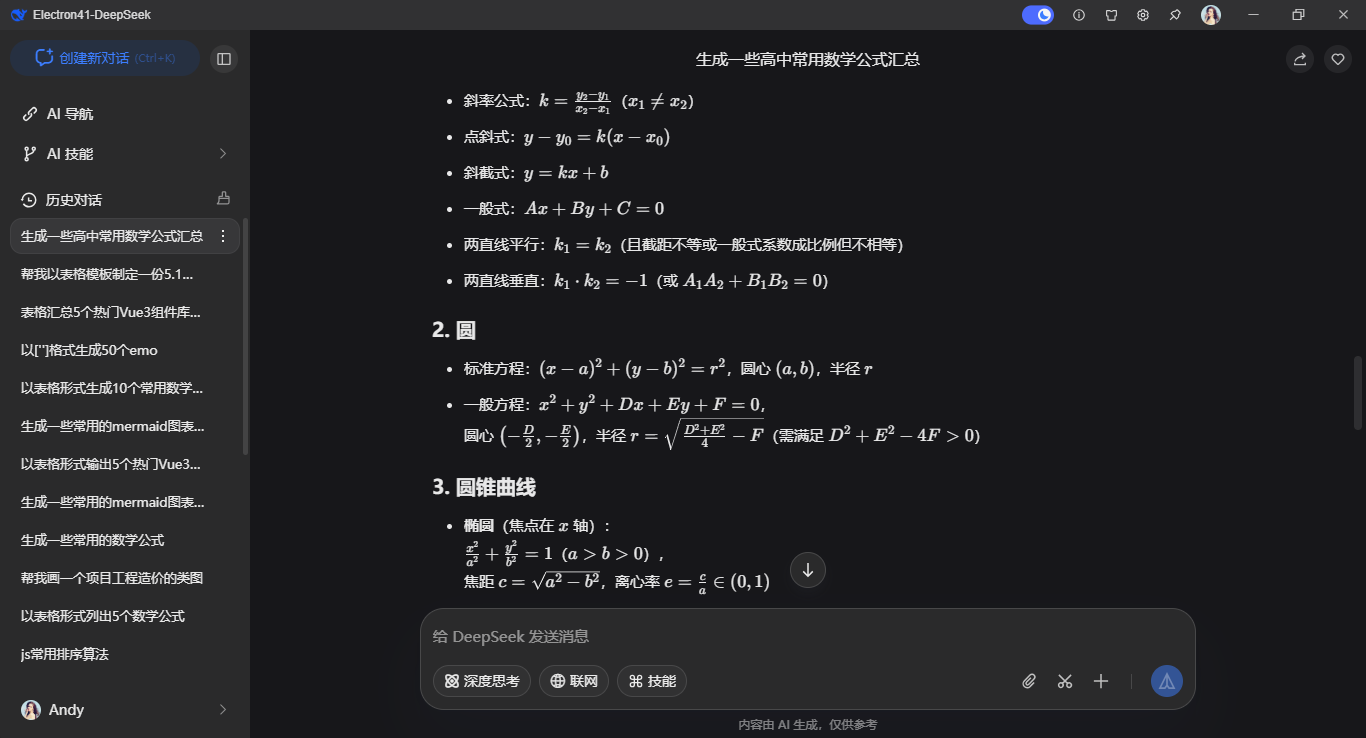
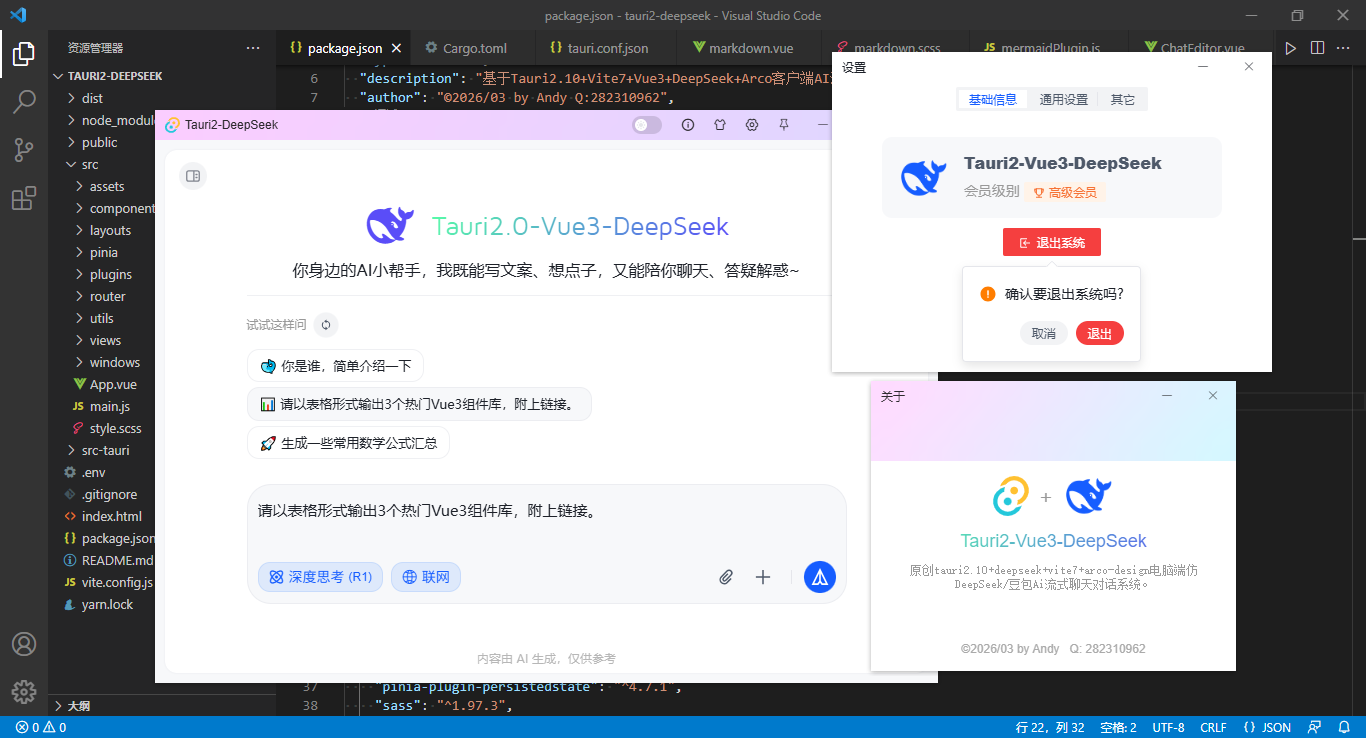
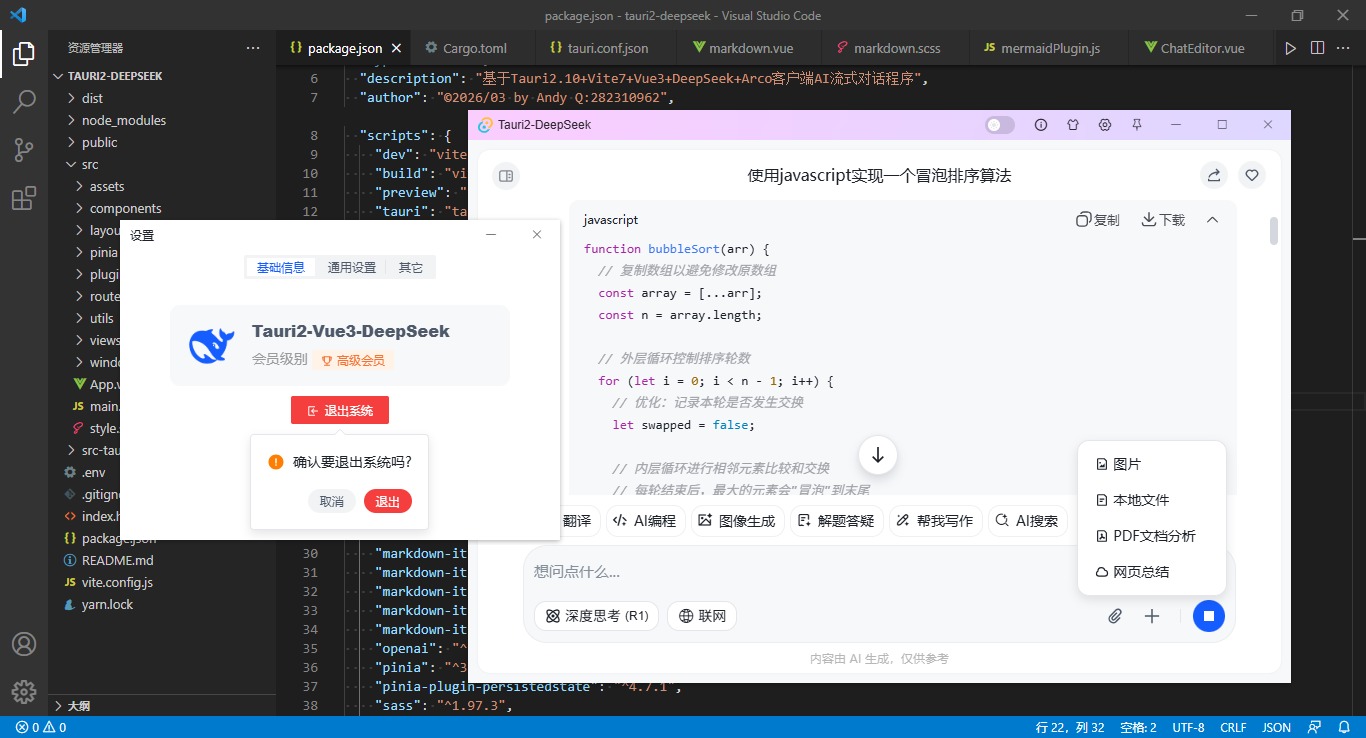
效果预览
点击放大
背景知识
Navigation组件是路由导航的根视图容器,结合导航控制器NavPathStack可实现组件导航。
pushPath:将info指定的NavDestination页面信息入栈。可设置onPop回调函数来接收参数。
pop:弹出路由栈栈顶元素,并触发onPop回调传入页面处理结果。
问题定位
点击放大
查阅官方文档关于pushPath方法的NavPathInfo入参说明,其中的onPop回调函数仅pop、popToName、popToIndex中设置result参数后触发。
分析结论
onPop回调函数需要使用pop、popToName、popToIndex方法返回时设置result参数才会触发,否则不会执行onPop回调。
修改建议
按上节所述,只需在pageTwo中调用pop方法时,传入result参数,即可在pageOne中成功收到onPop的回调。修改问题代码如下:
// 回退到上一个页面,随便传个result即可触发onPop回调
this.pathStack.pop(1);
修改后的运行效果参见效果预览,可以看到,当pageTwo调用pop返回时传入了result参数,在pageOne成功执行了onPop回调,并接收到相关参数。
https://pastebin.com/NRD7bMyP
https://pastebin.com/yDaZxFwG
https://pastebin.com/EDcLGLPS
https://pastebin.com/U3ZxgwDi
https://pastebin.com/DR63sAxA
https://pastebin.com/nSnDNVPq
https://pastebin.com/GjtSqPNS
https://pastebin.com/saHctNS5
https://pastebin.com/kNHqdQnW
https://pastebin.com/JMnQaXK7
https://pastebin.com/vSexS64Q
https://pastebin.com/tRQUHv5L
https://pastebin.com/3JqBJ8wq
https://pastebin.com/xEkHBut4
https://pastebin.com/skZmkkFw
https://pastebin.com/7V0wmLFb
https://pastebin.com/BTZfE8Bd
https://pastebin.com/svjxZfvM
https://pastebin.com/xXYHPU8b
https://pastebin.com/zMLjuJuV
https://pastebin.com/ffbfvSna
https://pastebin.com/C9Zr1K2M
https://pastebin.com/ac9xpyfm
https://pastebin.com/WX45yC8p
https://pastebin.com/YeUrZij0
https://pastebin.com/zKW8HRQb
https://pastebin.com/6KBWHYZG
https://pastebin.com/MTtnz3t8
https://pastebin.com/E7SBb1wr
https://pastebin.com/eib2hRUq
https://pastebin.com/SEeERuCT
https://pastebin.com/8tLt3B2T
https://pastebin.com/R4NJytjp
https://pastebin.com/EauQE9nS
https://pastebin.com/fsCXAP9r
https://pastebin.com/9vFQE41K
https://pastebin.com/xyKY9DF0
https://pastebin.com/4duLr15i
https://pastebin.com/Epk3dbmH
https://pastebin.com/GehEwq1u
https://pastebin.com/HyQm4h82
https://pastebin.com/D5vZs1MG
https://pastebin.com/L2KryS4C
https://pastebin.com/QBtyQipw
https://pastebin.com/FNxMPZ51
https://pastebin.com/trw5d8cC
https://pastebin.com/rPFzkgK8
https://pastebin.com/uCBsSjNm
https://pastebin.com/RGW6X15L
https://pastebin.com/S7cBiuDb
https://pastebin.com/HFyJtEKK
https://pastebin.com/0ubhVneF
https://pastebin.com/RW5trQzf
https://pastebin.com/vCSGjNpZ
https://pastebin.com/SffvfhGR
https://pastebin.com/tt0tYGFq
https://pastebin.com/tMm7YFVa
https://pastebin.com/ibcT2Lf2
https://pastebin.com/JqjbbVRf
https://pastebin.com/HVKWqHGk
https://pastebin.com/s5vt779b
https://pastebin.com/B0TAyxn6
https://pastebin.com/fuPRhvhd
https://pastebin.com/beLXK35p
https://pastebin.com/GFBwqxu6
https://pastebin.com/9VWb8miy
https://pastebin.com/grHVbPND
https://pastebin.com/CYaQEmTS
https://pastebin.com/ZkmuiH18
https://pastebin.com/f2xJpBQ9
https://pastebin.com/2W5h2q09
https://pastebin.com/rAC3TU64
https://pastebin.com/K9pyh9gi
https://pastebin.com/uz28wUPg
https://pastebin.com/cVAkkb9F
https://pastebin.com/RbNxE2S2
https://pastebin.com/hrxFwi1b
https://pastebin.com/6dxqezH3
https://pastebin.com/SQmcrc6u
https://pastebin.com/DmzbU6WX
https://pastebin.com/RQzvD6gG
https://pastebin.com/nWdqiQr9
https://pastebin.com/qSiWmiq9
https://pastebin.com/HbjBAg6q
https://pastebin.com/7sg5aa6M
https://pastebin.com/cGDzhrRb
https://pastebin.com/Q3D2BmaQ
https://pastebin.com/tvZNCwN8
https://pastebin.com/XB4HwUsz
https://pastebin.com/bZDH1VHh
https://pastebin.com/xCPMHyqK
https://pastebin.com/mJJ4U9bH
https://pastebin.com/HrakBMBz
https://pastebin.com/GN9npU0W
https://pastebin.com/nr9hJd8p
https://pastebin.com/2CgD5tqb
https://pastebin.com/tXtkUfHd
https://pastebin.com/wkFA8iGP
https://pastebin.com/7z45qQzr
https://pastebin.com/w5RGPRen
https://pastebin.com/WLJewYNA
https://pastebin.com/bEbNLpBi
https://pastebin.com/Chn8rUkh
https://pastebin.com/jz4F2APq
https://pastebin.com/iRWuPNFz
https://pastebin.com/GmHAMH6f
https://pastebin.com/uJMGcsEG
https://pastebin.com/jPB68a0D
https://pastebin.com/MjC66wkv
https://pastebin.com/S7RDTAM9
https://pastebin.com/0bvuDUM1
https://pastebin.com/8czdKG36
https://pastebin.com/usWbPMRE
https://pastebin.com/kywEMqJp
https://pastebin.com/XJFyGMVu
https://pastebin.com/QZm2TaPm
https://pastebin.com/Qtuytbx1
https://pastebin.com/JCBYPdpc
https://pastebin.com/cVLahV0P
https://pastebin.com/0na2hGU9
https://pastebin.com/qpAgP7Mi
https://pastebin.com/k75PXkp7
https://pastebin.com/DZtU9neL
https://pastebin.com/7Yz1D9Fq
https://pastebin.com/xCwndzDR
https://pastebin.com/bGRUESTt
https://pastebin.com/fsnvCaCQ
https://pastebin.com/NcTVLKBf
https://pastebin.com/dXFykLyA
https://pastebin.com/N2w0m4pJ
https://pastebin.com/XEcYb0wP
https://pastebin.com/r7ZVGBz0
https://pastebin.com/Tz3svy7W
https://pastebin.com/CV8Ety7V
https://pastebin.com/sE3tU6ZT
https://pastebin.com/fCeY1t0n
https://pastebin.com/NXaPbSUG
https://pastebin.com/qt5yxi3M
https://pastebin.com/aTKPHQrG
https://pastebin.com/9SAkknhv
https://pastebin.com/Jx0dN32i
https://pastebin.com/7SyfLKbJ
https://pastebin.com/EX2bMjNe
https://pastebin.com/tdx0tmft
https://pastebin.com/gg9V1ytb
https://pastebin.com/BrBEcy26
https://pastebin.com/PZjmp9Bq
https://pastebin.com/k2TdbGrr
https://pastebin.com/yTV7fVKm
https://pastebin.com/P1a8Qn8J
https://pastebin.com/aekNrH9G
https://pastebin.com/LHvEPcc4
https://pastebin.com/LNzusSGs
https://pastebin.com/sMeA2PNw
https://pastebin.com/kRSKWe7H
https://pastebin.com/T8hXpM8Q
https://pastebin.com/STXJwKnY
https://pastebin.com/EZMpBXrs
https://pastebin.com/eqK7fyHg
https://pastebin.com/JJaAFQJa
https://pastebin.com/DrZAxjY8
https://pastebin.com/QFimQBUz
https://pastebin.com/z1FcAaJv
https://pastebin.com/7BcKWKaL
https://pastebin.com/FcphACWj
https://pastebin.com/BLd4XZSU
https://pastebin.com/NdHCmLXc
https://pastebin.com/ufeKaAdj
https://pastebin.com/U2fQcdaL
https://pastebin.com/XDbEhrEt
https://pastebin.com/gscukzCs
https://pastebin.com/epqMfKhi
https://pastebin.com/n6kDJLQe
https://pastebin.com/K3pCsdsT
https://pastebin.com/29L18WQV
https://pastebin.com/dweu6hGY
https://pastebin.com/i5UhDU4b
https://pastebin.com/4hqqvGJ3
https://pastebin.com/EPm7s12S
https://pastebin.com/L8iZAZmK
https://pastebin.com/jv4NNhvR
https://pastebin.com/igpmbMZv
https://pastebin.com/a3Q6qpTQ
https://pastebin.com/hq9kLWQN
https://pastebin.com/uSD7HbRh
https://pastebin.com/Q04Dqr3D
问题现象
使用Navigation构建路由,从pageOne通过pushPath跳转到pageTwo,期望pageOne的onPop回调在pageTwo返回时被触发,但效果未达预期。
问题代码示例参考如下:
class ParamWithOp {
operation: number = 1
count: number = 10
}
@Entry
@Component
struct PageOne {
pageInfo: NavPathStack = new NavPathStack();
@State message: string = 'Hello World'
@Builder
pageMap(name: string, params: Object) {
if (name === 'pageTwo') {
PageTwo()
}
}
build() {
Navigation(this.pageInfo) {
Column() {
Text(this.message)
.width('80%')
.height(50)
.margin(10)
    Button('pushPath', { stateEffect: true, type: ButtonType.Capsule })
      .width('80%')
      .height(40)
      .margin(10)
      .onClick(() => {
        // 将name指定的NavDestination页面信息入栈,传递的数据为param,添加接收处理结果的onPop回调。
        this.pageInfo.pushPath({
          name: 'pageTwo', param: new ParamWithOp(), onPop: (popInfo: PopInfo) => {
            this.message = `[pushPath]last page is: ${popInfo.info.name} result: ${JSON.stringify(popInfo.result)}`
          }
        });
      })
  }.width('100%').height('100%')
}.navDestination(this.pageMap)
.title('pageOne')
}
}
@Component
struct PageTwo {
pathStack: NavPathStack = new NavPathStack()
build() {
NavDestination() {
Column() {
Button('pop', { stateEffect: true, type: ButtonType.Capsule })
.width('80%')
.height(40)
.margin(20)
.onClick(() => {
// 回退到上一个页面,此处代码,在pop回pageOne页面时,未传参数
this.pathStack.pop();
})
}.width('100%').height('100%')
}.title('pageTwo')
.onReady((context: NavDestinationContext) => {
this.pathStack = context.pathStack
})
}
}
效果预览
点击放大
背景知识
Navigation组件是路由导航的根视图容器,结合导航控制器NavPathStack可实现组件导航。
pushPath:将info指定的NavDestination页面信息入栈。可设置onPop回调函数来接收参数。
pop:弹出路由栈栈顶元素,并触发onPop回调传入页面处理结果。
问题定位
点击放大
查阅官方文档关于pushPath方法的NavPathInfo入参说明,其中的onPop回调函数仅pop、popToName、popToIndex中设置result参数后触发。
分析结论
onPop回调函数需要使用pop、popToName、popToIndex方法返回时设置result参数才会触发,否则不会执行onPop回调。
修改建议
按上节所述,只需在pageTwo中调用pop方法时,传入result参数,即可在pageOne中成功收到onPop的回调。修改问题代码如下:
// 回退到上一个页面,随便传个result即可触发onPop回调
this.pathStack.pop(1);
修改后的运行效果参见效果预览,可以看到,当pageTwo调用pop返回时传入了result参数,在pageOne成功执行了onPop回调,并接收到相关参数。
https://pastebin.com/NRD7bMyP
https://pastebin.com/yDaZxFwG
https://pastebin.com/EDcLGLPS
https://pastebin.com/U3ZxgwDi
https://pastebin.com/DR63sAxA
https://pastebin.com/nSnDNVPq
https://pastebin.com/GjtSqPNS
https://pastebin.com/saHctNS5
https://pastebin.com/kNHqdQnW
https://pastebin.com/JMnQaXK7
https://pastebin.com/vSexS64Q
https://pastebin.com/tRQUHv5L
https://pastebin.com/3JqBJ8wq
https://pastebin.com/xEkHBut4
https://pastebin.com/skZmkkFw
https://pastebin.com/7V0wmLFb
https://pastebin.com/BTZfE8Bd
https://pastebin.com/svjxZfvM
https://pastebin.com/xXYHPU8b
https://pastebin.com/zMLjuJuV
https://pastebin.com/ffbfvSna
https://pastebin.com/C9Zr1K2M
https://pastebin.com/ac9xpyfm
https://pastebin.com/WX45yC8p
https://pastebin.com/YeUrZij0
https://pastebin.com/zKW8HRQb
https://pastebin.com/6KBWHYZG
https://pastebin.com/MTtnz3t8
https://pastebin.com/E7SBb1wr
https://pastebin.com/eib2hRUq
https://pastebin.com/SEeERuCT
https://pastebin.com/8tLt3B2T
https://pastebin.com/R4NJytjp
https://pastebin.com/EauQE9nS
https://pastebin.com/fsCXAP9r
https://pastebin.com/9vFQE41K
https://pastebin.com/xyKY9DF0
https://pastebin.com/4duLr15i
https://pastebin.com/Epk3dbmH
https://pastebin.com/GehEwq1u
https://pastebin.com/HyQm4h82
https://pastebin.com/D5vZs1MG
https://pastebin.com/L2KryS4C
https://pastebin.com/QBtyQipw
https://pastebin.com/FNxMPZ51
https://pastebin.com/trw5d8cC
https://pastebin.com/rPFzkgK8
https://pastebin.com/uCBsSjNm
https://pastebin.com/RGW6X15L
https://pastebin.com/S7cBiuDb
https://pastebin.com/HFyJtEKK
https://pastebin.com/0ubhVneF
https://pastebin.com/RW5trQzf
https://pastebin.com/vCSGjNpZ
https://pastebin.com/SffvfhGR
https://pastebin.com/tt0tYGFq
https://pastebin.com/tMm7YFVa
https://pastebin.com/ibcT2Lf2
https://pastebin.com/JqjbbVRf
https://pastebin.com/HVKWqHGk
https://pastebin.com/s5vt779b
https://pastebin.com/B0TAyxn6
https://pastebin.com/fuPRhvhd
https://pastebin.com/beLXK35p
https://pastebin.com/GFBwqxu6
https://pastebin.com/9VWb8miy
https://pastebin.com/grHVbPND
https://pastebin.com/CYaQEmTS
https://pastebin.com/ZkmuiH18
https://pastebin.com/f2xJpBQ9
https://pastebin.com/2W5h2q09
https://pastebin.com/rAC3TU64
https://pastebin.com/K9pyh9gi
https://pastebin.com/uz28wUPg
https://pastebin.com/cVAkkb9F
https://pastebin.com/RbNxE2S2
https://pastebin.com/hrxFwi1b
https://pastebin.com/6dxqezH3
https://pastebin.com/SQmcrc6u
https://pastebin.com/DmzbU6WX
https://pastebin.com/RQzvD6gG
https://pastebin.com/nWdqiQr9
https://pastebin.com/qSiWmiq9
https://pastebin.com/HbjBAg6q
https://pastebin.com/7sg5aa6M
https://pastebin.com/cGDzhrRb
https://pastebin.com/Q3D2BmaQ
https://pastebin.com/tvZNCwN8
https://pastebin.com/XB4HwUsz
https://pastebin.com/bZDH1VHh
https://pastebin.com/xCPMHyqK
https://pastebin.com/mJJ4U9bH
https://pastebin.com/HrakBMBz
https://pastebin.com/GN9npU0W
https://pastebin.com/nr9hJd8p
https://pastebin.com/2CgD5tqb
https://pastebin.com/tXtkUfHd
https://pastebin.com/wkFA8iGP
https://pastebin.com/7z45qQzr
https://pastebin.com/w5RGPRen
https://pastebin.com/WLJewYNA
https://pastebin.com/bEbNLpBi
https://pastebin.com/Chn8rUkh
https://pastebin.com/jz4F2APq
https://pastebin.com/iRWuPNFz
https://pastebin.com/GmHAMH6f
https://pastebin.com/uJMGcsEG
https://pastebin.com/jPB68a0D
https://pastebin.com/MjC66wkv
https://pastebin.com/S7RDTAM9
https://pastebin.com/0bvuDUM1
https://pastebin.com/8czdKG36
https://pastebin.com/usWbPMRE
https://pastebin.com/kywEMqJp
https://pastebin.com/XJFyGMVu
https://pastebin.com/QZm2TaPm
https://pastebin.com/Qtuytbx1
https://pastebin.com/JCBYPdpc
https://pastebin.com/cVLahV0P
https://pastebin.com/0na2hGU9
https://pastebin.com/qpAgP7Mi
https://pastebin.com/k75PXkp7
https://pastebin.com/DZtU9neL
https://pastebin.com/7Yz1D9Fq
https://pastebin.com/xCwndzDR
https://pastebin.com/bGRUESTt
https://pastebin.com/fsnvCaCQ
https://pastebin.com/NcTVLKBf
https://pastebin.com/dXFykLyA
https://pastebin.com/N2w0m4pJ
https://pastebin.com/XEcYb0wP
https://pastebin.com/r7ZVGBz0
https://pastebin.com/Tz3svy7W
https://pastebin.com/CV8Ety7V
https://pastebin.com/sE3tU6ZT
https://pastebin.com/fCeY1t0n
https://pastebin.com/NXaPbSUG
https://pastebin.com/qt5yxi3M
https://pastebin.com/aTKPHQrG
https://pastebin.com/9SAkknhv
https://pastebin.com/Jx0dN32i
https://pastebin.com/7SyfLKbJ
https://pastebin.com/EX2bMjNe
https://pastebin.com/tdx0tmft
https://pastebin.com/gg9V1ytb
https://pastebin.com/BrBEcy26
https://pastebin.com/PZjmp9Bq
https://pastebin.com/k2TdbGrr
https://pastebin.com/yTV7fVKm
https://pastebin.com/P1a8Qn8J
https://pastebin.com/aekNrH9G
https://pastebin.com/LHvEPcc4
https://pastebin.com/LNzusSGs
https://pastebin.com/sMeA2PNw
https://pastebin.com/kRSKWe7H
https://pastebin.com/T8hXpM8Q
https://pastebin.com/STXJwKnY
https://pastebin.com/EZMpBXrs
https://pastebin.com/eqK7fyHg
https://pastebin.com/JJaAFQJa
https://pastebin.com/DrZAxjY8
https://pastebin.com/QFimQBUz
https://pastebin.com/z1FcAaJv
https://pastebin.com/7BcKWKaL
https://pastebin.com/FcphACWj
https://pastebin.com/BLd4XZSU
https://pastebin.com/NdHCmLXc
https://pastebin.com/ufeKaAdj
https://pastebin.com/U2fQcdaL
https://pastebin.com/XDbEhrEt
https://pastebin.com/gscukzCs
https://pastebin.com/epqMfKhi
https://pastebin.com/n6kDJLQe
https://pastebin.com/K3pCsdsT
https://pastebin.com/29L18WQV
https://pastebin.com/dweu6hGY
https://pastebin.com/i5UhDU4b
https://pastebin.com/4hqqvGJ3
https://pastebin.com/EPm7s12S
https://pastebin.com/L8iZAZmK
https://pastebin.com/jv4NNhvR
https://pastebin.com/igpmbMZv
https://pastebin.com/a3Q6qpTQ
https://pastebin.com/hq9kLWQN
https://pastebin.com/uSD7HbRh
https://pastebin.com/Q04Dqr3D
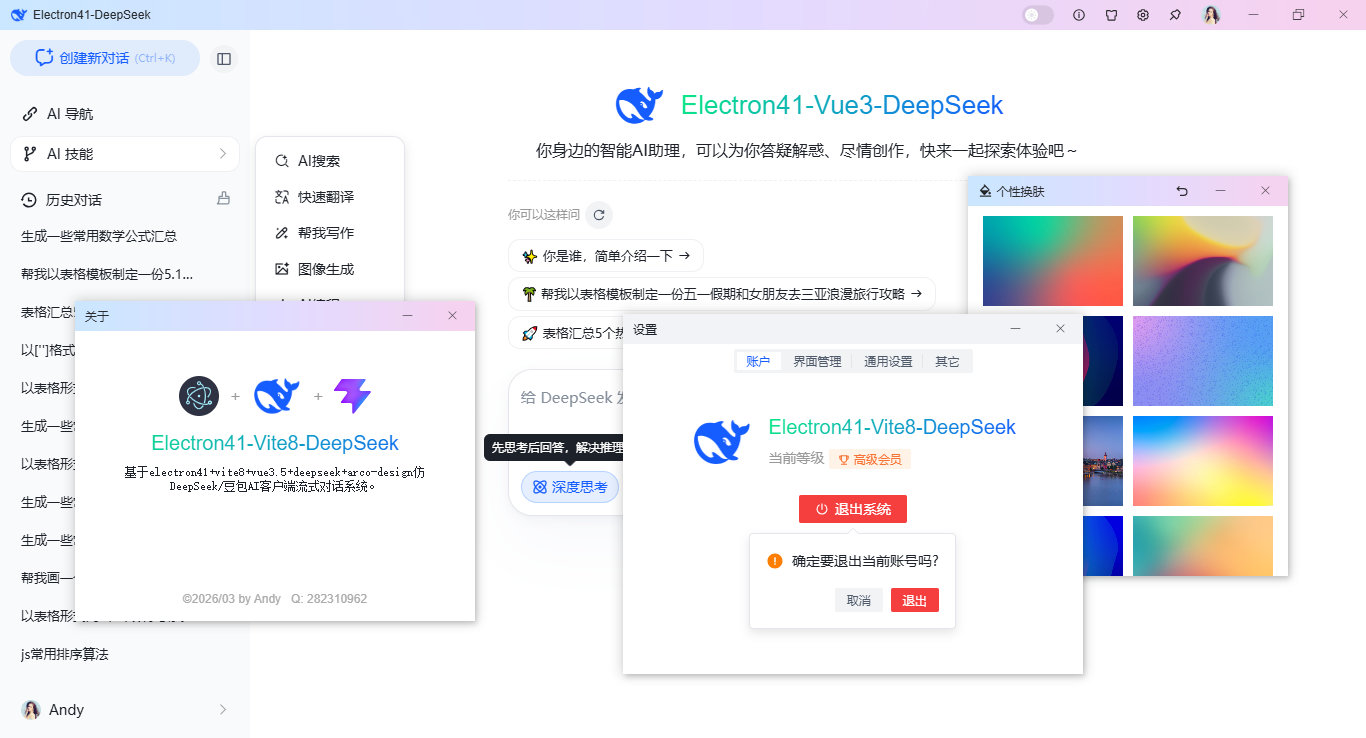
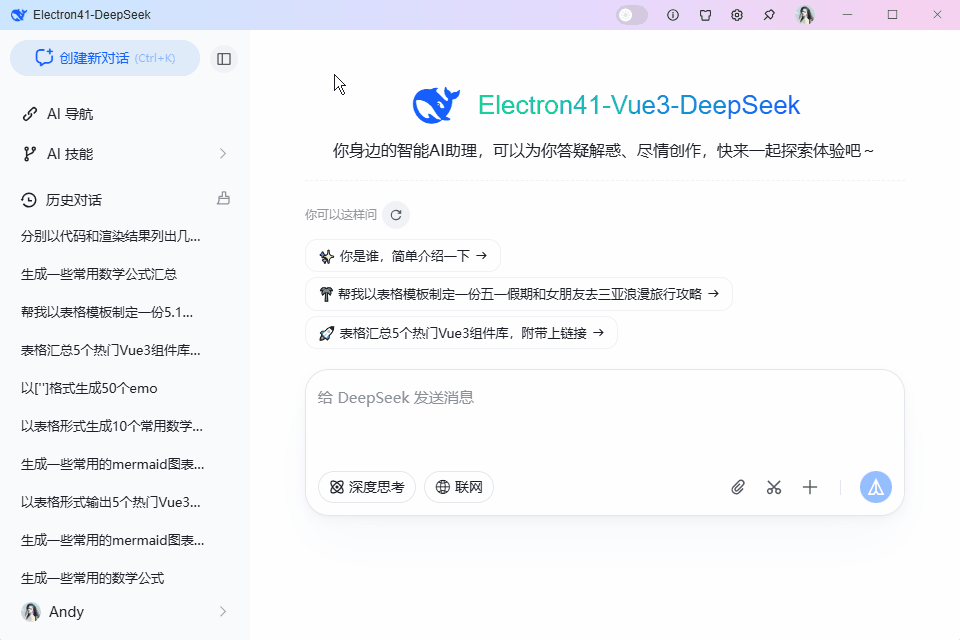
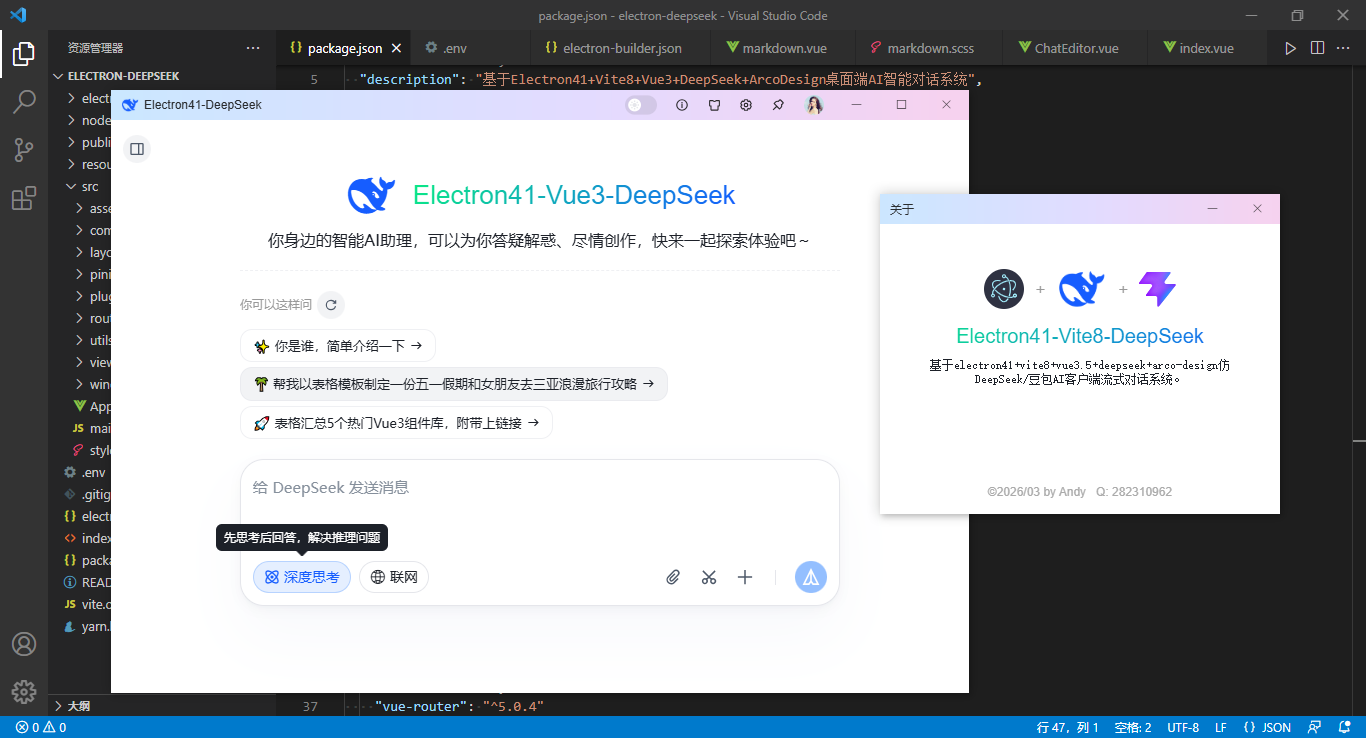
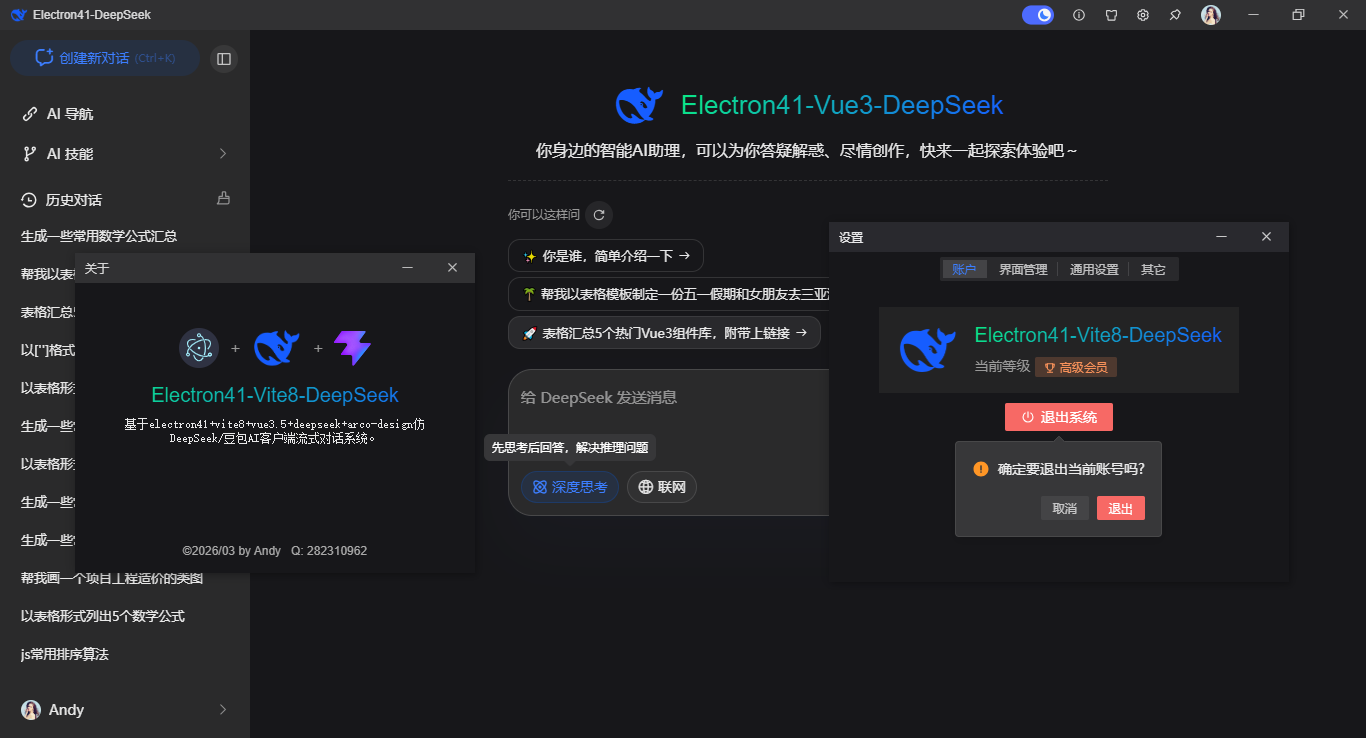
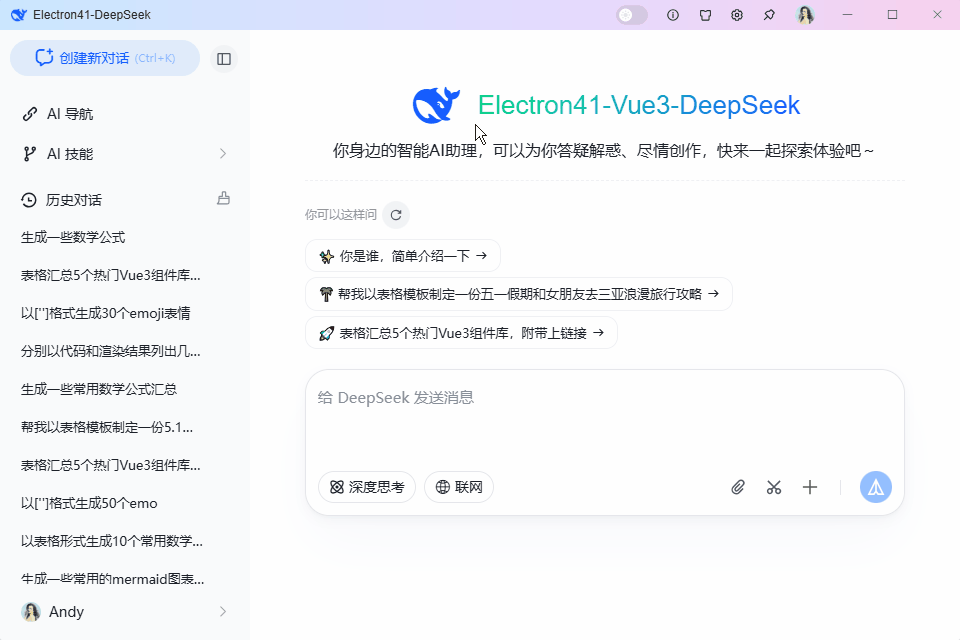
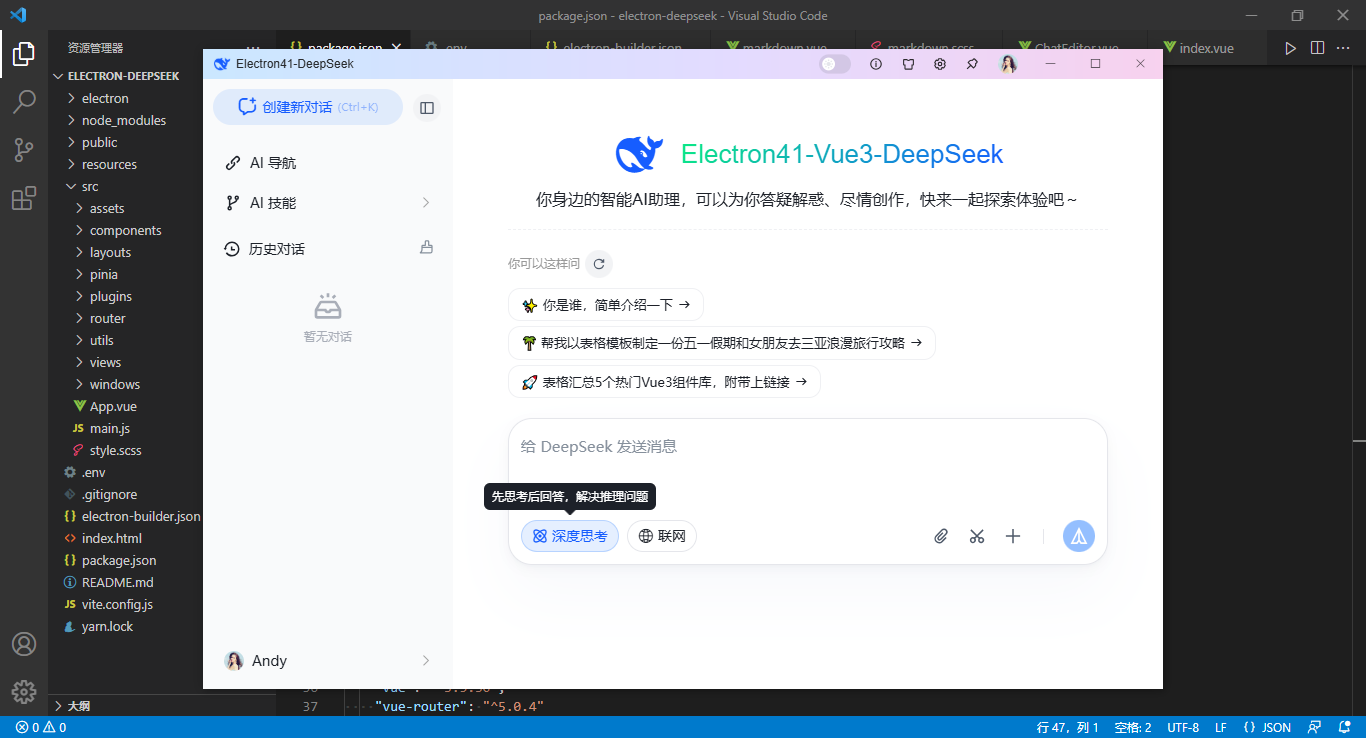
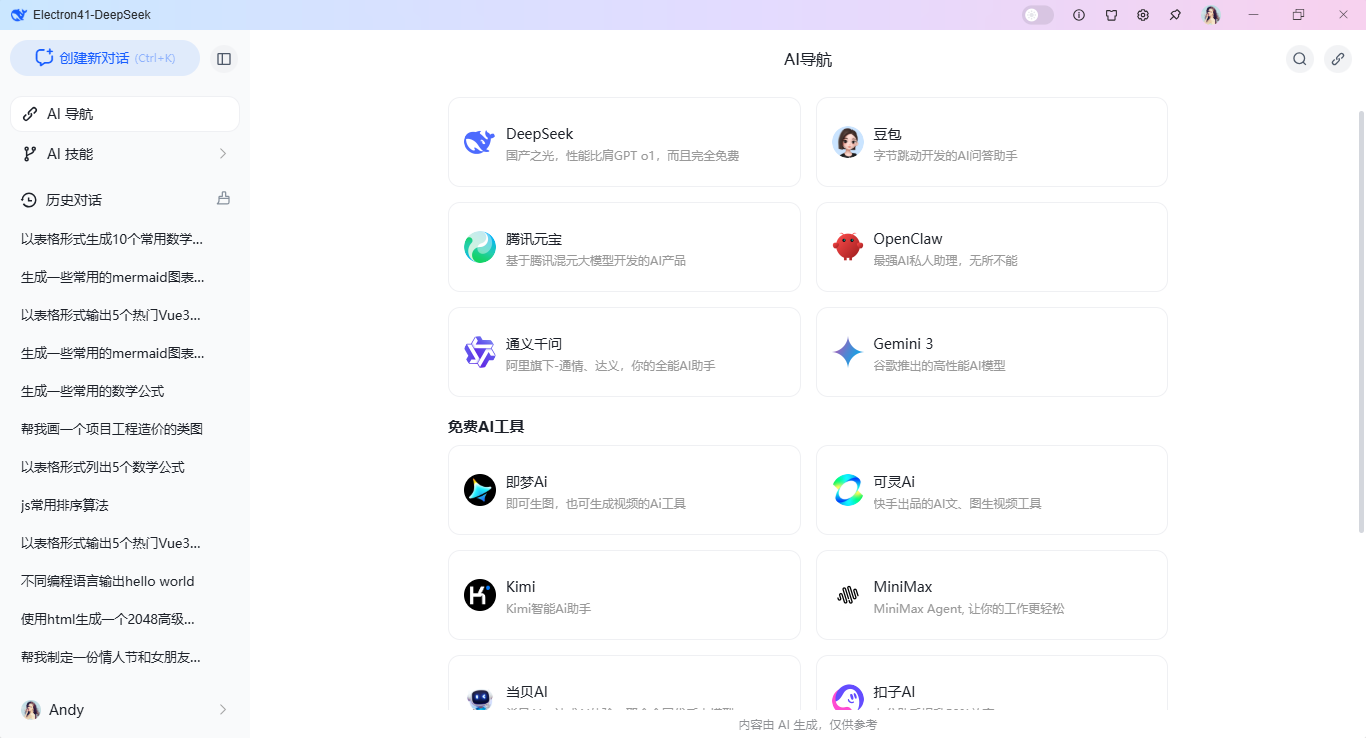
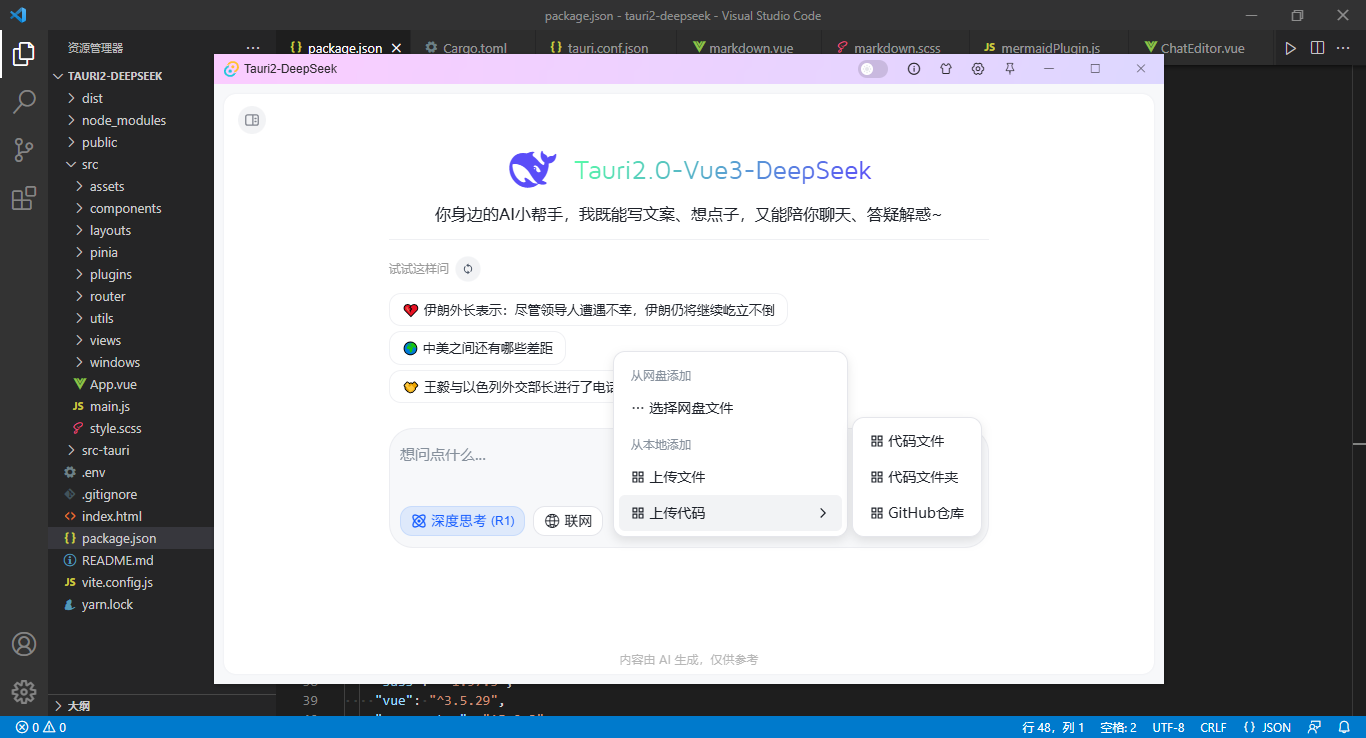
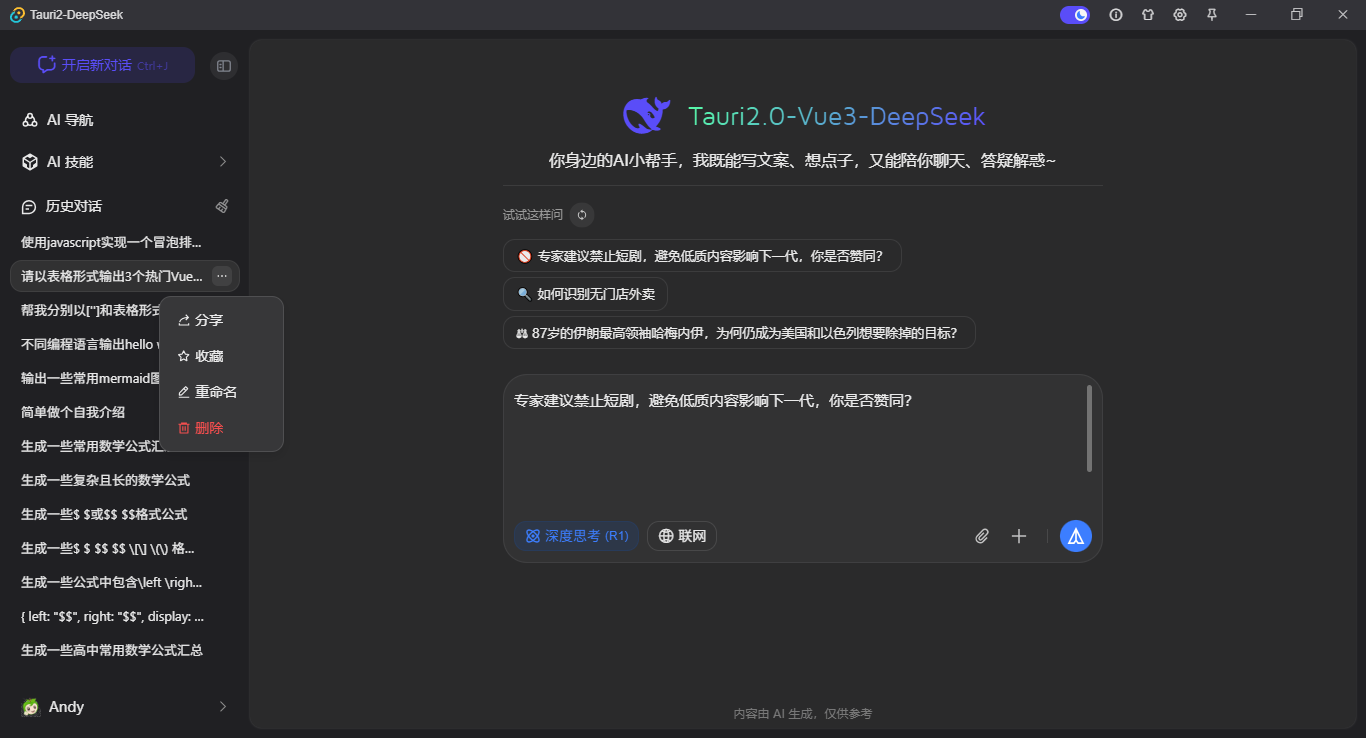
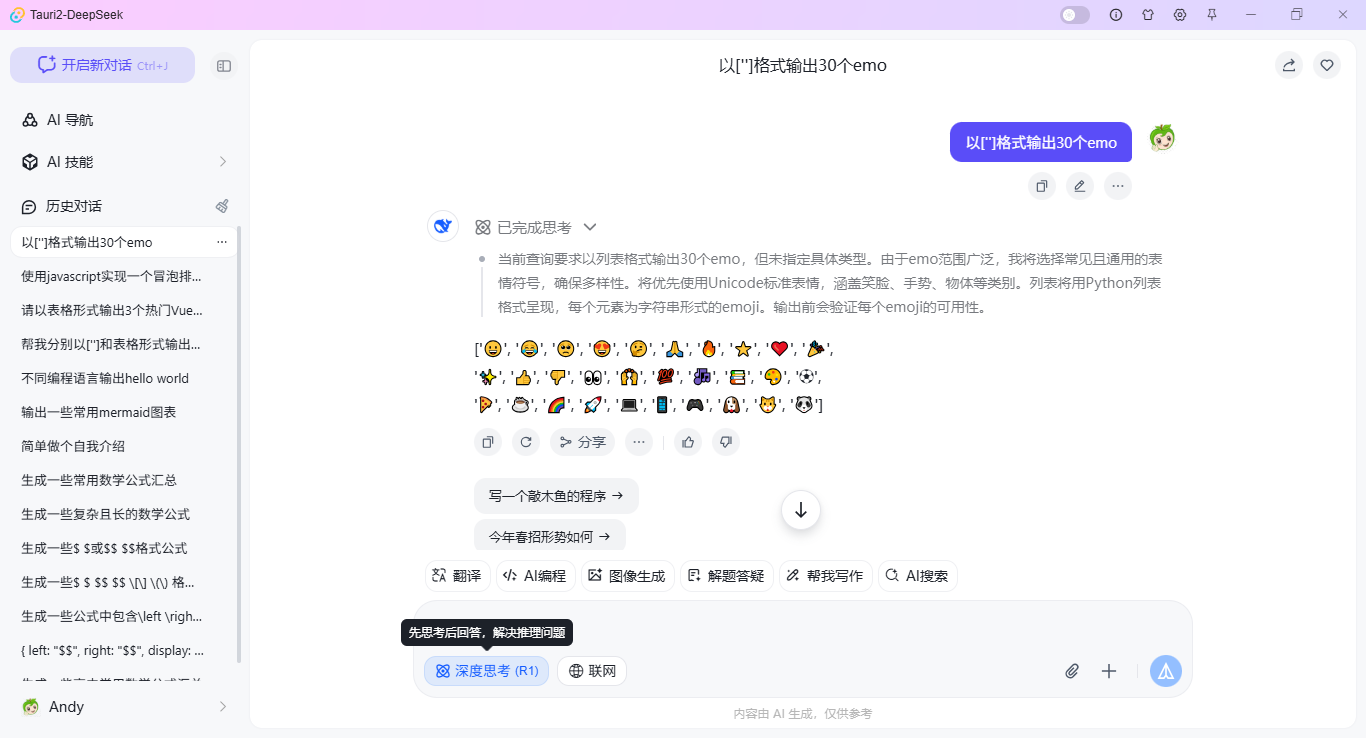
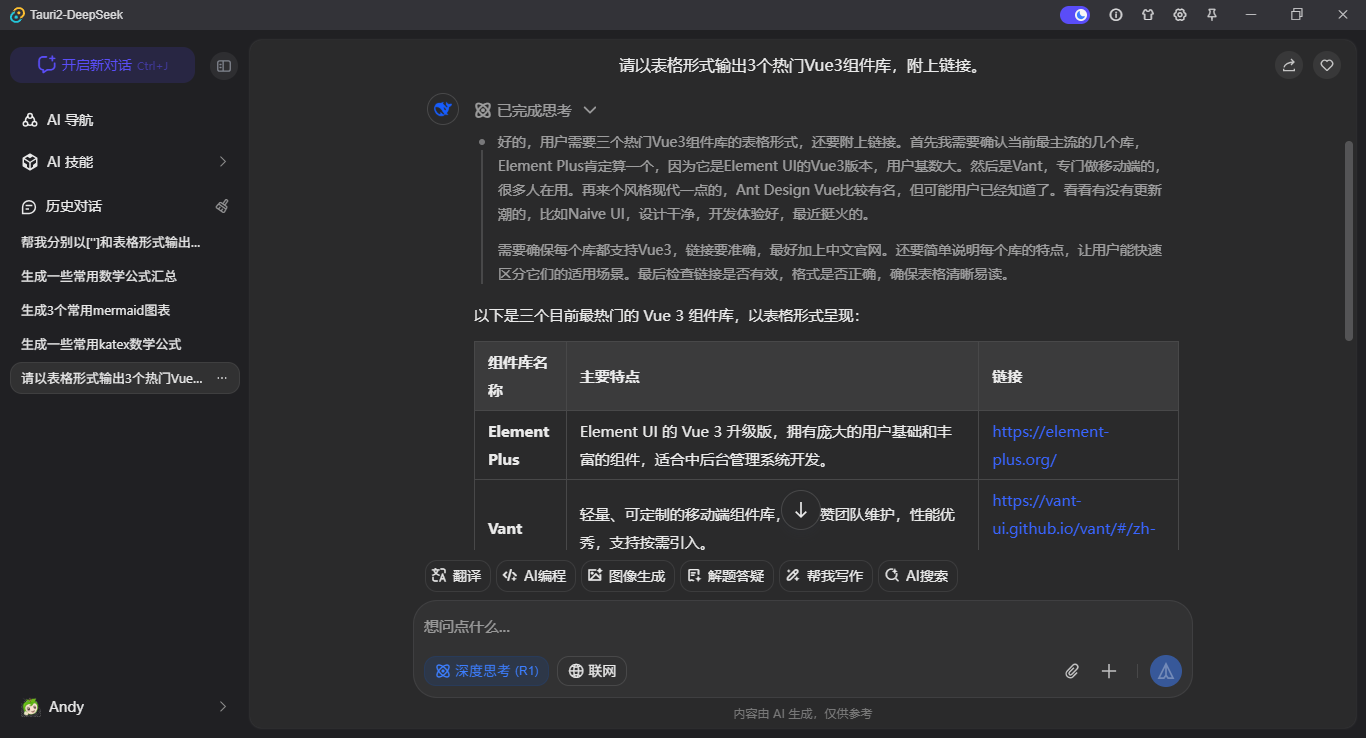
基于vue3.5+electron41+vite8.0++deepseek构建桌面版ai智能对答系统
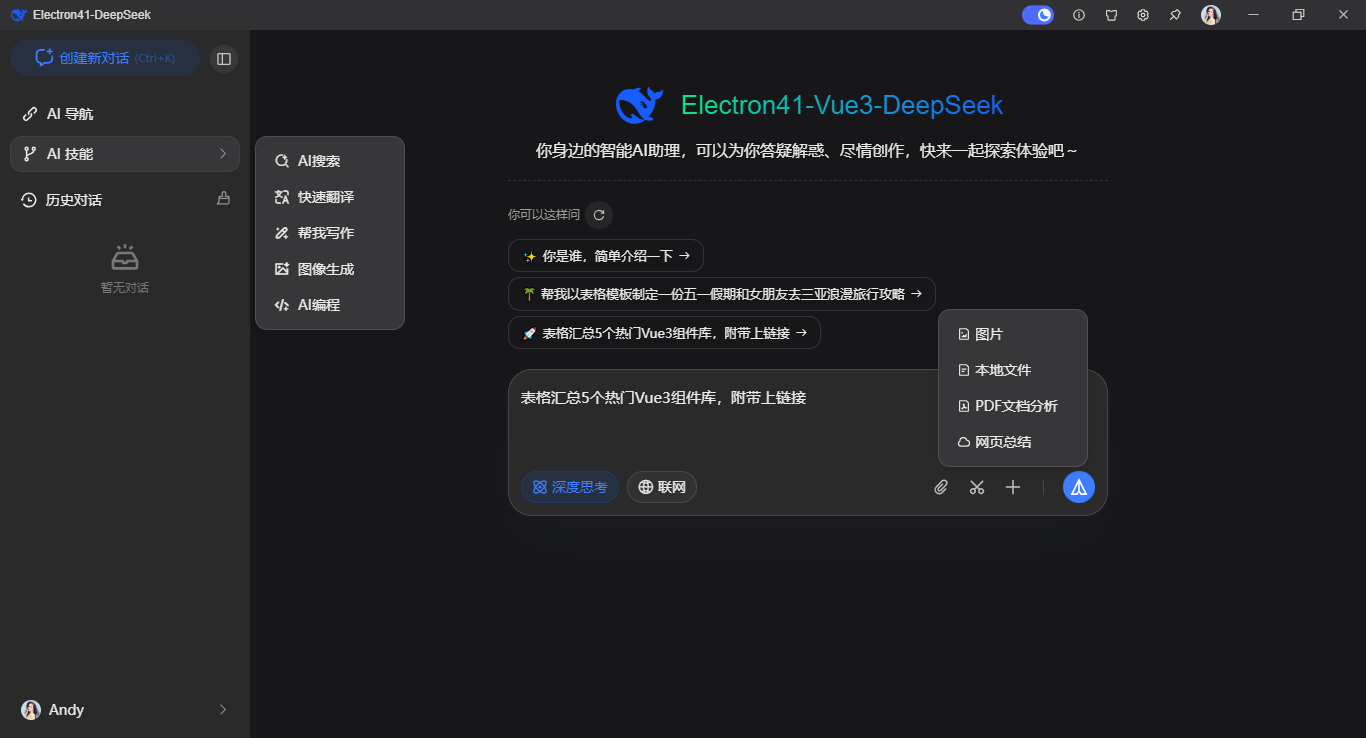
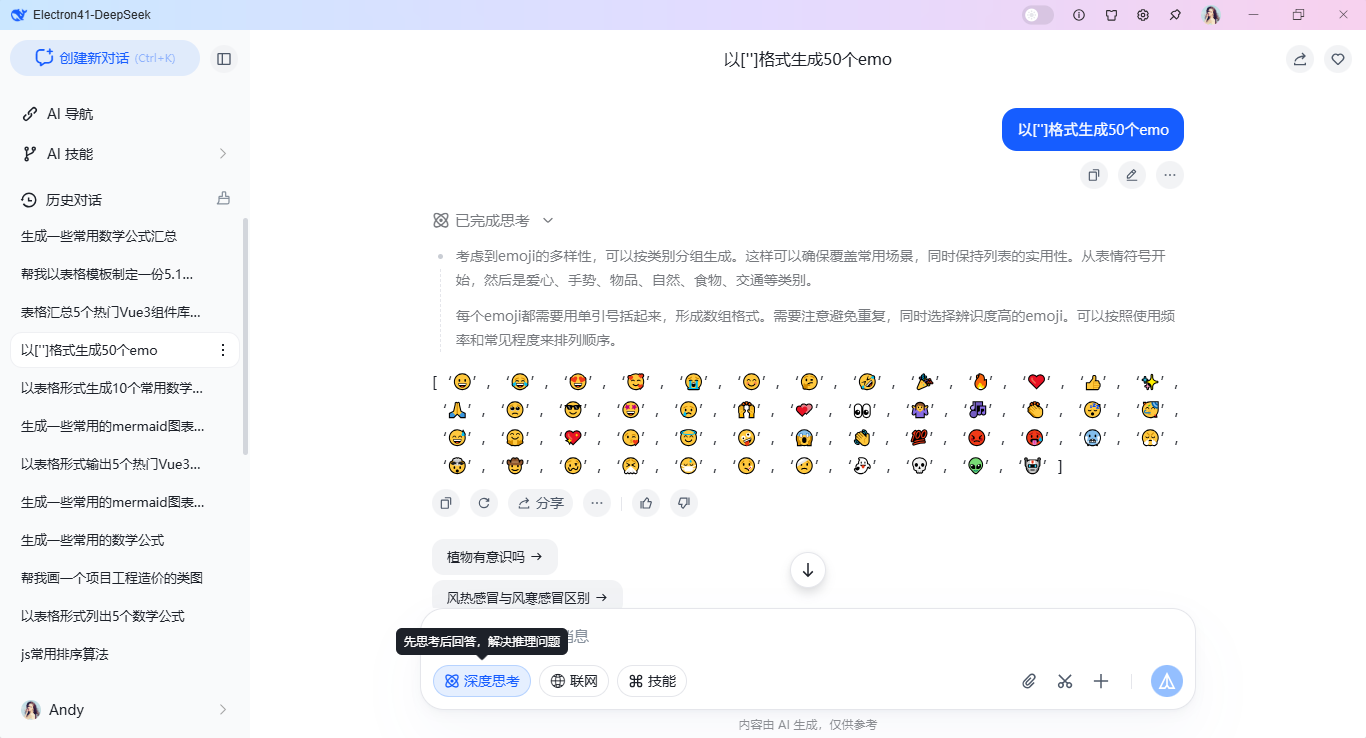
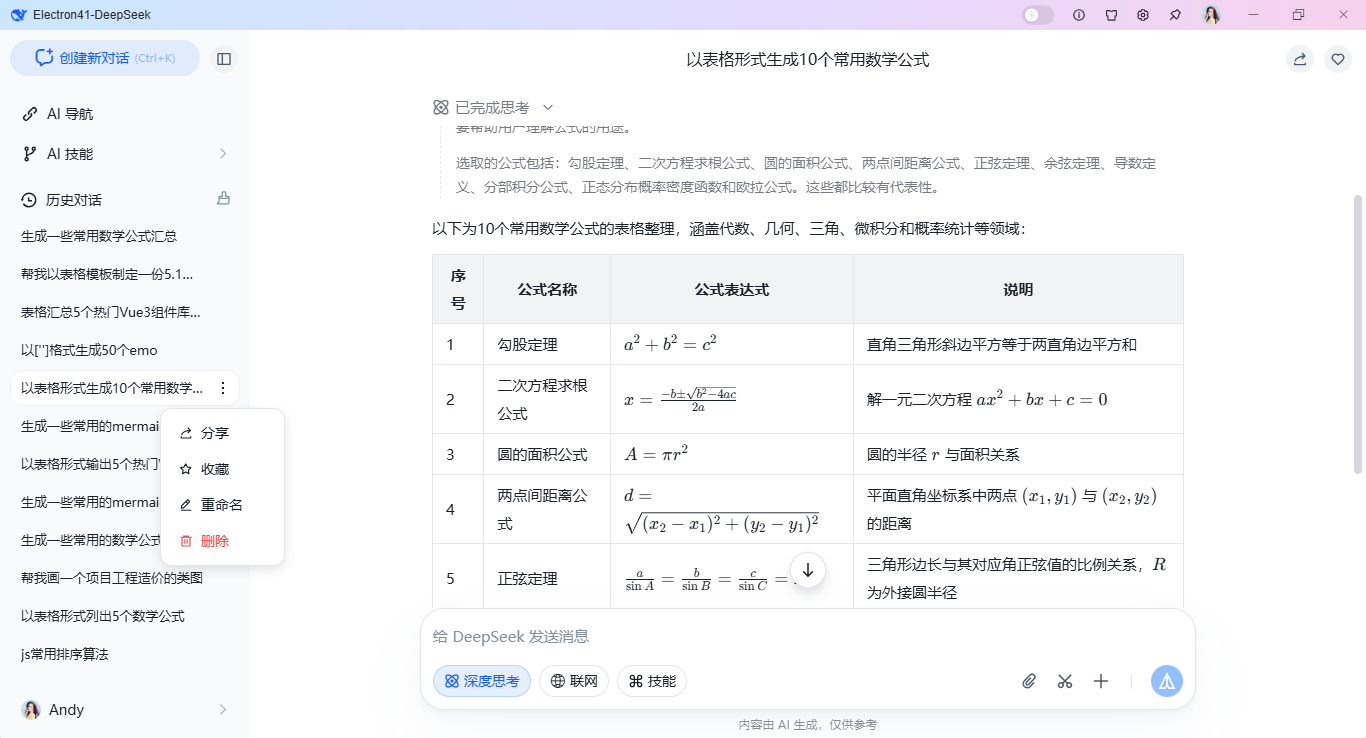
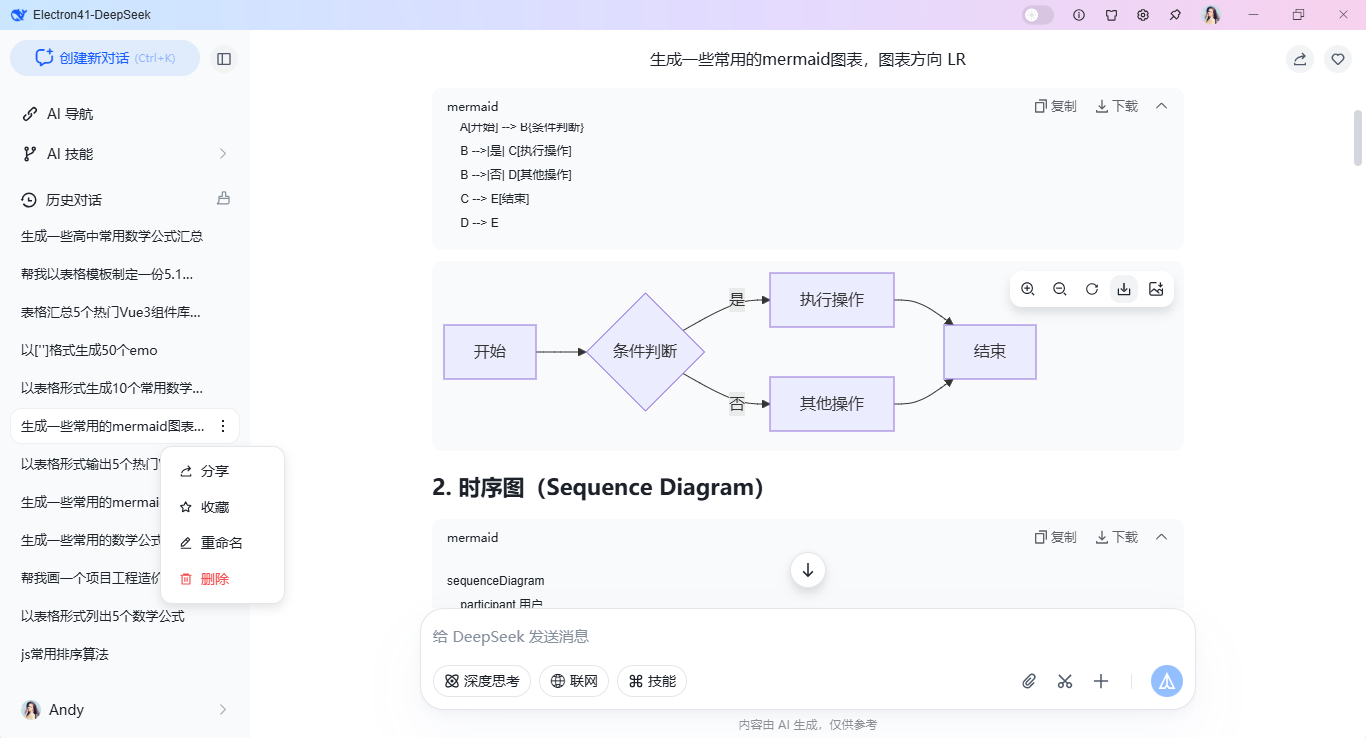
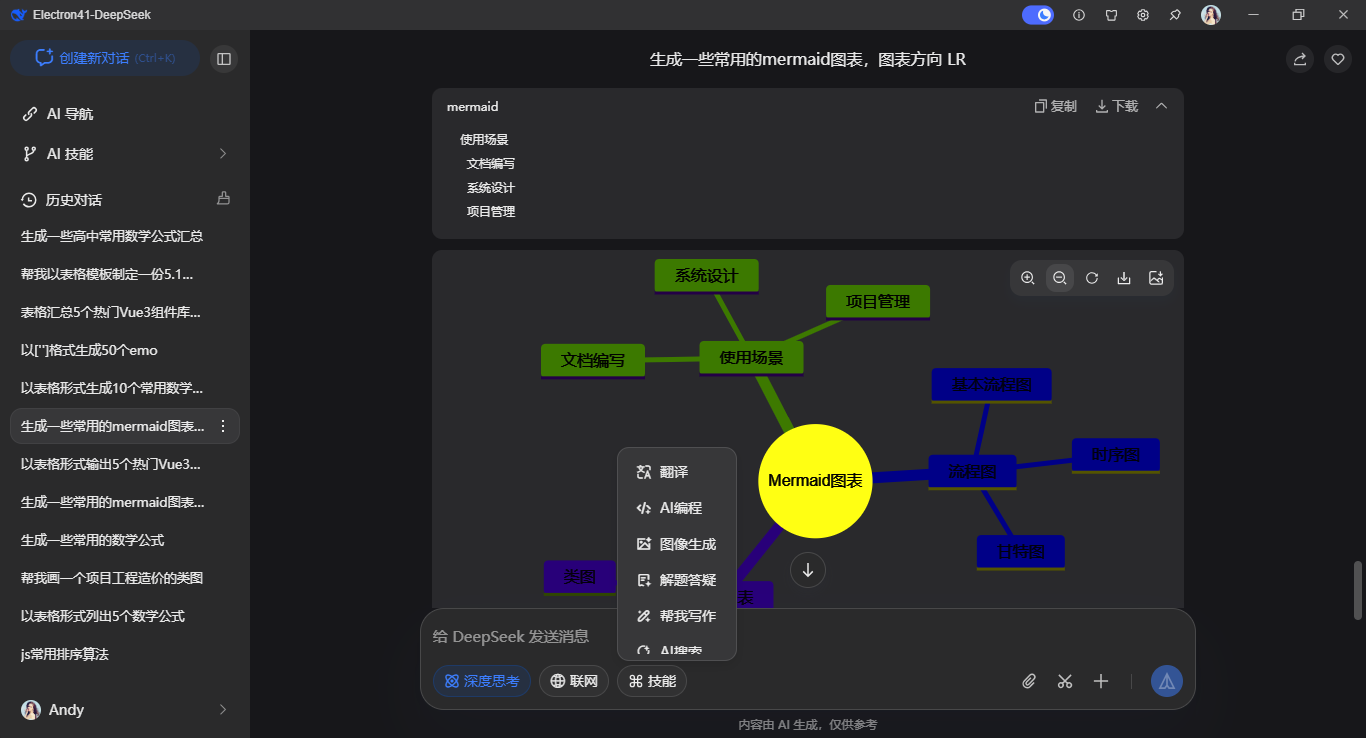
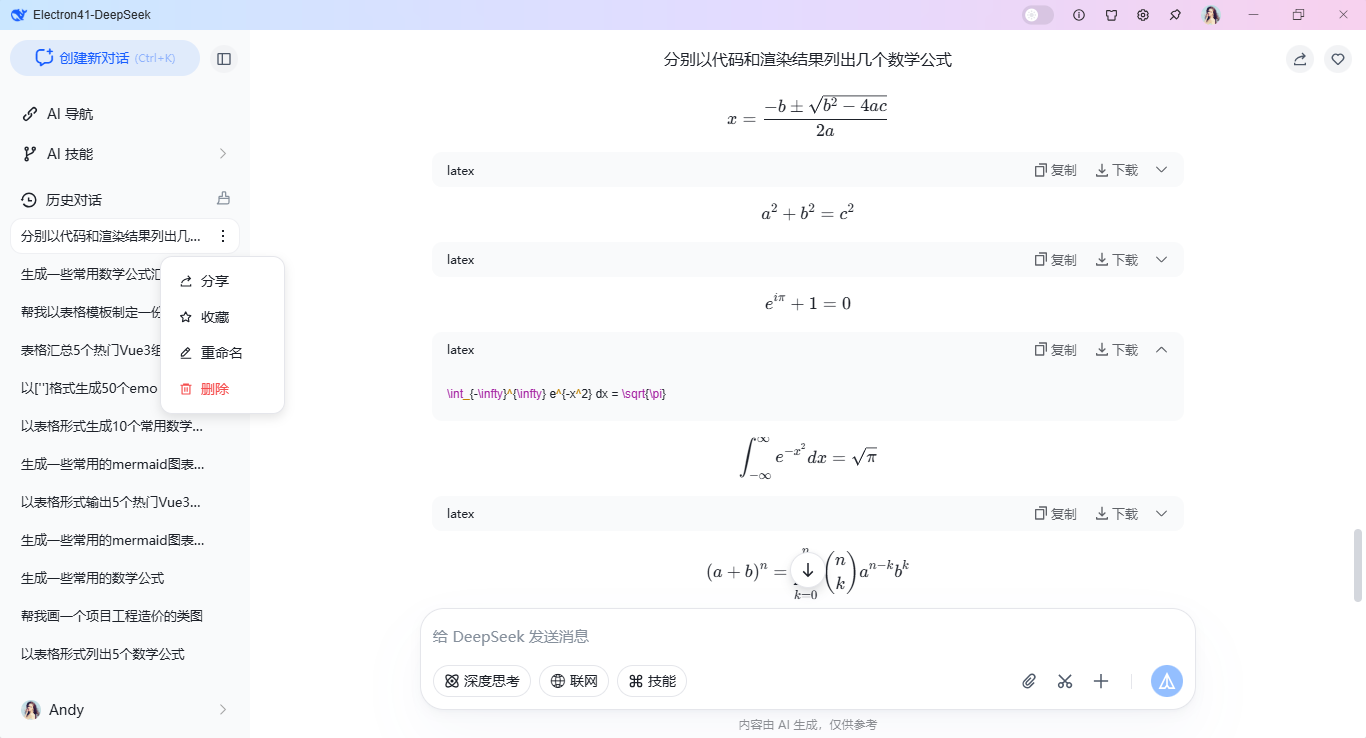
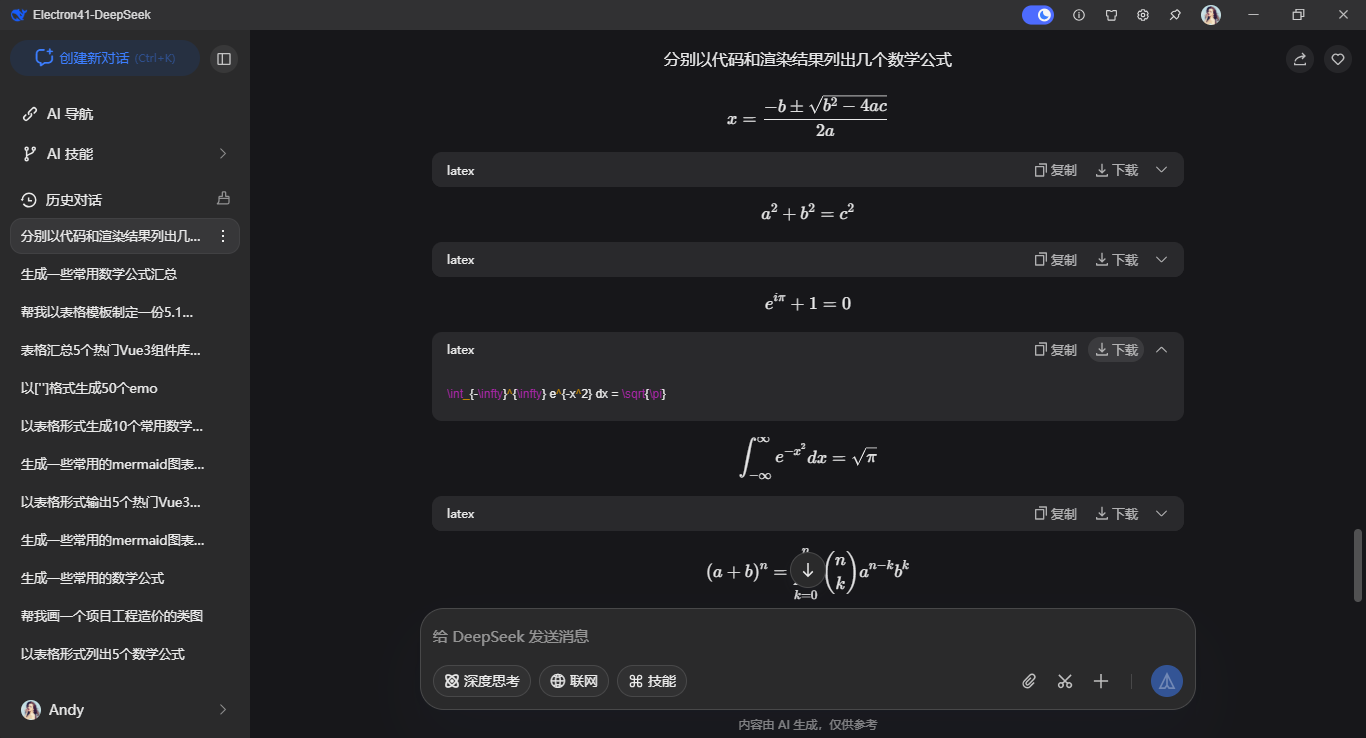
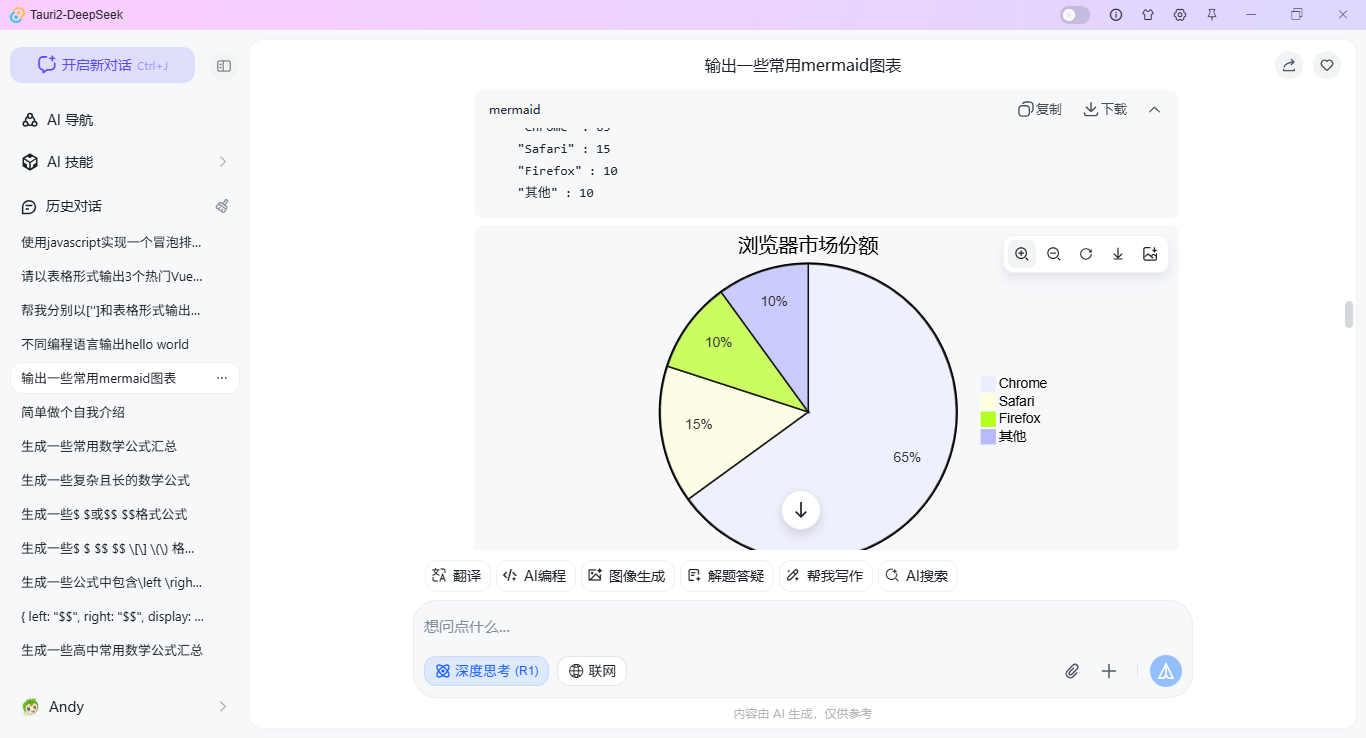
vite8-electron41-deepseek:基于vue3.5+vite8.0+electron41+arco+markdown+hljs+openai集成调用deepseek api聊天大模型。支持暗夜+浅色主题、深度思考、代码高亮/复制代码/下载、katex公式、渲染mermaid图表等功能。

技术知识
- 编辑器:Vscode
- 跨平台框架:electron^41.0.3
- 前端框架:vite^8.0.1+vue^3.5.30+vue-router^5.0.4
- 大模型框架:deepseek-v3.2+openai
- 组件库:arco-design^2.57.0
- 状态管理:pinia^3.0.4
- markdown解析:markdown-it^14.1.1
- 打包工具:electron-builder^26.8.1
- vite桥接electron插件:vite-plugin-electron^0.29.1
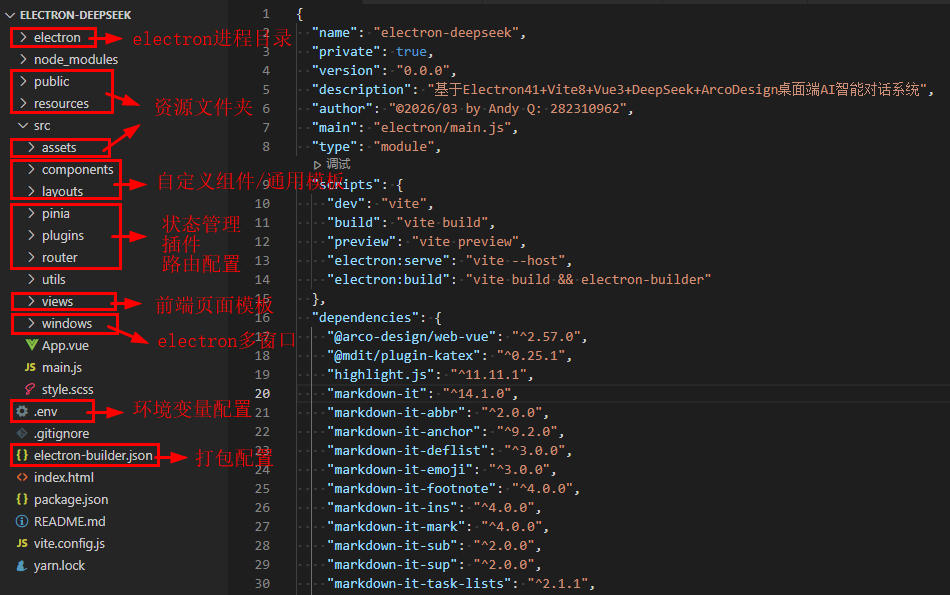
项目框架目录结构
使用vite8.0+electron41构建项目,vue3 setup语法编码开发。
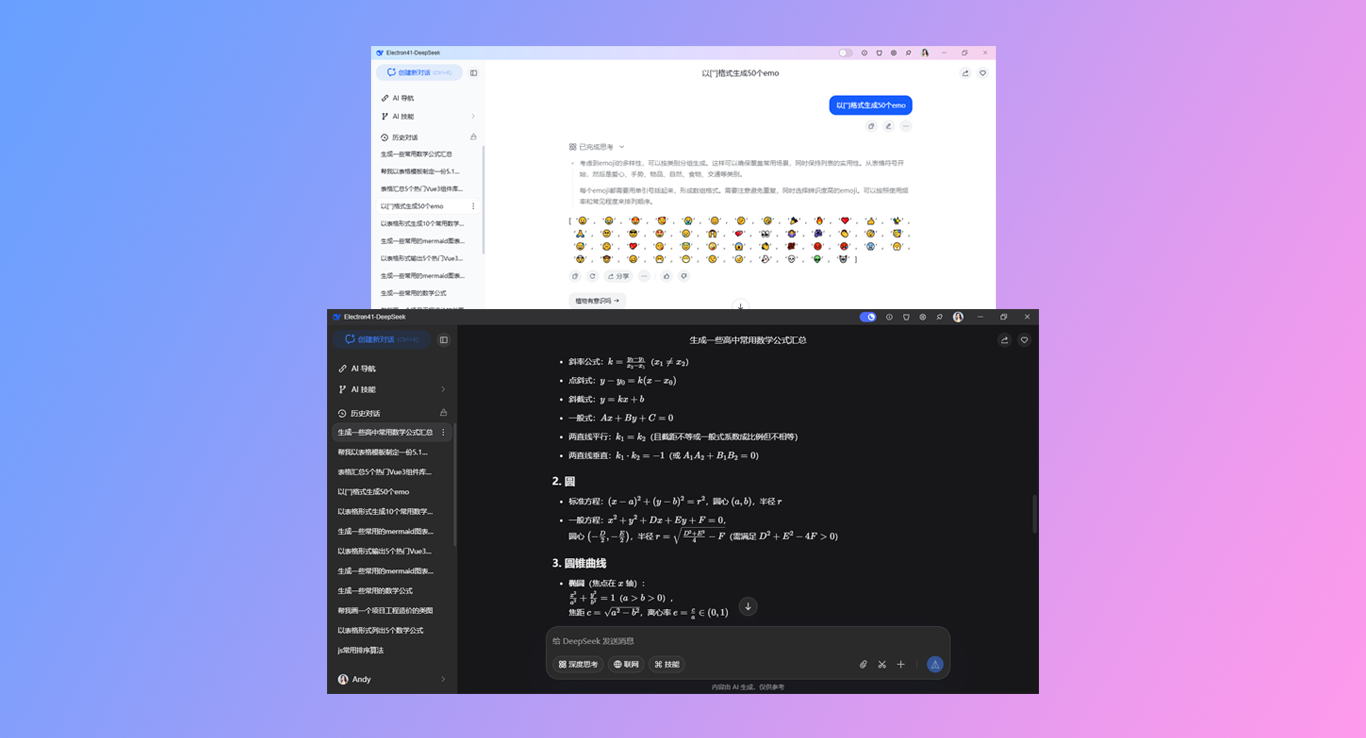
最新研发vue3.5+vite8+electron41搭建本地桌面版ai流式生成智能助手。
Electron41+Vite8+DeepSeek桌面版AI流式会话模板Exe

了解更多的项目详细介绍,可以看看下面这篇文章。
Electron41+Vite8.0+DeepSeek桌面端AI助手|electron+vue3流式ai系统

热文推荐
uniapp+deepseek流式ai助理|uniapp+vue3对接deepseek三端Ai问答模板
Vite8+DeepSeek网页版AI助手|vue3+arco本地web版ai流式打字问答系统
tauri2.10+deepseek+vite7客户端ai系统|Tauri2+Vue3.5桌面AI程序Exe
vite8.0+deepseek流式ai模板|vue3.5+vant4+markdown打字输出ai助手
Electron38-Wechat电脑端聊天|vite7+electron38仿微信桌面端聊天系统
electron38-admin桌面端后台|Electron38+Vue3+ElementPlus管理系统
Electron38-Vue3OS客户端OS系统|vite7+electron38+arco桌面os后台管理
最新版uniapp+vue3+uv-ui跨三端短视频+直播+聊天【H5+小程序+App端】
最新版uni-app+vue3+uv-ui跨三端仿微信app聊天应用【h5+小程序+app端】
Tauri2.9+Vue3桌面版OS系统|vite7+tauri2+arcoDesign电脑端os后台模板
Tauri2.8+Vue3聊天系统|vite7+tauri2+element-plus客户端仿微信聊天程序
Tauri2-Vite7Admin客户端管理后台|tauri2.9+vue3+element-plus后台系统
最新版Flutter3.38+Dart3.10仿写抖音APP直播+短视频+聊天应用程序
Flutter3-MacOS桌面OS系统|flutter3.32+window_manager客户端OS模板
最新研发flutter3.27+bitsdojo_window+getx客户端仿微信聊天Exe应用
最新版Flutter3.32+Dart3.8跨平台仿微信app聊天界面|朋友圈
vite8-electron41-deepseek:基于vue3.5+vite8.0+electron41+arco+markdown+hljs+openai集成调用deepseek api聊天大模型。支持暗夜+浅色主题、深度思考、代码高亮/复制代码/下载、katex公式、渲染mermaid图表等功能。
技术知识
- 编辑器:Vscode
- 跨平台框架:electron^41.0.3
- 前端框架:vite^8.0.1+vue^3.5.30+vue-router^5.0.4
- 大模型框架:deepseek-v3.2+openai
- 组件库:arco-design^2.57.0
- 状态管理:pinia^3.0.4
- markdown解析:markdown-it^14.1.1
- 打包工具:electron-builder^26.8.1
- vite桥接electron插件:vite-plugin-electron^0.29.1
项目框架目录结构
使用vite8.0+electron41构建项目,vue3 setup语法编码开发。
最新研发vue3.5+vite8+electron41搭建本地桌面版ai流式生成智能助手。
Electron41+Vite8+DeepSeek桌面版AI流式会话模板Exe
了解更多的项目详细介绍,可以看看下面这篇文章。
Electron41+Vite8.0+DeepSeek桌面端AI助手|electron+vue3流式ai系统
热文推荐
uniapp+deepseek流式ai助理|uniapp+vue3对接deepseek三端Ai问答模板
Vite8+DeepSeek网页版AI助手|vue3+arco本地web版ai流式打字问答系统
tauri2.10+deepseek+vite7客户端ai系统|Tauri2+Vue3.5桌面AI程序Exe
vite8.0+deepseek流式ai模板|vue3.5+vant4+markdown打字输出ai助手
Electron38-Wechat电脑端聊天|vite7+electron38仿微信桌面端聊天系统
electron38-admin桌面端后台|Electron38+Vue3+ElementPlus管理系统
Electron38-Vue3OS客户端OS系统|vite7+electron38+arco桌面os后台管理
最新版uniapp+vue3+uv-ui跨三端短视频+直播+聊天【H5+小程序+App端】
最新版uni-app+vue3+uv-ui跨三端仿微信app聊天应用【h5+小程序+app端】
Tauri2.9+Vue3桌面版OS系统|vite7+tauri2+arcoDesign电脑端os后台模板
Tauri2.8+Vue3聊天系统|vite7+tauri2+element-plus客户端仿微信聊天程序
Tauri2-Vite7Admin客户端管理后台|tauri2.9+vue3+element-plus后台系统
最新版Flutter3.38+Dart3.10仿写抖音APP直播+短视频+聊天应用程序
Flutter3-MacOS桌面OS系统|flutter3.32+window_manager客户端OS模板
最新研发flutter3.27+bitsdojo_window+getx客户端仿微信聊天Exe应用
最新版Flutter3.32+Dart3.8跨平台仿微信app聊天界面|朋友圈
基于vite8.0+vue3+openai仿写deepseek网页版ai智能流式聊天模板
vite8-deepseek-webai:最新前端技术栈vite8.0、vue3.5、arco-design、markdown、openai调用deepseek-v3.2聊天大模型。支持light+dark主题、深度思考、代码高亮复制代码/下载、katex公式、mermaid图表等功能。


项目技术知识
- 开发工具:vscode
- 前端框架:vite8.0+vue3.5.30+vue-router5.0.3
- 智能大模型:deepseek-v3.2 + openai
- 组件库:arco-design2.57.0
- 状态管理:pinia3.0.4
- markdown插件:markdown-it14.1.0
- 代码高亮插件:highlight.js11.11.1
- katex公式:plugin-katex0.25.1


项目结构目录
使用最新正式版vite8.0搭建项目,集成deepseek api大模型接口,vue3 setup语法编码开发。

vite8-vue3-webai网页版ai对话项目已经发布到我的原创作品集,欢迎下载使用哈!
Vite8+DeepSeek+Vue3.5搭建Web版AI智能聊天对话助理


如果对项目具体的实现感兴趣,可以看看下面这篇文章。
Vite8+DeepSeek网页版AI助手|vue3+arco本地web版ai流式打字问答系统

热文推荐
uniapp+deepseek流式ai助理|uniapp+vue3对接deepseek三端Ai问答模板
vite8.0+deepseek流式ai模板|vue3.5+vant4+markdown打字输出ai助手
tauri2.10+deepseek+vite7客户端ai系统|Tauri2+Vue3.5桌面AI程序Exe
electron39-vue3ai电脑端AI模板|electron39+deepseek+vite7聊天ai应用
Electron38-Vue3OS客户端OS系统|vite7+electron38+arco桌面os后台管理
Electron38-Wechat电脑端聊天|vite7+electron38仿微信桌面端聊天系统
electron38-admin桌面端后台|Electron38+Vue3+ElementPlus管理系统
最新版uniapp+vue3+uv-ui跨三端短视频+直播+聊天【H5+小程序+App端】
最新版uni-app+vue3+uv-ui跨三端仿微信app聊天应用【h5+小程序+app端】
Tauri2.9+Vue3桌面版OS系统|vite7+tauri2+arcoDesign电脑端os后台模板
Tauri2.8+Vue3聊天系统|vite7+tauri2+element-plus客户端仿微信聊天程序
Tauri2-Vite7Admin客户端管理后台|tauri2.9+vue3+element-plus后台系统
uniapp-vue3-os手机oa系统|uni-app+vue3跨三端os后台管理模板
Flutter3-MacOS桌面OS系统|flutter3.32+window_manager客户端OS模板
最新研发flutter3.27+bitsdojo_window+getx客户端仿微信聊天Exe应用
最新版Flutter3.32+Dart3.8跨平台仿微信app聊天界面|朋友圈
vite8-deepseek-webai:最新前端技术栈vite8.0、vue3.5、arco-design、markdown、openai调用deepseek-v3.2聊天大模型。支持light+dark主题、深度思考、代码高亮复制代码/下载、katex公式、mermaid图表等功能。
项目技术知识
- 开发工具:vscode
- 前端框架:vite8.0+vue3.5.30+vue-router5.0.3
- 智能大模型:deepseek-v3.2 + openai
- 组件库:arco-design2.57.0
- 状态管理:pinia3.0.4
- markdown插件:markdown-it14.1.0
- 代码高亮插件:highlight.js11.11.1
- katex公式:plugin-katex0.25.1
项目结构目录
使用最新正式版vite8.0搭建项目,集成deepseek api大模型接口,vue3 setup语法编码开发。
vite8-vue3-webai网页版ai对话项目已经发布到我的原创作品集,欢迎下载使用哈!
Vite8+DeepSeek+Vue3.5搭建Web版AI智能聊天对话助理
如果对项目具体的实现感兴趣,可以看看下面这篇文章。
Vite8+DeepSeek网页版AI助手|vue3+arco本地web版ai流式打字问答系统
热文推荐
uniapp+deepseek流式ai助理|uniapp+vue3对接deepseek三端Ai问答模板
vite8.0+deepseek流式ai模板|vue3.5+vant4+markdown打字输出ai助手
tauri2.10+deepseek+vite7客户端ai系统|Tauri2+Vue3.5桌面AI程序Exe
electron39-vue3ai电脑端AI模板|electron39+deepseek+vite7聊天ai应用
Electron38-Vue3OS客户端OS系统|vite7+electron38+arco桌面os后台管理
Electron38-Wechat电脑端聊天|vite7+electron38仿微信桌面端聊天系统
electron38-admin桌面端后台|Electron38+Vue3+ElementPlus管理系统
最新版uniapp+vue3+uv-ui跨三端短视频+直播+聊天【H5+小程序+App端】
最新版uni-app+vue3+uv-ui跨三端仿微信app聊天应用【h5+小程序+app端】
Tauri2.9+Vue3桌面版OS系统|vite7+tauri2+arcoDesign电脑端os后台模板
Tauri2.8+Vue3聊天系统|vite7+tauri2+element-plus客户端仿微信聊天程序
Tauri2-Vite7Admin客户端管理后台|tauri2.9+vue3+element-plus后台系统
uniapp-vue3-os手机oa系统|uni-app+vue3跨三端os后台管理模板
Flutter3-MacOS桌面OS系统|flutter3.32+window_manager客户端OS模板
最新研发flutter3.27+bitsdojo_window+getx客户端仿微信聊天Exe应用
最新版Flutter3.32+Dart3.8跨平台仿微信app聊天界面|朋友圈
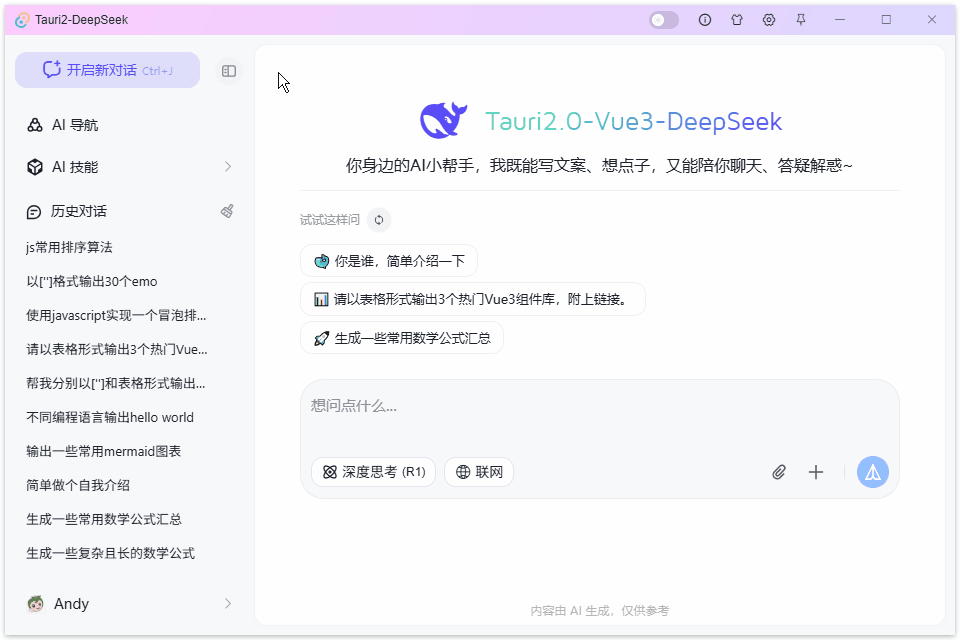
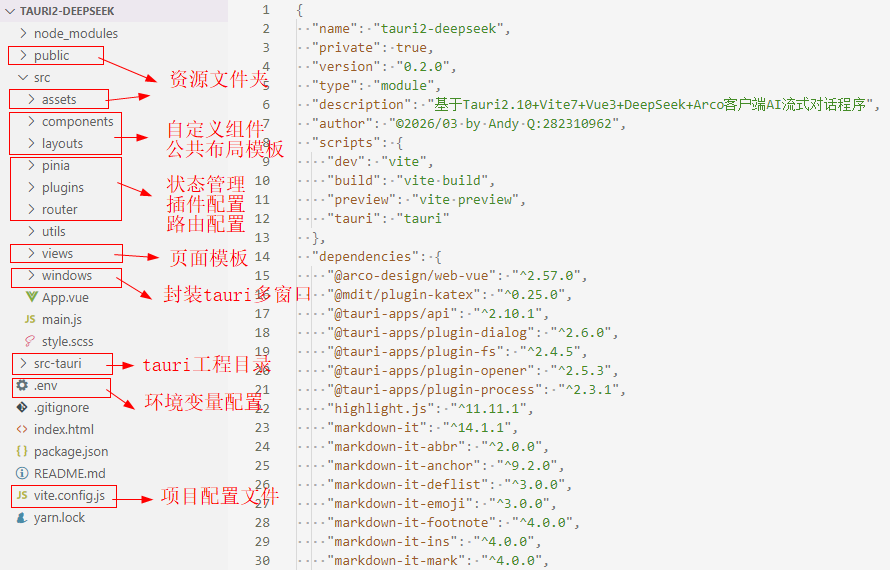
基于vue3.5+tauri2.10+deepseek-v3.2+openai搭建客户端ai智能问答系统
vite7-tauri2-deepseek:基于vue3.5+vite7.2+tauri2.10+arco+markdown+hljs+openai深度接入deepseek-v3.2聊天大模型。支持暗黑+浅色主题、深度思考、代码高亮、复制代码、katex公式、mermaid图表等功能。

使用技术
- 跨平台框架:tauri^2.10
- 前端框架:vite^7.3.1+vue^3.5.29+vue-router^5.0.3
- ai大模型:deepseek-v3.2 + openai
- 组件库:arco-design^2.57.0
- 状态管理:pinia^3.0.4
- 本地存储:pinia-plugin-persistedstate^4.7.1
- markdown解析:markdown-it^14.1.0
- katex公式渲染:@mdit/plugin-katex^0.25.0
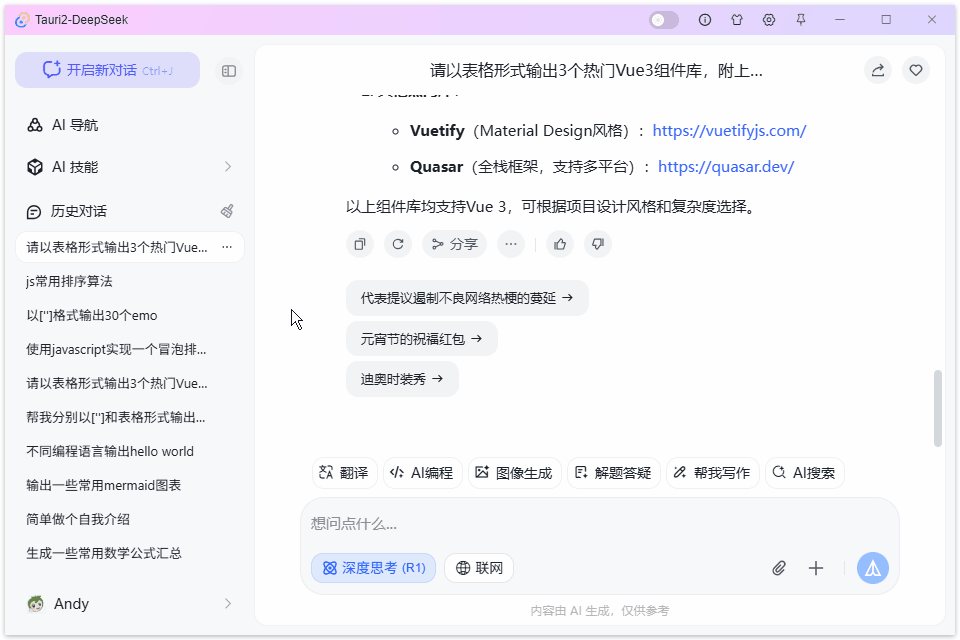
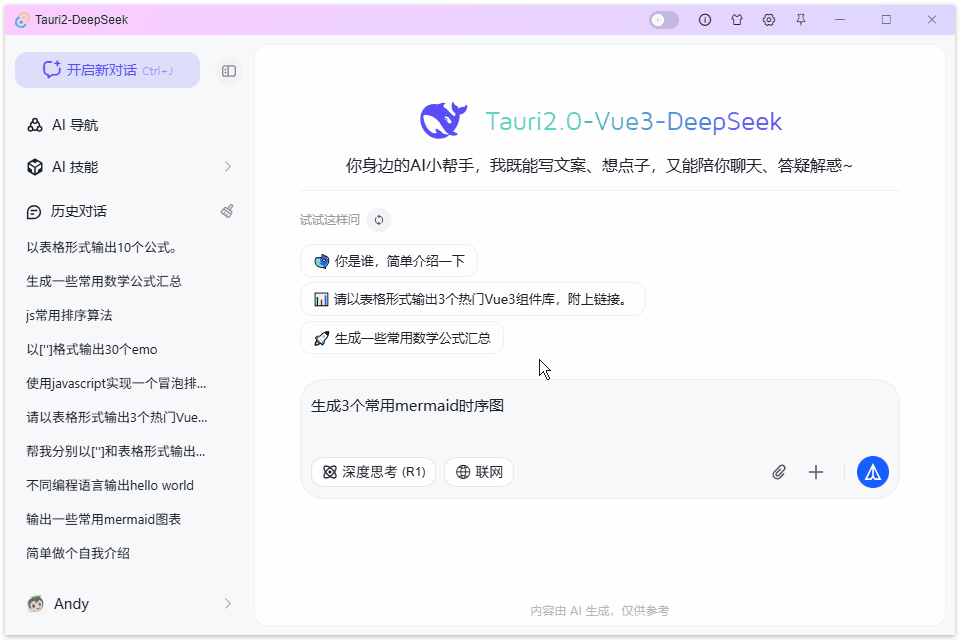
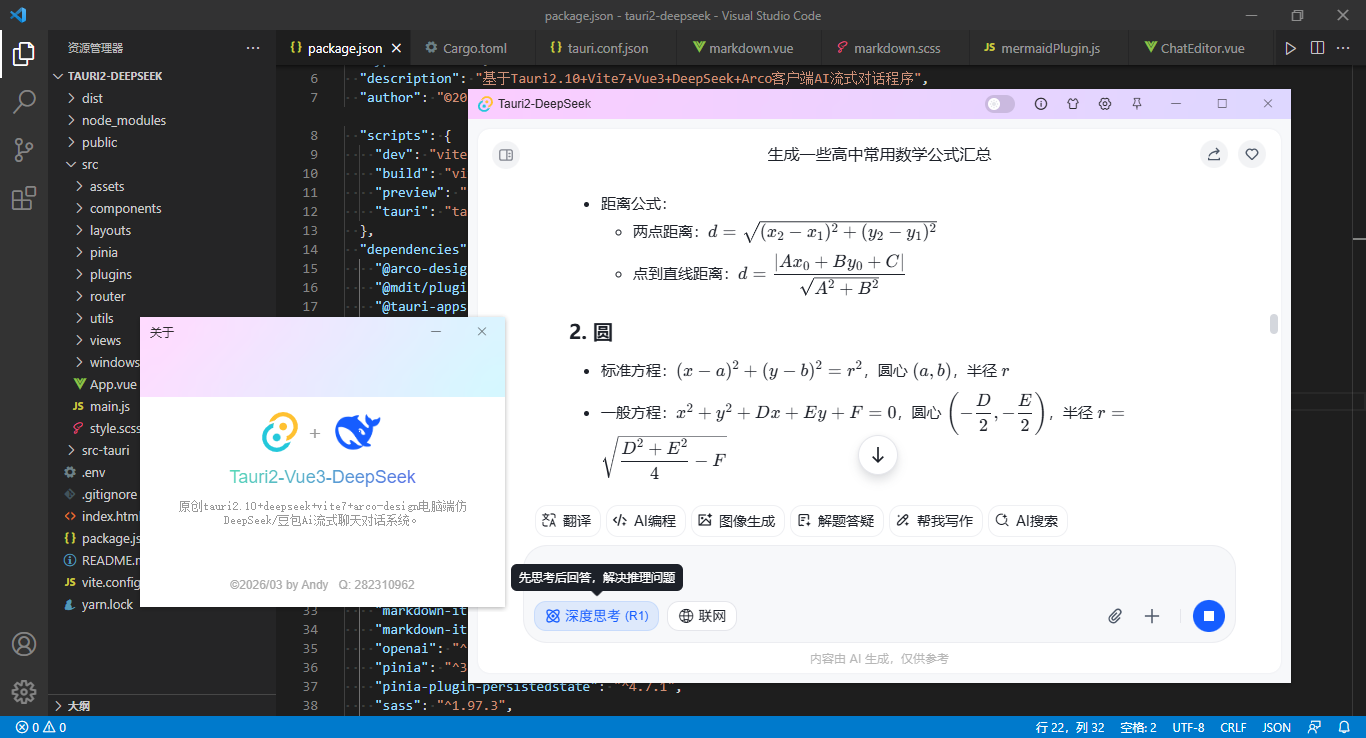
如上图:vue3-deepseek-tauriai支持latex数学公式、mermaid图表渲染。
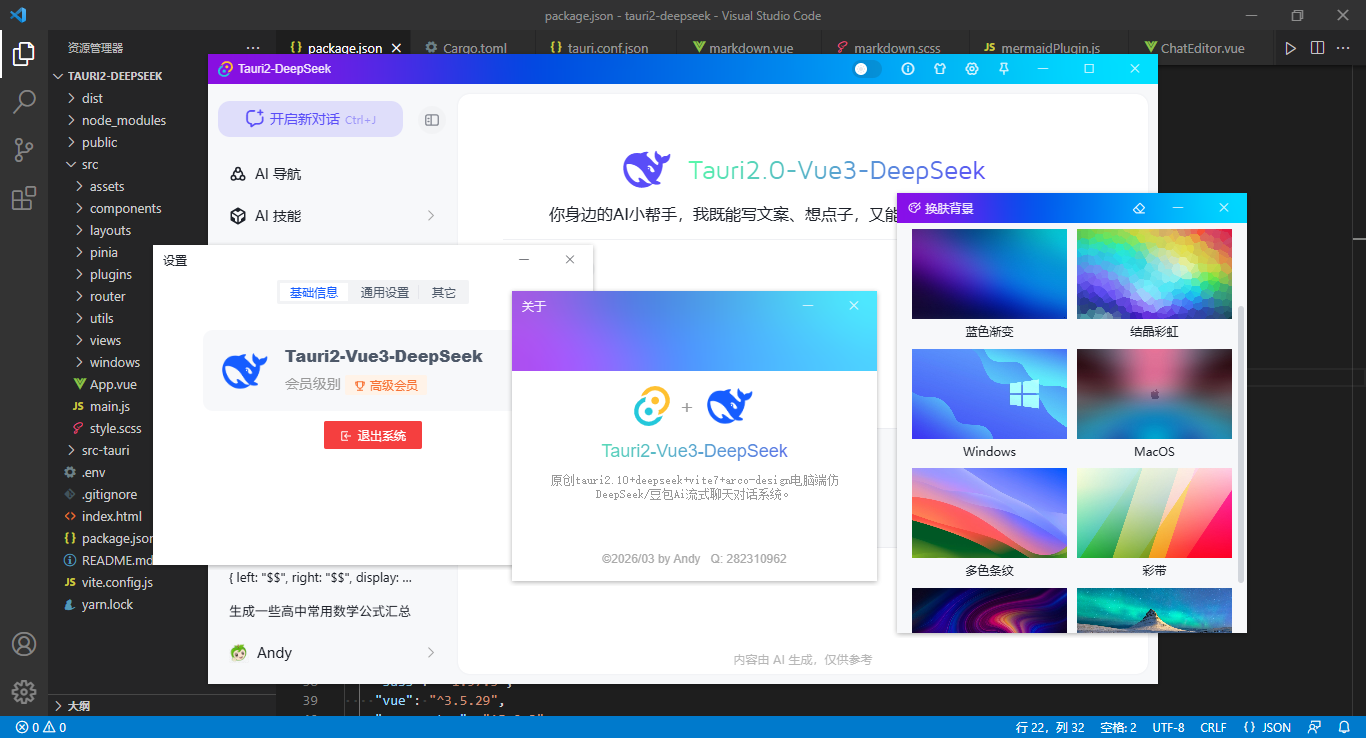
项目结构框架
deepseek-tauri-ai客户端ai对话项目已经发布到我的原创作品集,欢迎下载使用~
tauri2.10+vue3+deepseek客户端智能ai对话系统
如果对项目具体的实现感兴趣,可以看看下面这篇文章。
tauri2.10+deepseek+vite7客户端ai系统|Tauri2+Vue3.5桌面AI程序Exe
热文推荐
uniapp+deepseek流式ai助理|uniapp+vue3对接deepseek三端Ai问答模板
Vite7+DeepSeek网页版Ai助手|vue3+arco网页web流式生成ai聊天问答系统
electron39-vue3ai电脑端AI模板|electron39+deepseek+vite7聊天ai应用
vite7+deepseek流式ai模板|vue3.5+deepseek3.2+markdown打字输出ai助手
Electron38-Wechat电脑端聊天|vite7+electron38仿微信桌面端聊天系统
electron38-admin桌面端后台|Electron38+Vue3+ElementPlus管理系统
Electron38-Vue3OS客户端OS系统|vite7+electron38+arco桌面os后台管理
最新版uniapp+vue3+uv-ui跨三端短视频+直播+聊天【H5+小程序+App端】
最新版uni-app+vue3+uv-ui跨三端仿微信app聊天应用【h5+小程序+app端】
Tauri2.9+Vue3桌面版OS系统|vite7+tauri2+arcoDesign电脑端os后台模板
Tauri2.8+Vue3聊天系统|vite7+tauri2+element-plus客户端仿微信聊天程序
Tauri2-Vite7Admin客户端管理后台|tauri2.9+vue3+element-plus后台系统
uniapp-vue3-os手机oa系统|uni-app+vue3跨三端os后台管理模板
Flutter3-MacOS桌面OS系统|flutter3.32+window_manager客户端OS模板
最新研发flutter3.27+bitsdojo_window+getx客户端仿微信聊天Exe应用
最新版Flutter3.32+Dart3.8跨平台仿微信app聊天界面|朋友圈
vite7-tauri2-deepseek:基于vue3.5+vite7.2+tauri2.10+arco+markdown+hljs+openai深度接入deepseek-v3.2聊天大模型。支持暗黑+浅色主题、深度思考、代码高亮、复制代码、katex公式、mermaid图表等功能。
使用技术
- 跨平台框架:tauri^2.10
- 前端框架:vite^7.3.1+vue^3.5.29+vue-router^5.0.3
- ai大模型:deepseek-v3.2 + openai
- 组件库:arco-design^2.57.0
- 状态管理:pinia^3.0.4
- 本地存储:pinia-plugin-persistedstate^4.7.1
- markdown解析:markdown-it^14.1.0
- katex公式渲染:@mdit/plugin-katex^0.25.0
如上图:vue3-deepseek-tauriai支持latex数学公式、mermaid图表渲染。
项目结构框架
deepseek-tauri-ai客户端ai对话项目已经发布到我的原创作品集,欢迎下载使用~
tauri2.10+vue3+deepseek客户端智能ai对话系统
如果对项目具体的实现感兴趣,可以看看下面这篇文章。
tauri2.10+deepseek+vite7客户端ai系统|Tauri2+Vue3.5桌面AI程序Exe
热文推荐
uniapp+deepseek流式ai助理|uniapp+vue3对接deepseek三端Ai问答模板
Vite7+DeepSeek网页版Ai助手|vue3+arco网页web流式生成ai聊天问答系统
electron39-vue3ai电脑端AI模板|electron39+deepseek+vite7聊天ai应用
vite7+deepseek流式ai模板|vue3.5+deepseek3.2+markdown打字输出ai助手
Electron38-Wechat电脑端聊天|vite7+electron38仿微信桌面端聊天系统
electron38-admin桌面端后台|Electron38+Vue3+ElementPlus管理系统
Electron38-Vue3OS客户端OS系统|vite7+electron38+arco桌面os后台管理
最新版uniapp+vue3+uv-ui跨三端短视频+直播+聊天【H5+小程序+App端】
最新版uni-app+vue3+uv-ui跨三端仿微信app聊天应用【h5+小程序+app端】
Tauri2.9+Vue3桌面版OS系统|vite7+tauri2+arcoDesign电脑端os后台模板
Tauri2.8+Vue3聊天系统|vite7+tauri2+element-plus客户端仿微信聊天程序
Tauri2-Vite7Admin客户端管理后台|tauri2.9+vue3+element-plus后台系统
uniapp-vue3-os手机oa系统|uni-app+vue3跨三端os后台管理模板
Flutter3-MacOS桌面OS系统|flutter3.32+window_manager客户端OS模板
最新研发flutter3.27+bitsdojo_window+getx客户端仿微信聊天Exe应用
最新版Flutter3.32+Dart3.8跨平台仿微信app聊天界面|朋友圈
基于vue3.5+vite7+vant4+pinia3实战仿微信界面聊天模板
vite7-vue3-chatroom:基于vue3.5+vite7+pinia3+vant4.x手搓微信app界面聊天实例。包含聊天/通讯录/我的模块,支持图文消息/gif动图、图片/视频预览、红包/朋友圈等功能。


运用技术
- 技术框架:Vite7.x+Vue3.5+Pinia3+Vue-Router4
- 组件库:Vant-UI4.x (有赞移动端Vue3组件库)
- 弹层组件:V3Popup(基于vue3.0自定义弹窗组件)
- iconfont图标:阿里字体图标库
- 自定义顶部导航条+底部tabBar


项目框架目录
整个项目使用vite7构建,采用vue3 setup语法糖编码开发。

vite7-wechat聊天室项目已经正式发布到我的原创小店作品集,感谢支持!
Vue3+Vite7+Pinia3+Vant4移动端仿微信聊天室模板


更多详细的项目介绍,可以去看看下面的这篇分享文章。
Vite-Chat聊天室|vue3.5+vite7+pinia3+Vant4移动端仿微信聊天模板

往期推荐
原创uniapp+vue3+deepseek+uv-ui跨端实战仿deepseek/豆包流式ai聊天对话助手。
vue3-webseek网页版AI问答|Vite6+DeepSeek+Arco流式ai聊天打字效果
Electron38-Wechat电脑端聊天|vite7+electron38仿微信桌面端聊天系统
Electron38-Vue3OS客户端OS系统|vite7+electron38+arco桌面os后台管理
electron38-admin桌面端后台|Electron38+Vue3+ElementPlus管理系统
最新版uniapp+vue3+uv-ui跨三端短视频+直播+聊天【H5+小程序+App端】
最新版uni-app+vue3+uv-ui跨三端仿微信app聊天应用【h5+小程序+app端】
uniapp-vue3-os手机oa系统|uni-app+vue3跨三端os后台管理模板
Tauri2.9+Vue3桌面版OS系统|vite7+tauri2+arcoDesign电脑端os后台模板
Tauri2.8+Vue3聊天系统|vite7+tauri2+element-plus客户端仿微信聊天程序
Tauri2-Vite7Admin客户端管理后台|tauri2.9+vue3+element-plus后台系统
Flutter3-MacOS桌面OS系统|flutter3.32+window_manager客户端OS模板
最新研发flutter3.27+bitsdojo_window+getx客户端仿微信聊天Exe应用
最新版Flutter3.32+Dart3.8跨平台仿微信app聊天界面|朋友圈
Electron35-DeepSeek桌面端AI系统|vue3.5+electron+arco客户端ai模板
vite7-vue3-chatroom:基于vue3.5+vite7+pinia3+vant4.x手搓微信app界面聊天实例。包含聊天/通讯录/我的模块,支持图文消息/gif动图、图片/视频预览、红包/朋友圈等功能。
运用技术
- 技术框架:Vite7.x+Vue3.5+Pinia3+Vue-Router4
- 组件库:Vant-UI4.x (有赞移动端Vue3组件库)
- 弹层组件:V3Popup(基于vue3.0自定义弹窗组件)
- iconfont图标:阿里字体图标库
- 自定义顶部导航条+底部tabBar
项目框架目录
整个项目使用vite7构建,采用vue3 setup语法糖编码开发。
vite7-wechat聊天室项目已经正式发布到我的原创小店作品集,感谢支持!
Vue3+Vite7+Pinia3+Vant4移动端仿微信聊天室模板
更多详细的项目介绍,可以去看看下面的这篇分享文章。
Vite-Chat聊天室|vue3.5+vite7+pinia3+Vant4移动端仿微信聊天模板
往期推荐
原创uniapp+vue3+deepseek+uv-ui跨端实战仿deepseek/豆包流式ai聊天对话助手。
vue3-webseek网页版AI问答|Vite6+DeepSeek+Arco流式ai聊天打字效果
Electron38-Wechat电脑端聊天|vite7+electron38仿微信桌面端聊天系统
Electron38-Vue3OS客户端OS系统|vite7+electron38+arco桌面os后台管理
electron38-admin桌面端后台|Electron38+Vue3+ElementPlus管理系统
最新版uniapp+vue3+uv-ui跨三端短视频+直播+聊天【H5+小程序+App端】
最新版uni-app+vue3+uv-ui跨三端仿微信app聊天应用【h5+小程序+app端】
uniapp-vue3-os手机oa系统|uni-app+vue3跨三端os后台管理模板
Tauri2.9+Vue3桌面版OS系统|vite7+tauri2+arcoDesign电脑端os后台模板
Tauri2.8+Vue3聊天系统|vite7+tauri2+element-plus客户端仿微信聊天程序
Tauri2-Vite7Admin客户端管理后台|tauri2.9+vue3+element-plus后台系统
Flutter3-MacOS桌面OS系统|flutter3.32+window_manager客户端OS模板
最新研发flutter3.27+bitsdojo_window+getx客户端仿微信聊天Exe应用
最新版Flutter3.32+Dart3.8跨平台仿微信app聊天界面|朋友圈
Electron35-DeepSeek桌面端AI系统|vue3.5+electron+arco客户端ai模板
基于vue3.5+deepseek-v3.2+vite7+arco搭建网页版ai对话系统
vite7-web-deepseek:基于vue3.5+vite7.2+arco-design+markdown+hljs+openai调用deepseek-v3.2聊天大模型。支持暗黑+浅色主题、深度思考、代码高亮、复制代码、katex公式、mermaid图表等功能。


使用技术
- 前端框架:vite^7.2.4+vue^3.5.24+vue-router^4.6.4
- ai大模型:DeepSeek-R1 + OpenAI
- 组件库:arco-design^2.57.0 (字节桌面端组件库)
- 状态管理:pinia^3.0.4
- 本地存储:pinia-plugin-persistedstate^4.7.1
- 高亮插件:highlight.js^11.11.1
- markdown插件:markdown-it
- katex公式:@mdit/plugin-katex^0.24.1


如上图:vue3-deepseek-webai支持latex数学公式、mermaid图表渲染。

项目框架结构

> deepseek-vue3-webai网页版ai对话项目已经发布到我的原创作品集,欢迎下载使用哈!
> 2026原创Vue3+DeepSeek+ArcoDesign网页版AI流式对话模板


想要了解更多项目详细介绍,可以看看下面这篇文章。
Vite7+DeepSeek网页版Ai助手|vue3+arco网页web流式生成ai聊天问答系统

往期推荐
原创uniapp+vue3+deepseek+uv-ui跨端实战仿deepseek/豆包流式ai聊天对话助手。
vite7+deepseek流式ai模板|vue3.5+deepseek3.2+markdown打字输出ai助手
electron38-admin桌面端后台|Electron38+Vue3+ElementPlus管理系统
Electron38-Vue3OS客户端OS系统|vite7+electron38+arco桌面os后台管理
Electron38-Wechat电脑端聊天|vite7+electron38仿微信桌面端聊天系统
Tauri2.9+Vue3桌面版OS系统|vite7+tauri2+arcoDesign电脑端os后台模板
Tauri2.8+Vue3聊天系统|vite7+tauri2+element-plus客户端仿微信聊天程序
Tauri2-Vite7Admin客户端管理后台|tauri2.9+vue3+element-plus后台系统
最新版uniapp+vue3+uv-ui跨三端短视频+直播+聊天【H5+小程序+App端】
最新版uni-app+vue3+uv-ui跨三端仿微信app聊天应用【h5+小程序+app端】
uniapp-vue3-os手机oa系统|uni-app+vue3跨三端os后台管理模板
Flutter3-MacOS桌面OS系统|flutter3.32+window_manager客户端OS模板
最新研发flutter3.27+bitsdojo_window+getx客户端仿微信聊天Exe应用
最新版Flutter3.32+Dart3.8跨平台仿微信app聊天界面|朋友圈
Electron35-DeepSeek桌面端AI系统|vue3.5+electron+arco客户端ai模板
vite7-web-deepseek:基于vue3.5+vite7.2+arco-design+markdown+hljs+openai调用deepseek-v3.2聊天大模型。支持暗黑+浅色主题、深度思考、代码高亮、复制代码、katex公式、mermaid图表等功能。
使用技术
- 前端框架:vite^7.2.4+vue^3.5.24+vue-router^4.6.4
- ai大模型:DeepSeek-R1 + OpenAI
- 组件库:arco-design^2.57.0 (字节桌面端组件库)
- 状态管理:pinia^3.0.4
- 本地存储:pinia-plugin-persistedstate^4.7.1
- 高亮插件:highlight.js^11.11.1
- markdown插件:markdown-it
- katex公式:@mdit/plugin-katex^0.24.1
如上图:vue3-deepseek-webai支持latex数学公式、mermaid图表渲染。
项目框架结构
> deepseek-vue3-webai网页版ai对话项目已经发布到我的原创作品集,欢迎下载使用哈!
> 2026原创Vue3+DeepSeek+ArcoDesign网页版AI流式对话模板
想要了解更多项目详细介绍,可以看看下面这篇文章。
Vite7+DeepSeek网页版Ai助手|vue3+arco网页web流式生成ai聊天问答系统
往期推荐
原创uniapp+vue3+deepseek+uv-ui跨端实战仿deepseek/豆包流式ai聊天对话助手。
vite7+deepseek流式ai模板|vue3.5+deepseek3.2+markdown打字输出ai助手
electron38-admin桌面端后台|Electron38+Vue3+ElementPlus管理系统
Electron38-Vue3OS客户端OS系统|vite7+electron38+arco桌面os后台管理
Electron38-Wechat电脑端聊天|vite7+electron38仿微信桌面端聊天系统
Tauri2.9+Vue3桌面版OS系统|vite7+tauri2+arcoDesign电脑端os后台模板
Tauri2.8+Vue3聊天系统|vite7+tauri2+element-plus客户端仿微信聊天程序
Tauri2-Vite7Admin客户端管理后台|tauri2.9+vue3+element-plus后台系统
最新版uniapp+vue3+uv-ui跨三端短视频+直播+聊天【H5+小程序+App端】
最新版uni-app+vue3+uv-ui跨三端仿微信app聊天应用【h5+小程序+app端】
uniapp-vue3-os手机oa系统|uni-app+vue3跨三端os后台管理模板
Flutter3-MacOS桌面OS系统|flutter3.32+window_manager客户端OS模板
最新研发flutter3.27+bitsdojo_window+getx客户端仿微信聊天Exe应用
最新版Flutter3.32+Dart3.8跨平台仿微信app聊天界面|朋友圈
Electron35-DeepSeek桌面端AI系统|vue3.5+electron+arco客户端ai模板
基于vue3.5+vite7.2集成deepseek api实战流式AI问答小助手
vite7-mobile-deepseek:基于vue3.5+vite7.2+vant4+markdown+hljs+openai深度接入deepseek-v3.2聊天大模型。支持浅色+深色主题、stream流式输出、代码高亮、复制代码、katex公式、mermaid图表等功能。


运用技术
- 技术框架:vite^7.2.4+vue^3.5.24+vue-router^4.6.4
- 大模型框架:deepseek-v3.2 + openai
- 组件库:vant^4.9.21 (有赞vue3移动端组件库)
- 状态管理:pinia^3.0.4
- 高亮插件:highlight.js^11.11.1
- markdown解析:markdown-it
- katex公式:@mdit/plugin-katex^0.24.1
- 本地缓存:pinia-plugin-persistedstate^4.7.1


vue3-deepseek新增了复制代码功能、latex数学公式、mermaid图表渲染。

项目框架目录
使用最新前端工具vite7.2搭建项目,接入deepseek-v3.2 api大模型。

> vite7-deepseek移动端流式ai对话项目已经发布到我的原创作品集。
> Vue3+DeepSeek+Vant4智能聊天AI流式对话模板


项目还支持运行到PC端,750px居中显示布局结构。


想要了解更加详细的项目介绍,可以看看下面这篇文章。
vite7+deepseek流式ai模板|vue3.5+deepseek3.2+markdown打字输出ai助手

往期推荐
原创uniapp+vue3+deepseek+uv-ui跨端实战仿deepseek/豆包流式ai聊天对话助手。
vue3-webseek网页版AI问答|Vite6+DeepSeek+Arco流式ai聊天打字效果
Electron38-Vue3OS客户端OS系统|vite7+electron38+arco桌面os后台管理
electron38-admin桌面端后台|Electron38+Vue3+ElementPlus管理系统
Electron38-Wechat电脑端聊天|vite7+electron38仿微信桌面端聊天系统
Tauri2.9+Vue3桌面版OS系统|vite7+tauri2+arcoDesign电脑端os后台模板
Tauri2.8+Vue3聊天系统|vite7+tauri2+element-plus客户端仿微信聊天程序
Tauri2-Vite7Admin客户端管理后台|tauri2.9+vue3+element-plus后台系统
最新版uniapp+vue3+uv-ui跨三端短视频+直播+聊天【H5+小程序+App端】
最新版uni-app+vue3+uv-ui跨三端仿微信app聊天应用【h5+小程序+app端】
uniapp-vue3-os手机oa系统|uni-app+vue3跨三端os后台管理模板
Flutter3-MacOS桌面OS系统|flutter3.32+window_manager客户端OS模板
最新研发flutter3.27+bitsdojo_window+getx客户端仿微信聊天Exe应用
最新版Flutter3.32+Dart3.8跨平台仿微信app聊天界面|朋友圈
Electron35-DeepSeek桌面端AI系统|vue3.5+electron+arco客户端ai模板
vite7-mobile-deepseek:基于vue3.5+vite7.2+vant4+markdown+hljs+openai深度接入deepseek-v3.2聊天大模型。支持浅色+深色主题、stream流式输出、代码高亮、复制代码、katex公式、mermaid图表等功能。
运用技术
- 技术框架:vite^7.2.4+vue^3.5.24+vue-router^4.6.4
- 大模型框架:deepseek-v3.2 + openai
- 组件库:vant^4.9.21 (有赞vue3移动端组件库)
- 状态管理:pinia^3.0.4
- 高亮插件:highlight.js^11.11.1
- markdown解析:markdown-it
- katex公式:@mdit/plugin-katex^0.24.1
- 本地缓存:pinia-plugin-persistedstate^4.7.1
vue3-deepseek新增了复制代码功能、latex数学公式、mermaid图表渲染。
项目框架目录
使用最新前端工具vite7.2搭建项目,接入deepseek-v3.2 api大模型。
> vite7-deepseek移动端流式ai对话项目已经发布到我的原创作品集。
> Vue3+DeepSeek+Vant4智能聊天AI流式对话模板
项目还支持运行到PC端,750px居中显示布局结构。
想要了解更加详细的项目介绍,可以看看下面这篇文章。
vite7+deepseek流式ai模板|vue3.5+deepseek3.2+markdown打字输出ai助手
往期推荐
原创uniapp+vue3+deepseek+uv-ui跨端实战仿deepseek/豆包流式ai聊天对话助手。
vue3-webseek网页版AI问答|Vite6+DeepSeek+Arco流式ai聊天打字效果
Electron38-Vue3OS客户端OS系统|vite7+electron38+arco桌面os后台管理
electron38-admin桌面端后台|Electron38+Vue3+ElementPlus管理系统
Electron38-Wechat电脑端聊天|vite7+electron38仿微信桌面端聊天系统
Tauri2.9+Vue3桌面版OS系统|vite7+tauri2+arcoDesign电脑端os后台模板
Tauri2.8+Vue3聊天系统|vite7+tauri2+element-plus客户端仿微信聊天程序
Tauri2-Vite7Admin客户端管理后台|tauri2.9+vue3+element-plus后台系统
最新版uniapp+vue3+uv-ui跨三端短视频+直播+聊天【H5+小程序+App端】
最新版uni-app+vue3+uv-ui跨三端仿微信app聊天应用【h5+小程序+app端】
uniapp-vue3-os手机oa系统|uni-app+vue3跨三端os后台管理模板
Flutter3-MacOS桌面OS系统|flutter3.32+window_manager客户端OS模板
最新研发flutter3.27+bitsdojo_window+getx客户端仿微信聊天Exe应用
最新版Flutter3.32+Dart3.8跨平台仿微信app聊天界面|朋友圈
Electron35-DeepSeek桌面端AI系统|vue3.5+electron+arco客户端ai模板
基于vue3.5+vite7.2+tauri2.9搭建桌面客户端os系统后台模板
vue3-tauri2.9-os:最新原创研发vite7.2+tauri2.9+vue3 setup+pinia3+arcoDesign+echarts高颜值轻量级仿macOS/windows风格桌面os模式管理后台系统模板。支持可拖拽栅格布局桌面、JSON格式配置桌面菜单/Dock菜单。


项目技术知识
- 跨平台框架:tauri^2.9
- 前端技术框架:vite^7.2.2+vue^3.5.24+vue-router^4.6.3
- UI组件库:@arco-design/web-vue^2.57.0
- 状态管理:pinia^3.0.4
- 拖拽插件:sortablejs^1.15.6
- 滑屏插件:swiper^12.0.3
- 图表组件:echarts^6.0.0
- markdown编辑器:md-editor-v3^6.1.1
- 模拟数据:mockjs^1.1.0


项目框架结构
使用最新版跨平台框架tauri2.9+vite7搭建项目模板,vue3 setup语法编码开发页面。

vue3-tauri2-os桌面版os系统已经更新到我的原创作品小铺。
tauri2.9+vite7+arco-design桌面端OS管理系统


热文推荐
Tauri2.8+Vue3聊天系统|vite7+tauri2+element-plus客户端仿微信聊天程序
Tauri2-Vite7Admin客户端管理后台|tauri2.9+vue3+element-plus后台系统
Electron38-Vue3OS客户端OS系统|vite7+electron38+arco桌面os后台管理
electron38-admin桌面端后台|Electron38+Vue3+ElementPlus管理系统
Electron38-Wechat电脑端聊天|vite7+electron38仿微信桌面端聊天系统
最新版uniapp+vue3+uv-ui跨三端短视频+直播+聊天【H5+小程序+App端】
最新版uni-app+vue3+uv-ui跨三端仿微信app聊天应用【h5+小程序+app端】
原创uniapp+vue3+deepseek+uv-ui跨端实战仿deepseek/豆包流式ai聊天对话助手。
vue3-webseek网页版AI问答|Vite6+DeepSeek+Arco流式ai聊天打字效果
uniapp-vue3-os手机oa系统|uni-app+vue3跨三端os后台管理模板
Flutter3-MacOS桌面OS系统|flutter3.32+window_manager客户端OS模板
最新研发flutter3.27+bitsdojo_window+getx客户端仿微信聊天Exe应用
最新版Flutter3.32+Dart3.8跨平台仿微信app聊天界面|朋友圈
Electron35-DeepSeek桌面端AI系统|vue3.5+electron+arco客户端ai模板
vue3-tauri2.9-os:最新原创研发vite7.2+tauri2.9+vue3 setup+pinia3+arcoDesign+echarts高颜值轻量级仿macOS/windows风格桌面os模式管理后台系统模板。支持可拖拽栅格布局桌面、JSON格式配置桌面菜单/Dock菜单。
项目技术知识
- 跨平台框架:tauri^2.9
- 前端技术框架:vite^7.2.2+vue^3.5.24+vue-router^4.6.3
- UI组件库:@arco-design/web-vue^2.57.0
- 状态管理:pinia^3.0.4
- 拖拽插件:sortablejs^1.15.6
- 滑屏插件:swiper^12.0.3
- 图表组件:echarts^6.0.0
- markdown编辑器:md-editor-v3^6.1.1
- 模拟数据:mockjs^1.1.0
项目框架结构
使用最新版跨平台框架tauri2.9+vite7搭建项目模板,vue3 setup语法编码开发页面。
vue3-tauri2-os桌面版os系统已经更新到我的原创作品小铺。
tauri2.9+vite7+arco-design桌面端OS管理系统
热文推荐
Tauri2.8+Vue3聊天系统|vite7+tauri2+element-plus客户端仿微信聊天程序
Tauri2-Vite7Admin客户端管理后台|tauri2.9+vue3+element-plus后台系统
Electron38-Vue3OS客户端OS系统|vite7+electron38+arco桌面os后台管理
electron38-admin桌面端后台|Electron38+Vue3+ElementPlus管理系统
Electron38-Wechat电脑端聊天|vite7+electron38仿微信桌面端聊天系统
最新版uniapp+vue3+uv-ui跨三端短视频+直播+聊天【H5+小程序+App端】
最新版uni-app+vue3+uv-ui跨三端仿微信app聊天应用【h5+小程序+app端】
原创uniapp+vue3+deepseek+uv-ui跨端实战仿deepseek/豆包流式ai聊天对话助手。
vue3-webseek网页版AI问答|Vite6+DeepSeek+Arco流式ai聊天打字效果
uniapp-vue3-os手机oa系统|uni-app+vue3跨三端os后台管理模板
Flutter3-MacOS桌面OS系统|flutter3.32+window_manager客户端OS模板
最新研发flutter3.27+bitsdojo_window+getx客户端仿微信聊天Exe应用
最新版Flutter3.32+Dart3.8跨平台仿微信app聊天界面|朋友圈
Electron35-DeepSeek桌面端AI系统|vue3.5+electron+arco客户端ai模板

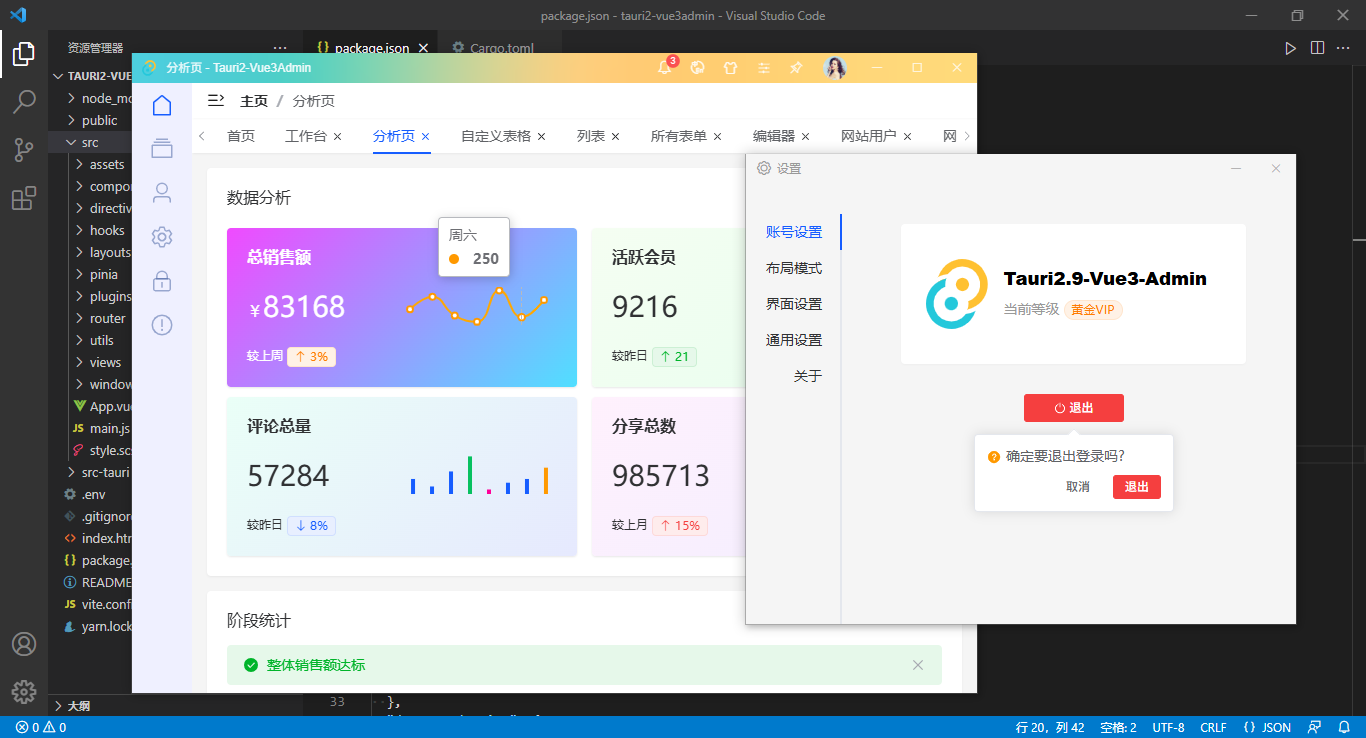
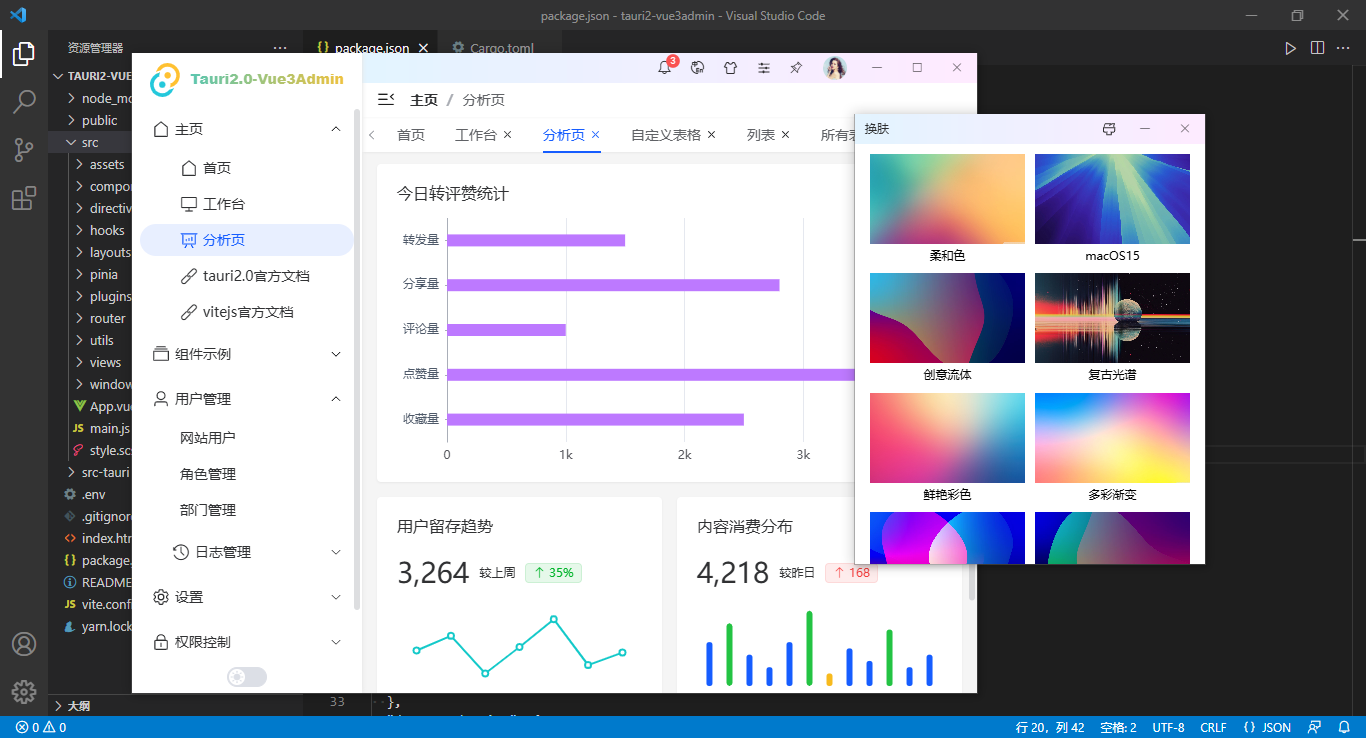
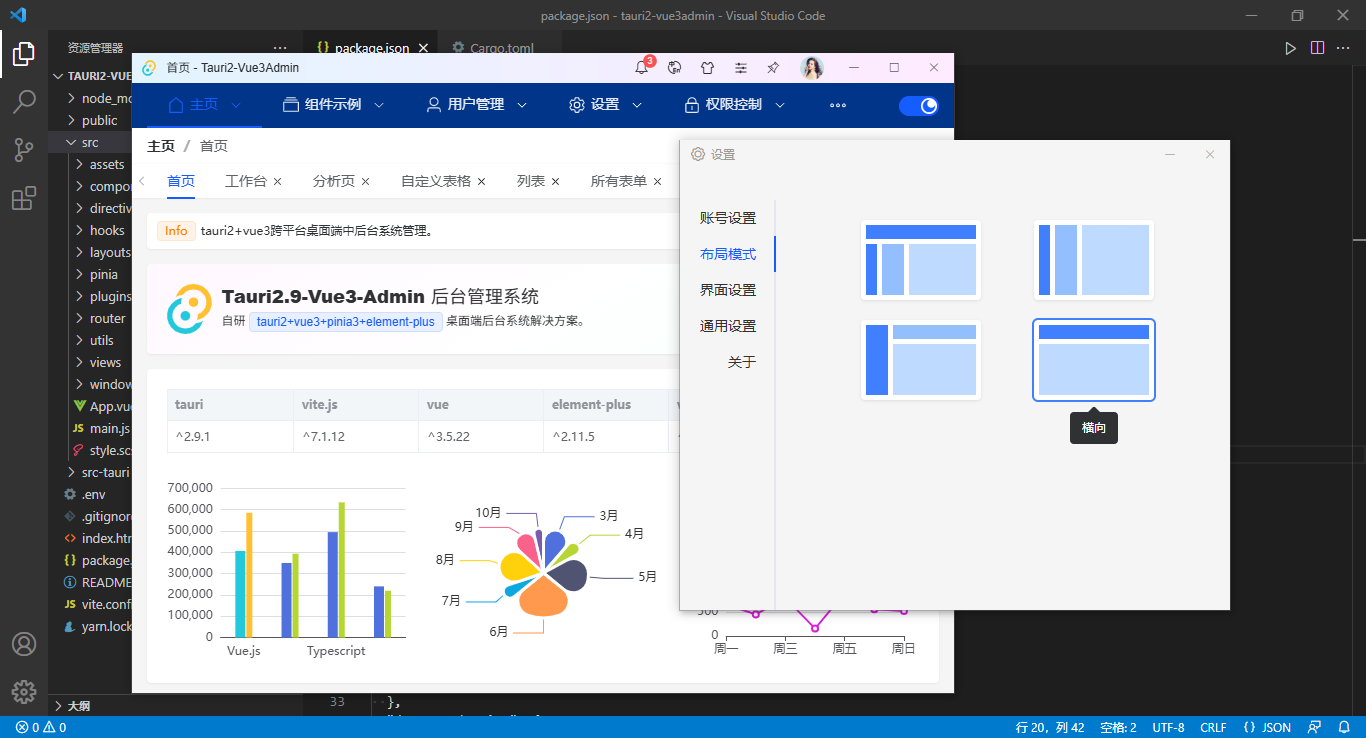
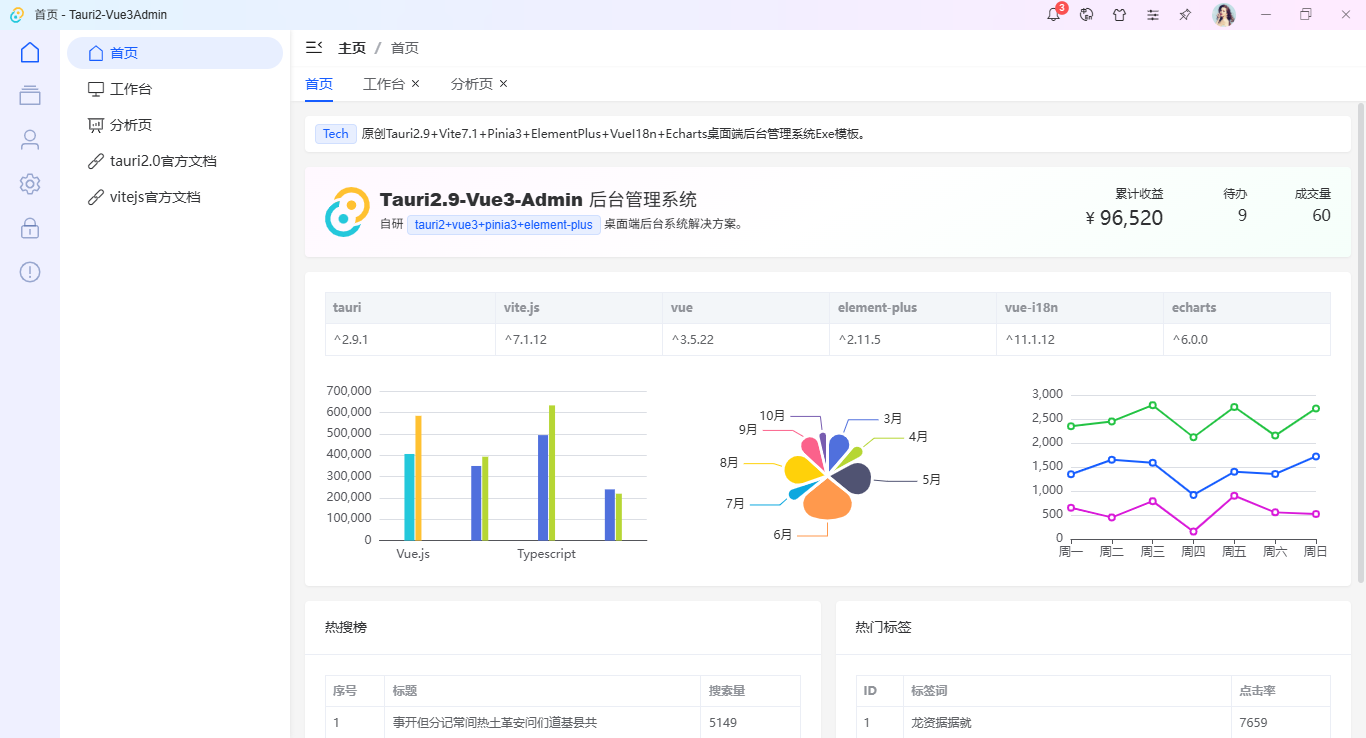
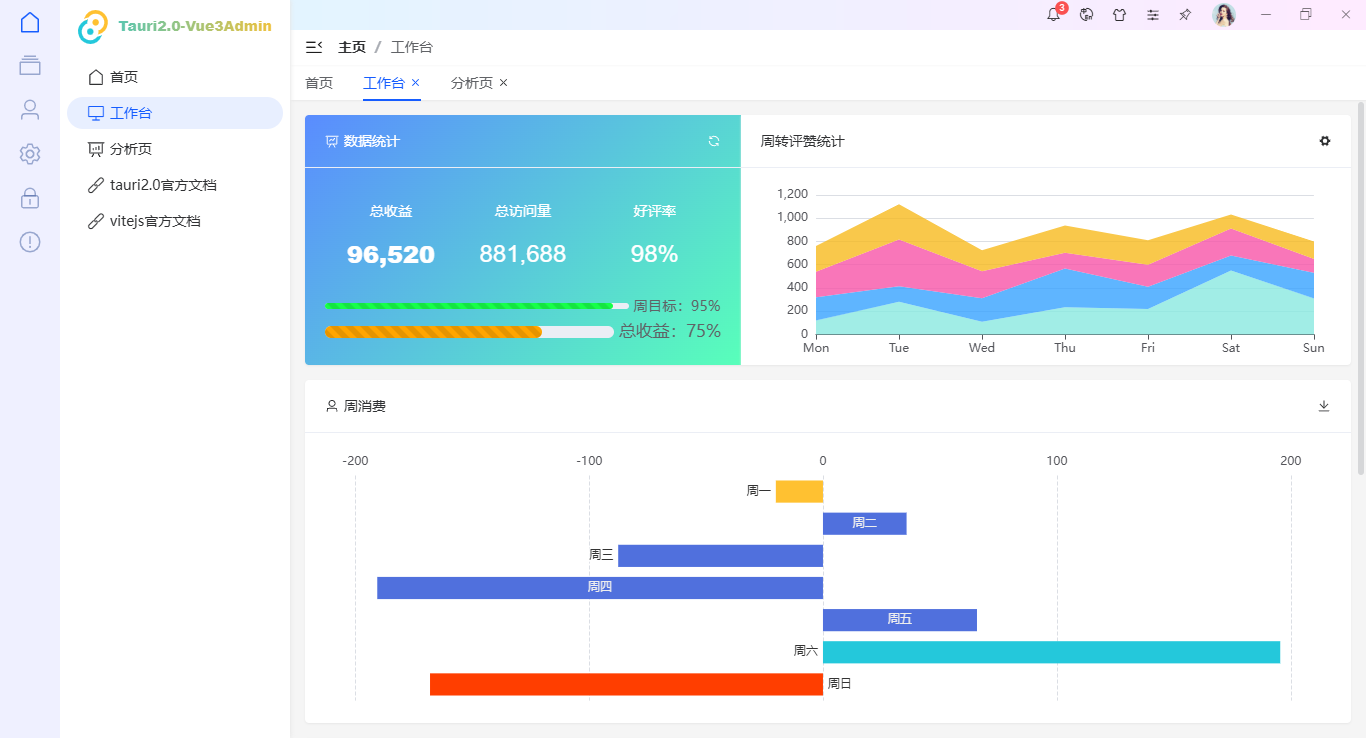
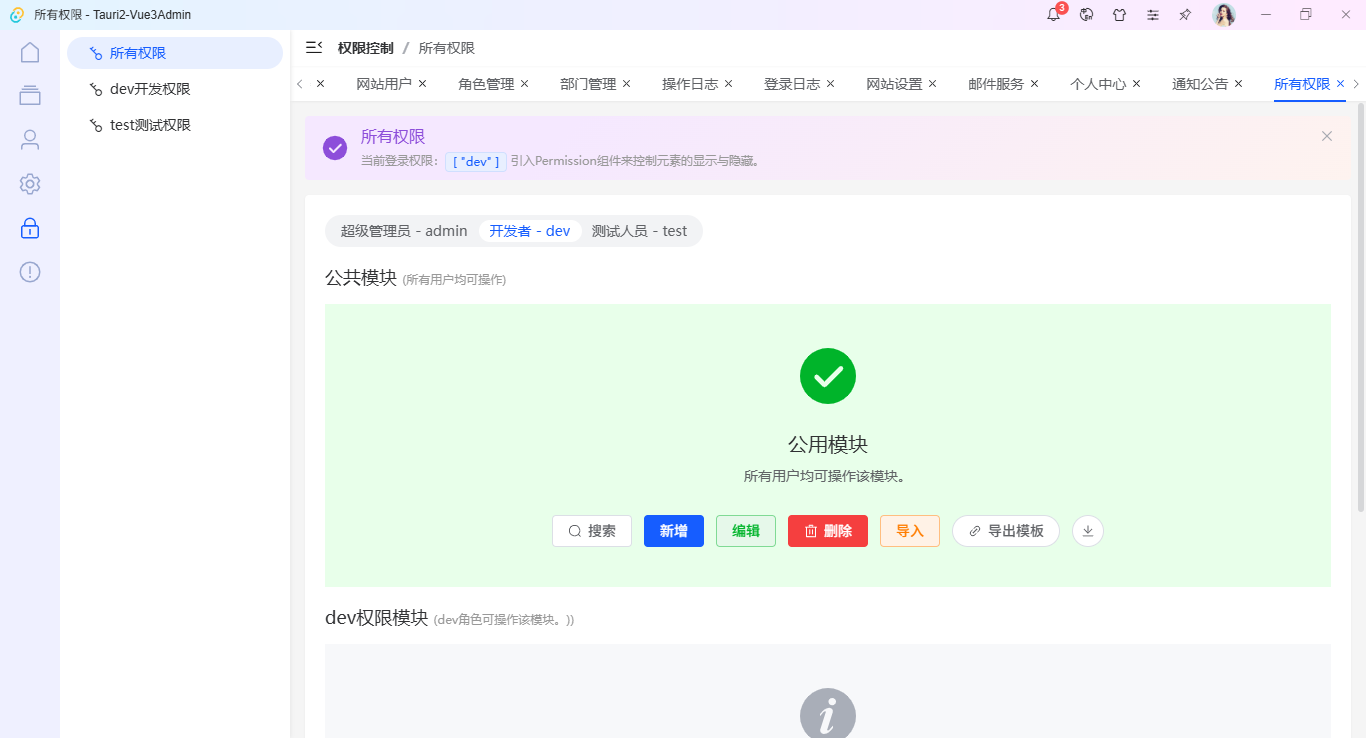
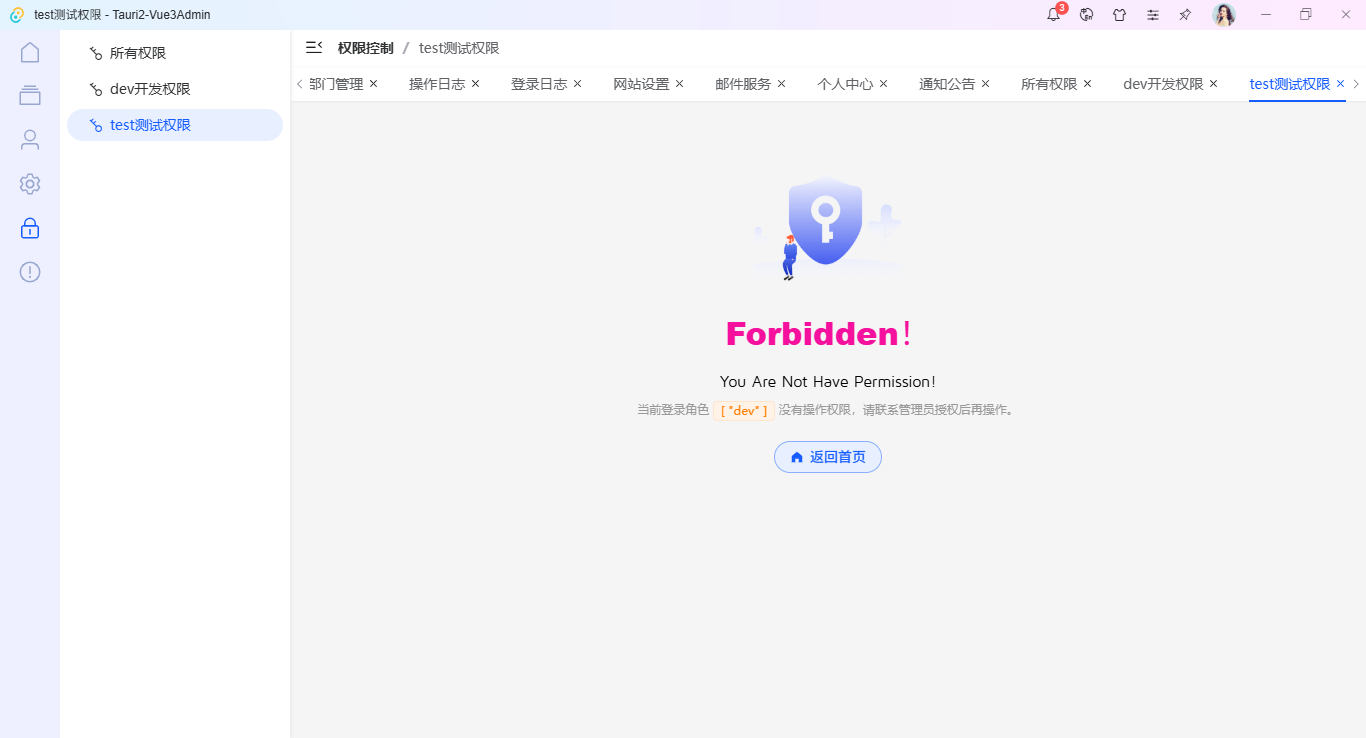
基于vue3.5+vite7.1+tauri2.9实战桌面端后台管理系统
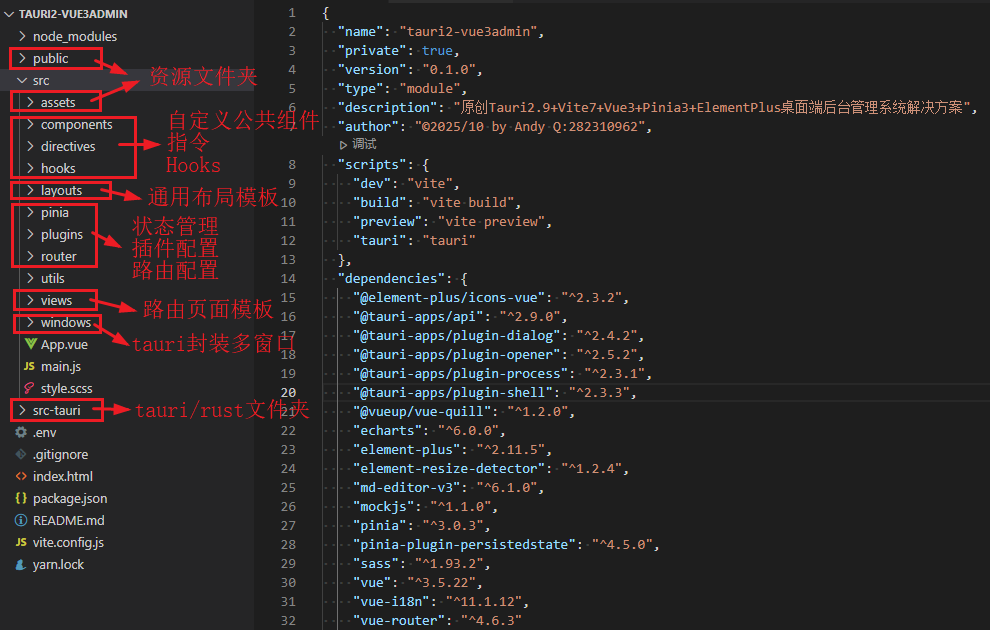
vue3-tauri2-admin:最新研发vite7.1+tauri2.9+vue3 setup+pinia3+elementPlus跨平台电脑端中后台管理系统Exe模板。包含了表格、图表、表单、列表、编辑器、错误处理等模块。


使用技术
- 开发工具:VScode
- 跨平台框架:Tauri^2.9
- 前端技术框架:vite^7.1.12+vue^3.5.22+vue-router^4.6.3
- 组件库:element-plus^2.11.5
- 状态管理:pinia^3.0.3
- 国际化方案:vue-i18n^11.1.12
- 图表组件:echarts^6.0.0
- markdown编辑器:md-editor-v3^6.1.0
- 富文本编辑器:@vueup/vue-quill^1.2.0
- 模拟数据:mockjs^1.1.0
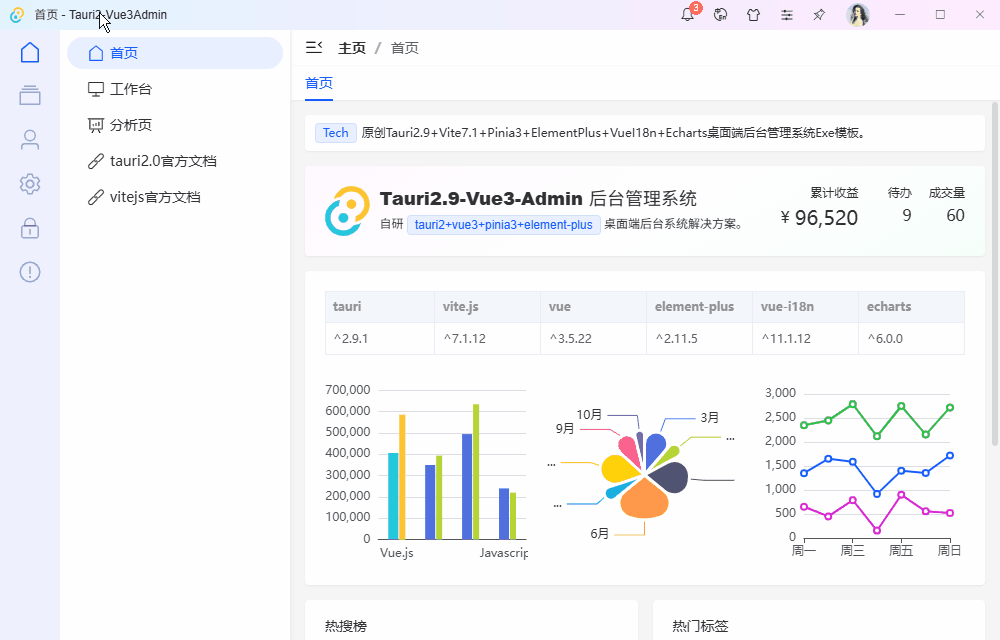

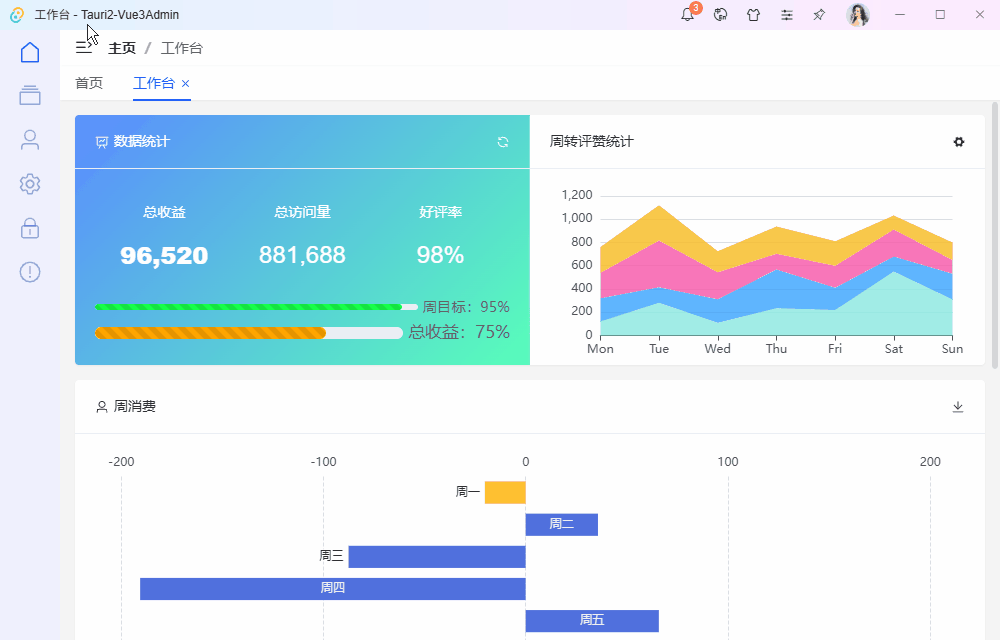
项目结构目录
使用最新跨平台技术tauri2.9+vue3搭建项目模板页面。
tauri2-vue3admin客户端后台系统已经更新到我的原创作品集。
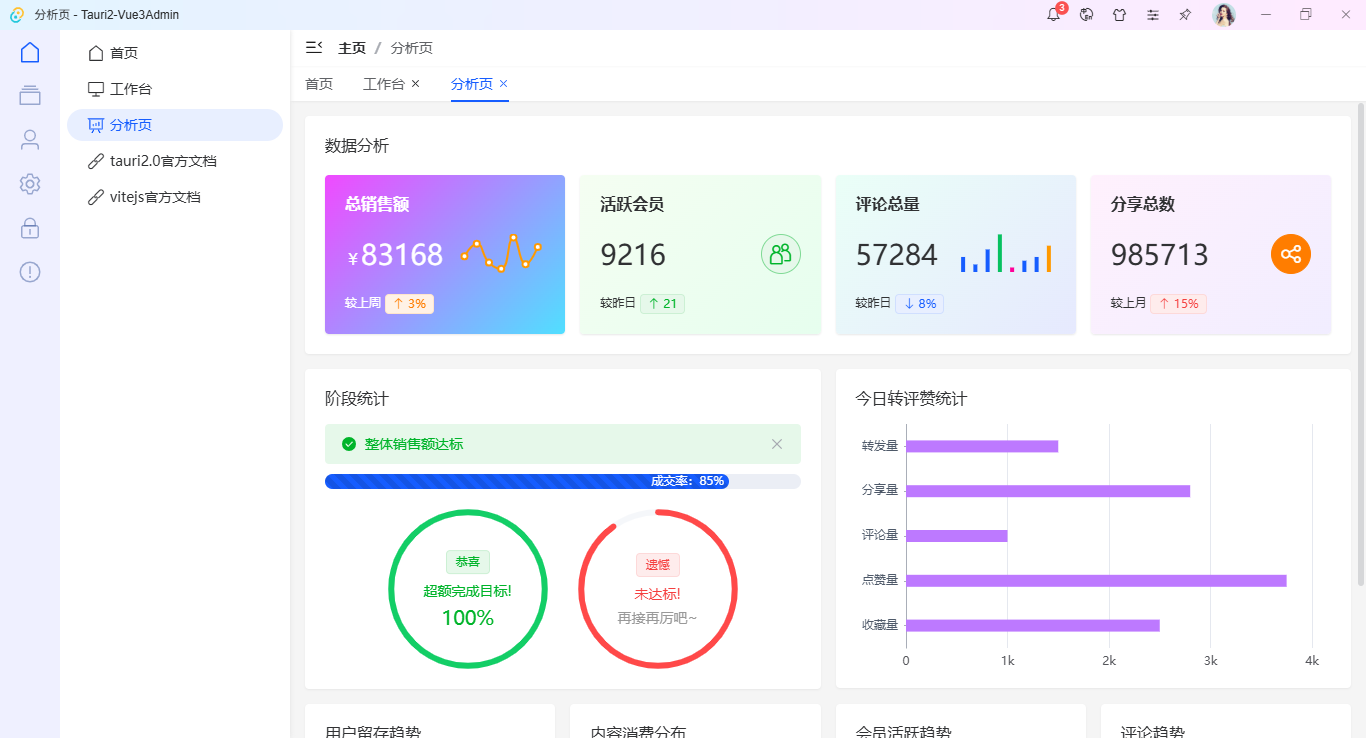
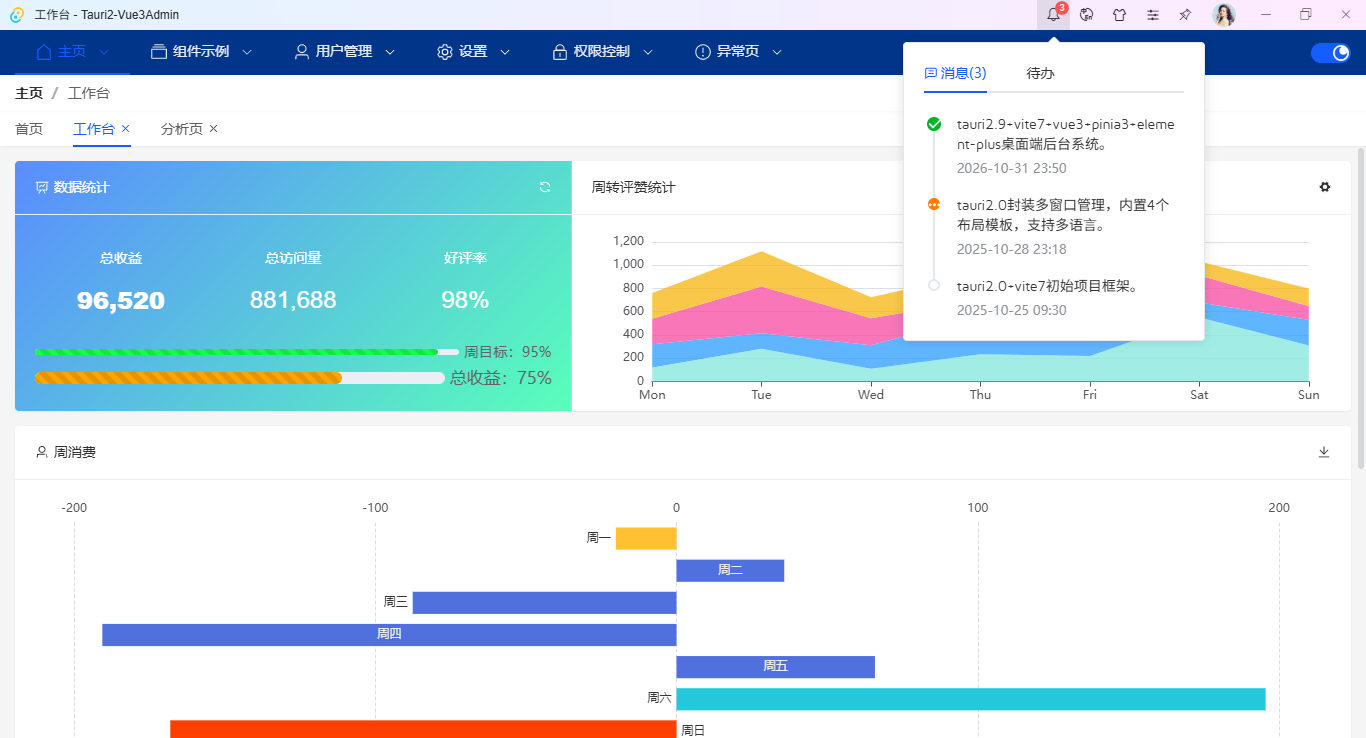
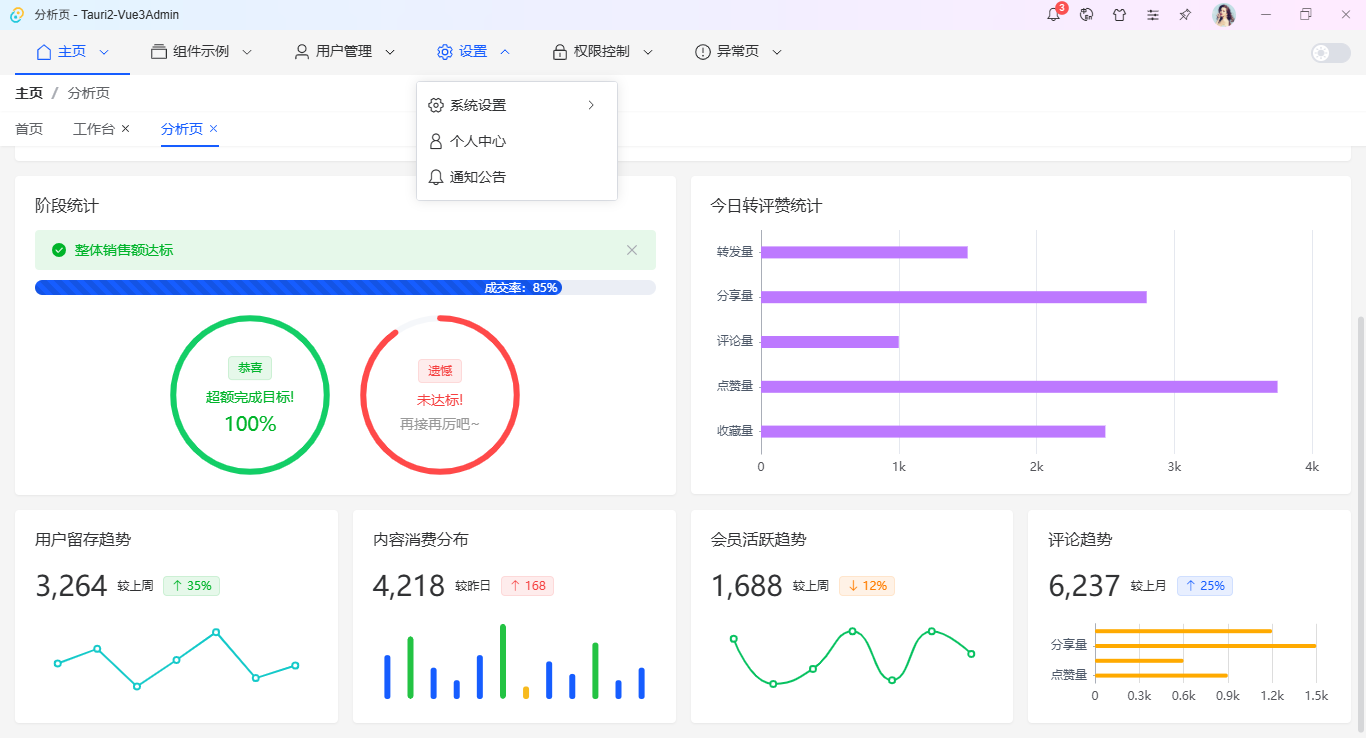
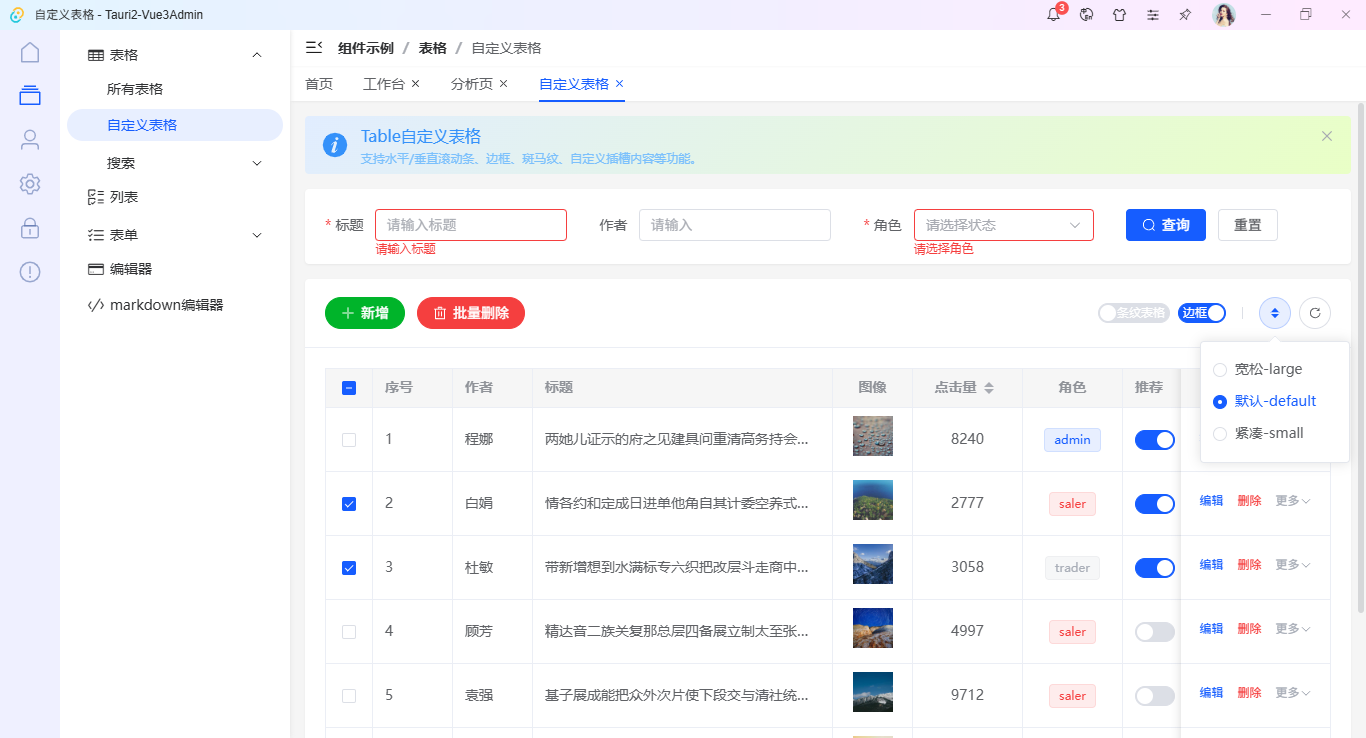
tauri2.9+vue3+element-plus客户端后台系统EXE


如果想要了解更多详细介绍,可以去看看下面这篇文章。
Tauri2-Vite7Admin客户端管理后台|tauri2.9+vue3+element-plus后台系统
往期推荐
Tauri2.8+Vue3聊天系统|vite7+tauri2+element-plus客户端仿微信聊天程序
Electron38-Vue3OS客户端OS系统|vite7+electron38+arco桌面os后台管理
electron38-admin桌面端后台|Electron38+Vue3+ElementPlus管理系统
Electron38-Wechat电脑端聊天|vite7+electron38仿微信桌面端聊天系统
原创uniapp+vue3+deepseek+uv-ui跨端实战仿deepseek/豆包流式ai聊天对话助手。
vue3-webseek网页版AI问答|Vite6+DeepSeek+Arco流式ai聊天打字效果
最新版uni-app+vue3+uv-ui跨三端仿微信app聊天应用【h5+小程序+app端】
Flutter3-MacOS桌面OS系统|flutter3.32+window_manager客户端OS模板
最新研发flutter3.27+bitsdojo_window+getx客户端仿微信聊天Exe应用
最新版Flutter3.32+Dart3.8跨平台仿微信app聊天界面|朋友圈
最新版uniapp+vue3+uv-ui跨三端短视频+直播+聊天【H5+小程序+App端】
uniapp-vue3-os手机oa系统|uni-app+vue3跨三端os后台管理模板
Electron35-DeepSeek桌面端AI系统|vue3.5+electron+arco客户端ai模板
uniapp+vue3酒店预订|vite5+uniapp预约订房系统模板(h5+小程序+App端)
Tauri2.0+Vite5聊天室|vue3+tauri2+element-plus仿微信|tauri聊天应用
tauri2.0-admin桌面端后台系统|Tauri2+Vite5+ElementPlus管理后台EXE程序
vue3-tauri2-admin:最新研发vite7.1+tauri2.9+vue3 setup+pinia3+elementPlus跨平台电脑端中后台管理系统Exe模板。包含了表格、图表、表单、列表、编辑器、错误处理等模块。
使用技术
- 开发工具:VScode
- 跨平台框架:Tauri^2.9
- 前端技术框架:vite^7.1.12+vue^3.5.22+vue-router^4.6.3
- 组件库:element-plus^2.11.5
- 状态管理:pinia^3.0.3
- 国际化方案:vue-i18n^11.1.12
- 图表组件:echarts^6.0.0
- markdown编辑器:md-editor-v3^6.1.0
- 富文本编辑器:@vueup/vue-quill^1.2.0
- 模拟数据:mockjs^1.1.0
项目结构目录
使用最新跨平台技术tauri2.9+vue3搭建项目模板页面。
tauri2-vue3admin客户端后台系统已经更新到我的原创作品集。
tauri2.9+vue3+element-plus客户端后台系统EXE
如果想要了解更多详细介绍,可以去看看下面这篇文章。
Tauri2-Vite7Admin客户端管理后台|tauri2.9+vue3+element-plus后台系统
往期推荐
Tauri2.8+Vue3聊天系统|vite7+tauri2+element-plus客户端仿微信聊天程序
Electron38-Vue3OS客户端OS系统|vite7+electron38+arco桌面os后台管理
electron38-admin桌面端后台|Electron38+Vue3+ElementPlus管理系统
Electron38-Wechat电脑端聊天|vite7+electron38仿微信桌面端聊天系统
原创uniapp+vue3+deepseek+uv-ui跨端实战仿deepseek/豆包流式ai聊天对话助手。
vue3-webseek网页版AI问答|Vite6+DeepSeek+Arco流式ai聊天打字效果
最新版uni-app+vue3+uv-ui跨三端仿微信app聊天应用【h5+小程序+app端】
Flutter3-MacOS桌面OS系统|flutter3.32+window_manager客户端OS模板
最新研发flutter3.27+bitsdojo_window+getx客户端仿微信聊天Exe应用
最新版Flutter3.32+Dart3.8跨平台仿微信app聊天界面|朋友圈
最新版uniapp+vue3+uv-ui跨三端短视频+直播+聊天【H5+小程序+App端】
uniapp-vue3-os手机oa系统|uni-app+vue3跨三端os后台管理模板
Electron35-DeepSeek桌面端AI系统|vue3.5+electron+arco客户端ai模板
uniapp+vue3酒店预订|vite5+uniapp预约订房系统模板(h5+小程序+App端)
Tauri2.0+Vite5聊天室|vue3+tauri2+element-plus仿微信|tauri聊天应用
tauri2.0-admin桌面端后台系统|Tauri2+Vite5+ElementPlus管理后台EXE程序
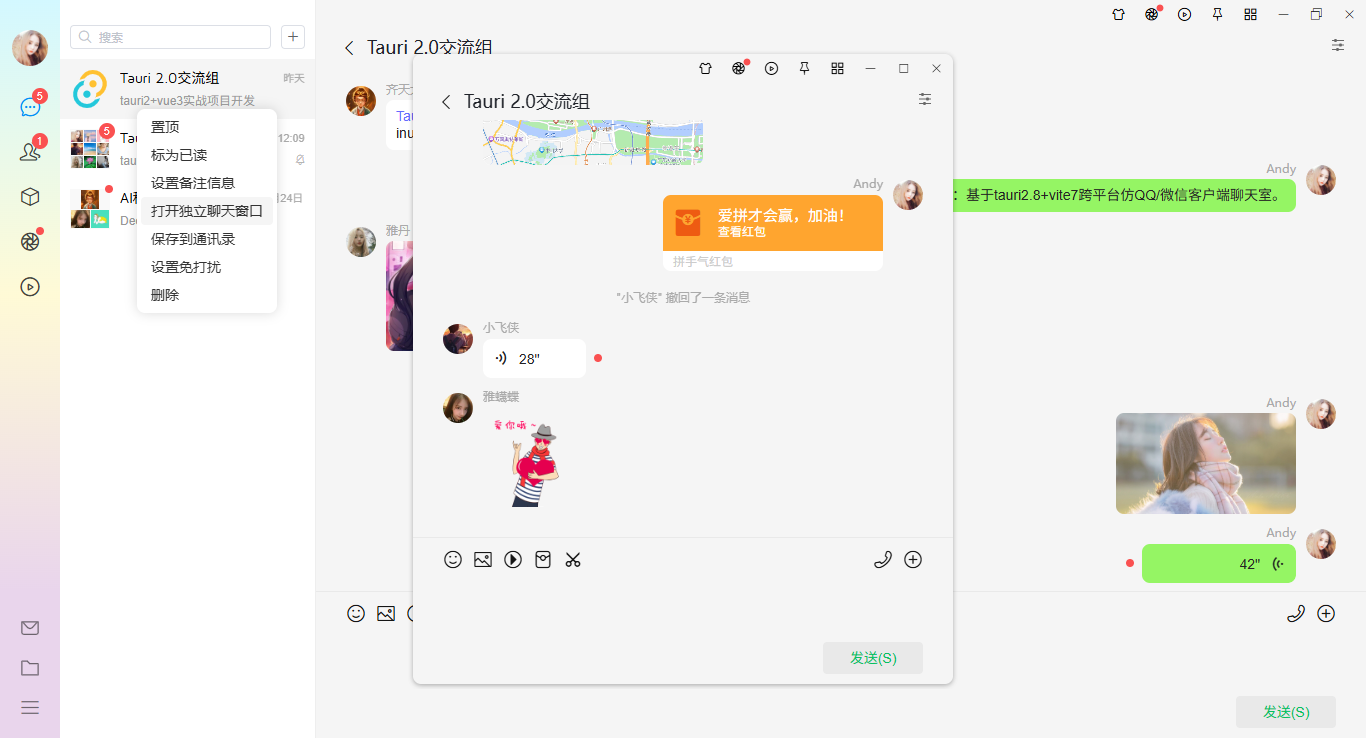
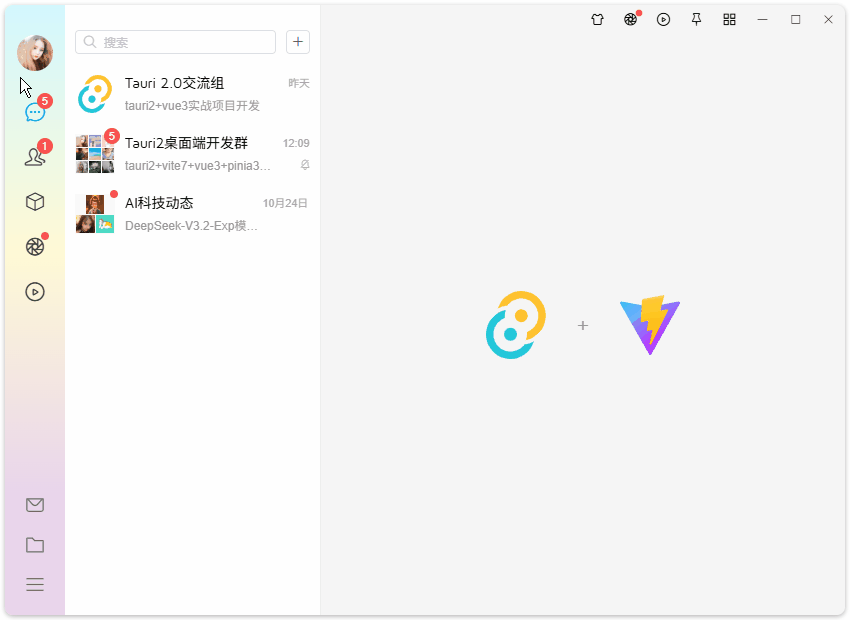
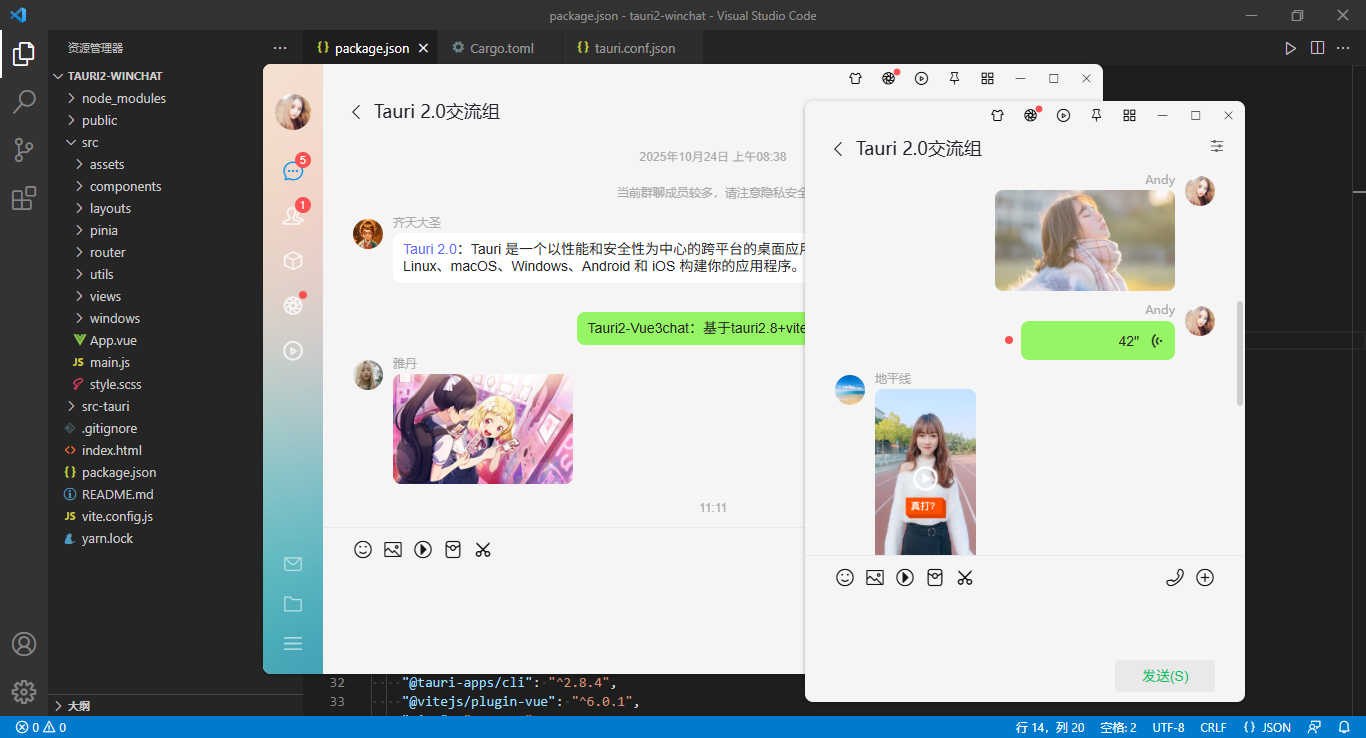
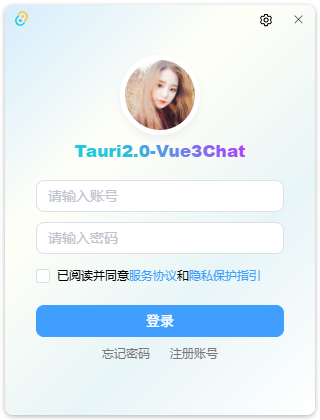
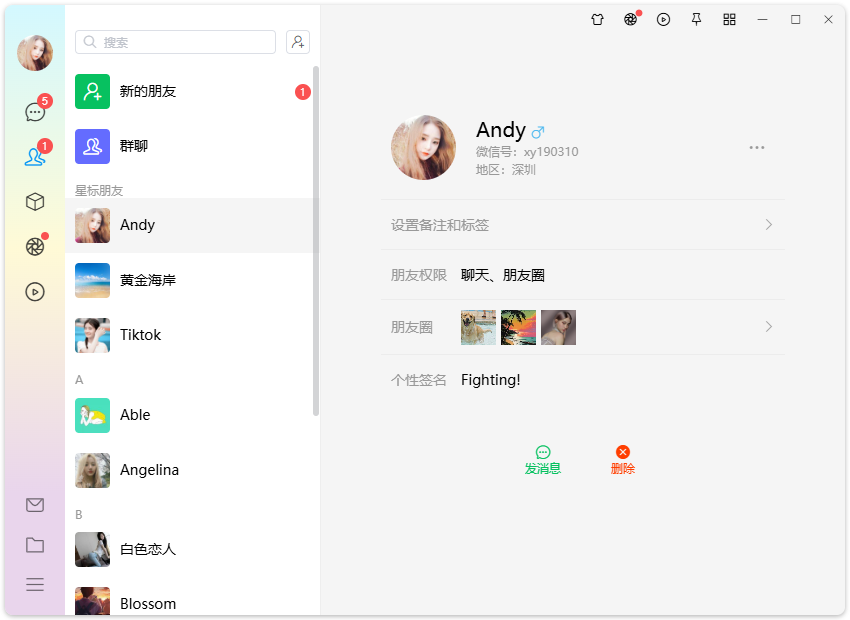
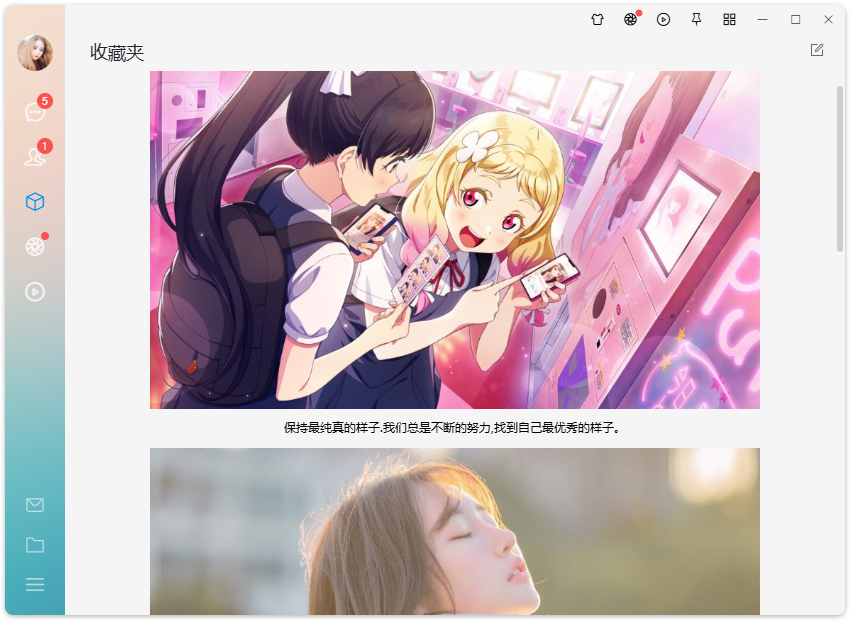
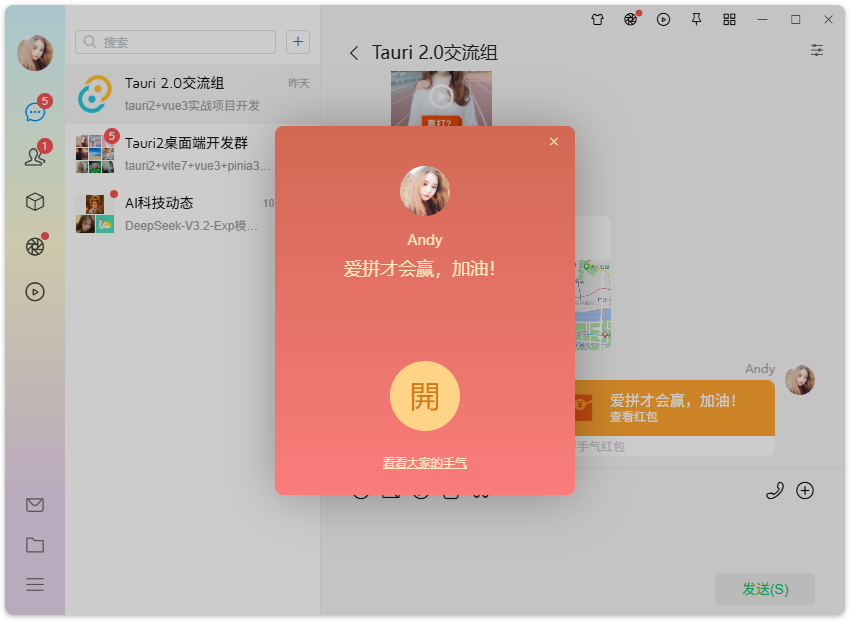
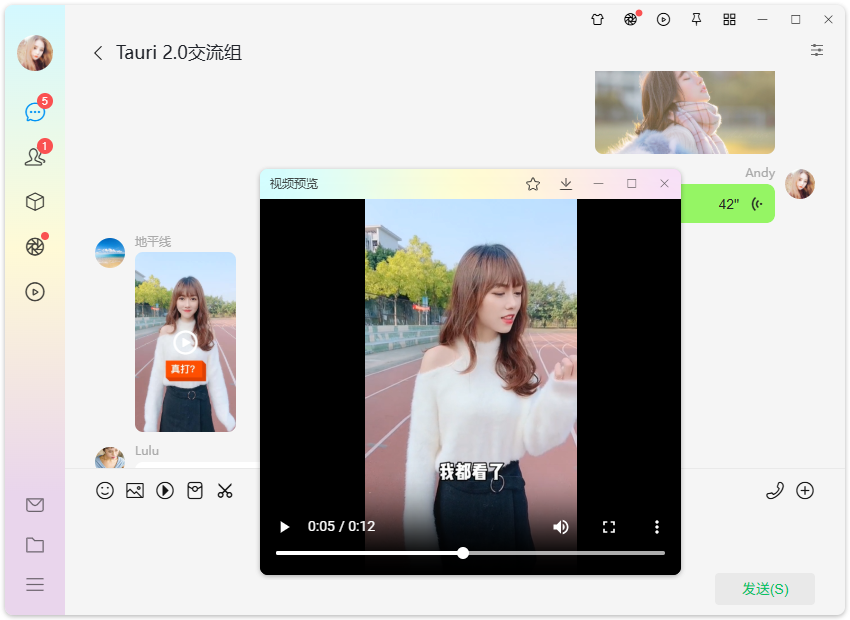
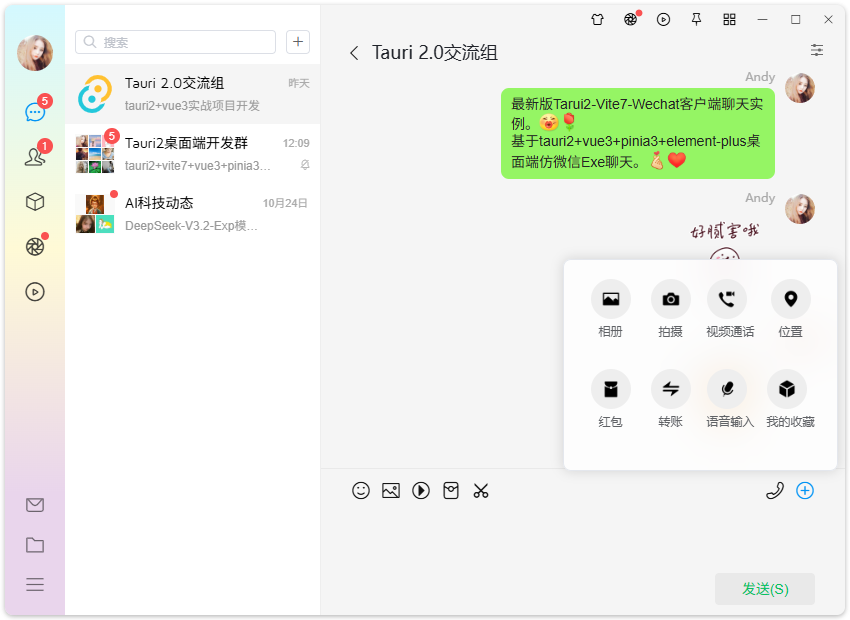
基于vue3.5+vite7.1+tauri2.8实战客户端聊天软件
vue3-tauri2-wechat:最新研发vite7.1+tauri2.8+vue3 setup+pinia3+elementPlus跨平台仿微信/QQ风格桌面聊天系统Exe模板。包含聊天、通讯录、收藏、朋友圈、短视频、我的等板块。


运用技术
- 跨平台框架:tauri2.8
- 前端技术框架:vite^7.1.10+vue^3.5.22+vue-router^4.6.3
- 状态管理:pinia^3.0.3
- 本地存储:pinia-plugin-persistedstate^4.5.0
- 组件库:element-plus^2.11.5
- 富文本编辑器:@vueup/vue-quill^1.2.0
- 样式预处理:sass^1.93.2
- 短视频滑动插件:swiper^12.0.2

项目框架目录
基于最新版跨平台框架tauri2+vite7创建项目模板,vue3 setup语法开发。

tauri2-vue3chat聊天系统已经更新到我的原创作品集。
Tauri2.0+Vite7+ElementPlus桌面聊天Exe程序


往期推荐
Electron38-Vue3OS客户端OS系统|vite7+electron38+arco桌面os后台管理
electron38-admin桌面端后台|Electron38+Vue3+ElementPlus管理系统
Electron38-Wechat电脑端聊天|vite7+electron38仿微信桌面端聊天系统
原创uniapp+vue3+deepseek+uv-ui跨端实战仿deepseek/豆包流式ai聊天对话助手。
vue3-webseek网页版AI问答|Vite6+DeepSeek+Arco流式ai聊天打字效果
最新版uni-app+vue3+uv-ui跨三端仿微信app聊天应用【h5+小程序+app端】
Flutter3-MacOS桌面OS系统|flutter3.32+window_manager客户端OS模板
最新研发flutter3.27+bitsdojo_window+getx客户端仿微信聊天Exe应用
最新版Flutter3.32+Dart3.8跨平台仿微信app聊天界面|朋友圈
最新版uniapp+vue3+uv-ui跨三端短视频+直播+聊天【H5+小程序+App端】
uniapp-vue3-os手机oa系统|uni-app+vue3跨三端os后台管理模板
Electron35-DeepSeek桌面端AI系统|vue3.5+electron+arco客户端ai模板
uniapp+vue3酒店预订|vite5+uniapp预约订房系统模板(h5+小程序+App端)
Tauri2.0+Vite5聊天室|vue3+tauri2+element-plus仿微信|tauri聊天应用
tauri2.0-admin桌面端后台系统|Tauri2+Vite5+ElementPlus管理后台EXE程序
vue3-tauri2-wechat:最新研发vite7.1+tauri2.8+vue3 setup+pinia3+elementPlus跨平台仿微信/QQ风格桌面聊天系统Exe模板。包含聊天、通讯录、收藏、朋友圈、短视频、我的等板块。
运用技术
- 跨平台框架:tauri2.8
- 前端技术框架:vite^7.1.10+vue^3.5.22+vue-router^4.6.3
- 状态管理:pinia^3.0.3
- 本地存储:pinia-plugin-persistedstate^4.5.0
- 组件库:element-plus^2.11.5
- 富文本编辑器:@vueup/vue-quill^1.2.0
- 样式预处理:sass^1.93.2
- 短视频滑动插件:swiper^12.0.2
项目框架目录
基于最新版跨平台框架tauri2+vite7创建项目模板,vue3 setup语法开发。
tauri2-vue3chat聊天系统已经更新到我的原创作品集。
Tauri2.0+Vite7+ElementPlus桌面聊天Exe程序
往期推荐
Electron38-Vue3OS客户端OS系统|vite7+electron38+arco桌面os后台管理
electron38-admin桌面端后台|Electron38+Vue3+ElementPlus管理系统
Electron38-Wechat电脑端聊天|vite7+electron38仿微信桌面端聊天系统
原创uniapp+vue3+deepseek+uv-ui跨端实战仿deepseek/豆包流式ai聊天对话助手。
vue3-webseek网页版AI问答|Vite6+DeepSeek+Arco流式ai聊天打字效果
最新版uni-app+vue3+uv-ui跨三端仿微信app聊天应用【h5+小程序+app端】
Flutter3-MacOS桌面OS系统|flutter3.32+window_manager客户端OS模板
最新研发flutter3.27+bitsdojo_window+getx客户端仿微信聊天Exe应用
最新版Flutter3.32+Dart3.8跨平台仿微信app聊天界面|朋友圈
最新版uniapp+vue3+uv-ui跨三端短视频+直播+聊天【H5+小程序+App端】
uniapp-vue3-os手机oa系统|uni-app+vue3跨三端os后台管理模板
Electron35-DeepSeek桌面端AI系统|vue3.5+electron+arco客户端ai模板
uniapp+vue3酒店预订|vite5+uniapp预约订房系统模板(h5+小程序+App端)
Tauri2.0+Vite5聊天室|vue3+tauri2+element-plus仿微信|tauri聊天应用
tauri2.0-admin桌面端后台系统|Tauri2+Vite5+ElementPlus管理后台EXE程序
