


keystore 没有MD5
使用android studio 就可以查看
下面的链接是教程
https://blog.csdn.net/z302766296/article/details/124706791
使用android studio 就可以查看
下面的链接是教程
https://blog.csdn.net/z302766296/article/details/124706791

uni或plus有没有方法实现前置摄像头扫码
plus.barcode默认是后置摄像头,如果能像plus.camera选择摄像头就好了
不知道有没有偏门的方法实现使用前置摄像头扫码
weibo.com/ttarticle/p/show?id=2309404836831824052597
weibo.com/ttarticle/p/show?id=2309404836848634823158
weibo.com/ttarticle/p/show?id=2309404836848639016966
weibo.com/ttarticle/p/show?id=2309404836848642949803
weibo.com/ttarticle/p/show?id=2309404836848647406010
weibo.com/ttarticle/p/show?id=2309404836848655794213
weibo.com/ttarticle/p/show?id=2309404836848672571544
weibo.com/ttarticle/p/show?id=2309404836848672571597
weibo.com/ttarticle/p/show?id=2309404836848680697985
weibo.com/ttarticle/p/show?id=2309404836848680960500
weibo.com/ttarticle/p/show?id=2309404836848685154492
weibo.com/ttarticle/p/show?id=2309404836848685154944
weibo.com/ttarticle/p/show?id=2309404836848693281165
weibo.com/ttarticle/p/show?id=2309404836848701669953
weibo.com/ttarticle/p/show?id=2309404836848706126652
weibo.com/ttarticle/p/show?id=2309404836848710058407
weibo.com/ttarticle/p/show?id=2309404836848714514507
HBuilderX 开发 vue3 + typescript 无法类型提示的一个小技巧
当前使用 HBuilderX 3.6.8.20221027-alpha 版本。
开发 vue 3 使用: setup + ts 模式。
就会遇到这样一个问题:
在 <template> 标签内有时无法识别到使用 <script> 标签定义的值 的类型。
那么就可以这样做:
- 先关闭所有标签页
- 再打开一个
.ts文件 - 最后打开一个
.vue文件
这样就能识别到 <template> 标签使用的 值的类型。
哈哈哈 不保证能适用所有人哦。
当前使用 HBuilderX 3.6.8.20221027-alpha 版本。
开发 vue 3 使用: setup + ts 模式。
就会遇到这样一个问题:
在 <template> 标签内有时无法识别到使用 <script> 标签定义的值 的类型。
那么就可以这样做:
- 先关闭所有标签页
- 再打开一个
.ts文件 - 最后打开一个
.vue文件
这样就能识别到 <template> 标签使用的 值的类型。
哈哈哈 不保证能适用所有人哦。
收起阅读 »
关于swiper轮播 animationfinish的问题
文档上写着字节跳动小程序与飞书小程序不支持 但是我发现目前字节是支持的 请官方不要偷懒 及时更新文档
文档上写着字节跳动小程序与飞书小程序不支持 但是我发现目前字节是支持的 请官方不要偷懒 及时更新文档
对于数组对象中,遍历出相同(对象属性)的元素
// 对于数组对象中,查询出name属性值相同的元素
            let obj = [
                {
                    name:"幼儿园",
                    num:100,
                    level:1
                },
                {
                    name:"幼儿园1",
                    num:10,
                    level:3
                },
                {
                    name:"幼儿园3",
                    num:110,
                    level:3
                },
                {
                    name:"幼儿园1",
                    num:101,
                    level:2
                },
                {
                    name:"幼儿园",
                    num:100,
                    level:1
                },
                {
                    name:"幼儿园4",
                    num:10,
                    level:3
                },
                {
                    name:"幼儿园",
                    num:110,
                    level:3
                },
                {
                    name:"幼儿园5",
                    num:101,
                    level:2
                },
                {
                    name:"幼儿园3",
                    num:110,
                    level:3
                },
                {
                    name:"幼儿园5",
                    num:101,
                    level:2
                }
            ]
            //利用对象的唯一性
            // 1.用for+变量
            let obj2 ={};
            for (let i = 0; i < obj.length; i++) {
                if(!obj2[obj[i].name]){
                    obj2[obj[i].name] = [];
                    obj2[obj[i].name].push(obj[i]);
                }else{
                    obj2[obj[i].name].push(obj[i]);
                }
            }
            console.log(obj2);

            // 2.reduce()
            let objs = obj.reduce((total, currentValue,)=>{

                if(!total[currentValue.name]){
                    total[currentValue.name] = []
                    total[currentValue.name].push(currentValue)
                }else{
                    total[currentValue.name].push(currentValue)
                }
                return total;
            },{})
            console.log(objs);
            // 在去重的基础上再进行获取重复元素
            let newArr=[],uniArr=[];
            for (let i = 0; i < obj.length; i++) {
                let name = obj[i].name;
                if(!uniArr.includes(name)){
                    uniArr.push(name);
                    newArr[uniArr.length-1] = [];
                    newArr[uniArr.length-1].push(obj[i]);
                }else{
                    let index =uniArr.indexOf(name)>-1?uniArr.indexOf(name):0;
                    newArr[index].push(obj[i]);
                }
            }
            console.log(newArr,uniArr);

企业网站源码|科技企业官网源码开发
随着企业如何过渡到数字世界,拥有一个有效的网站已成为必须。虽然自己创建似乎可行,但实际上您却错过了聘请专业人士的优势。在创建网站时,可用性和可信度是重要因素。在本文中,我们将讨论与自由职业者相比,与网站设计公司合作的主要好处。
演示:m.jcedus.top
team.html
<!DOCTYPE html>
<html>
<head>
<title>GUN Team</title>
<meta name="viewport" content="width=device-width, initial-scale=1">
<link rel="stylesheet" type="text/css" href="styles/team.css">
<link rel="stylesheet" href="https://maxcdn.bootstrapcdn.com/font-awesome/4.5.0/css/font-awesome.min.css">
<link href='https://fonts.googleapis.com/css?family=Oxygen:400,700' rel='stylesheet' type='text/css'>
<link href='https://fonts.googleapis.com/css?family=Alegreya+Sans+SC:800italic' rel='stylesheet' type='text/css'>
<script src="https://ajax.googleapis.com/ajax/libs/jquery/1.12.0/jquery.min.js"></script>
</head>
<body>
<div class="team">
<div class="pictures">
</div>
<div class="title">
<a href="index.html"><img src="img/gun.svg"></a>
<div class="content">
<h2>Gun's team</h2>
<p>Mark, Martti, Dr. Amber Cazzell, Priya Kuber, and the Open Source community. Team page and photos coming soon!</p>
</div>
</div>
</div>
<div class="canvas hide">
<div id="display"></div>
<div class="canvas_content">
<div class="nav">
<h1></h1>
<div class="arrows">
<i id="prev" class="fa fa-arrow-left"></i>
<i id="next" class="fa fa-arrow-right"></i>
<i id="close" class="fa fa-times"></i>
</div>
</div>
<p></p>
<a id="amail" href=""></a>
</div>
</div>
<div id="footer">
<div class="container" class="page">
<div class="footer_social">
<div class="grid">
<a href="http://www.github.com/amark/gun" target="_blank"><img src="img/icons/github.svg"></a>
<a href="https://gitter.im/amark/gun" target="_blank"><img src="img/icons/gitter.svg"></a>
<a href="https://twitter.com/databasegun" target="_blank"><img src="img/icons/twitter.svg"></a>
<a href="https://www.linkedin.com/company/gun-inc" target="_blank"><img src="img/icons/linkedin.svg"></a>
</div>
</div>
</div>
<nav>
<a href="http://gun.js.org/" target="_blank">Get Started</a>
<a href="http://gun.js.org/docs" target="_blank">Documentation</a>
<a href="http://gun.js.org/think.html">Tutorials</a>
<a href="https://github.com/amark/gun">Download</a>
</nav>
</div>
<footer>
<div class="container">
<p>Designed with ♥ by Mark Nadal, the gun team, and many very awesome contributors. Liberally licensed under <a href="https://github.com/amark/gun/wiki/package.json"> Zlib or MIT or Apache 2.0.</a></p>
</div>
</footer>
<script type="text/javascript" src="js/team.js"></script>
</body>
</html> 公司选择聘请自由职业者而不是专业网页设计公司的最大决策因素是预算。但是,实际上还有很多您可能不知道的专业人士。有了这个,这里有七个理由选择专业的网站设计公司而不是自由职业者。

1. 加深对行业的了解
技术的现实是不断变化的,这在经营企业时可能很难跟踪。这就是在所有事情上拥有一个专门的团队有很大帮助的地方。在网络开发公司的适当指导下,您和您的网站一定会跟上最新的技术和趋势。
虽然任何人都可以从事网页设计,但雇佣任何人可能不是最好的选择。设计一个有效且用户友好的网站是吸引客户和提高电子商务销售额的关键。而且通常情况下,选择更便宜的替代品往往弊大于利。网站设计是一个完整的职业,需要大量的潜在客户转换、适当的 SEO 和搜索引擎算法方面的技能和经验。
2. 吸引人的网页设计
一家优秀的网络开发公司可以为您的网站带来更大的利润,因为他们确保网站在美学上令客户满意。这也有助于与您的品牌保持一致,这也是吸引客户的重要因素。设计最终也会变老。网页设计公司的好处之一是您的设计永远不会过时。此外,与能够满足您所有特定需求的团队一起工作很重要,这正是网页设计公司可以提供的。无论客户的想法是什么,一家优秀的网页设计公司都将确保他们提供超出预期的内容,将质量和数量完美结合,并具有凝聚力和出色的网页礼仪。
3. 安全可靠的网站
专业人员将在考虑安全性的情况下构建您的网站。从一开始,他们就会为您的网站设置保护协议。一种方法涉及SSL 证书,该证书在您的网址开头显示为“https”。
将其放在您的网站上是确保您和您客户的信息安全的最佳方式。如果您的网站处理密码或信用详细信息等信息,这对您来说是必不可少的。此外,由于其安全性,Google 会将您的网站排名更高。
4. SEO友好
建立一个对 SEO 友好的网站是成功企业的基础。这可以通过将其合并到您的电子商务网页设计和您的书面内容中来完成。谷歌重视用户体验,并偏爱为其访问者提供这种体验的网站。
一个好的设计不仅能吸引访客,还能帮助他们完成客户旅程。正确使用空白、配色方案和易于阅读的字体是网页设计公司的额外好处,设计师将使用这些好处来保持访问者的可读性。
确保您的内容经过 SEO 优化也很重要。专业的网站设计公司一定会使用适当的工具填充您的内容,例如元和标题标签、焦点关键词、目标关键字和位置标记。这样做不仅可以帮助查看者了解您的业务到底提供了什么,还可以帮助搜索引擎在 SERP 中对您进行排名。有一家优秀的网络开发公司在您身边,您可以确信您的内容不仅有用且信息丰富,而且与您的访问者相关。
5.响应和速度优化的网站
您的网站是您在互联网上的第一印象。优化您的网站速度可以为您提供更好的 SEO、更好的排名,进而获得更好的投资回报率。一个无缝运行且每次都能正确加载的网站更有可能将访问者转化为忠实客户。
通过选择专业服务,您将确信您的网站将快速高效。与网页设计公司合作的好处包括使用 CDN(内容交付网络)、更好的服务器主机、优化图像大小、减少插件、最小化 JavaScript 和 CSS、网站缓存、使用数据库和 CMS 优化性能是我们网站的一部分速度优化服务,减少网页字体。
6.移动优化
移动搜索引擎优化是优化您的网站的美学和功能的过程。当您的网站针对 SEO 进行优化时,您将为访问者提供积极的体验。
在网页设计公司的帮助下,这很容易,因为他们拥有一套完整的工具和技能来为您完成这项工作。他们将确保您的网站具有响应式设计。一种使用适应性强的布局适合任何设备,包括移动设备。
7. 客户支持
在您的公司网站建立后,您的企业获得客户支持也很重要。网页设计公司的主要好处之一是,即使在网站完成后,他们也能确保看到他们的工作。与您选择自由职业者不同,您的合作伙伴关系在网站启动并运行后立即结束。
能够解决可能出现的任何问题或未来客户的需求是首要任务。有很多网站需要考虑。编辑内容、添加网站页面、更新主机,甚至定期维护都是重要的例子。有了网页设计公司,您就不必担心联系全新的设计师。您只需从同一联络点获得所需的服务。
随着企业如何过渡到数字世界,拥有一个有效的网站已成为必须。虽然自己创建似乎可行,但实际上您却错过了聘请专业人士的优势。在创建网站时,可用性和可信度是重要因素。在本文中,我们将讨论与自由职业者相比,与网站设计公司合作的主要好处。
演示:m.jcedus.top
team.html
<!DOCTYPE html>
<html>
<head>
<title>GUN Team</title>
<meta name="viewport" content="width=device-width, initial-scale=1">
<link rel="stylesheet" type="text/css" href="styles/team.css">
<link rel="stylesheet" href="https://maxcdn.bootstrapcdn.com/font-awesome/4.5.0/css/font-awesome.min.css">
<link href='https://fonts.googleapis.com/css?family=Oxygen:400,700' rel='stylesheet' type='text/css'>
<link href='https://fonts.googleapis.com/css?family=Alegreya+Sans+SC:800italic' rel='stylesheet' type='text/css'>
<script src="https://ajax.googleapis.com/ajax/libs/jquery/1.12.0/jquery.min.js"></script>
</head>
<body>
<div class="team">
<div class="pictures">
</div>
<div class="title">
<a href="index.html"><img src="img/gun.svg"></a>
<div class="content">
<h2>Gun's team</h2>
<p>Mark, Martti, Dr. Amber Cazzell, Priya Kuber, and the Open Source community. Team page and photos coming soon!</p>
</div>
</div>
</div>
<div class="canvas hide">
<div id="display"></div>
<div class="canvas_content">
<div class="nav">
<h1></h1>
<div class="arrows">
<i id="prev" class="fa fa-arrow-left"></i>
<i id="next" class="fa fa-arrow-right"></i>
<i id="close" class="fa fa-times"></i>
</div>
</div>
<p></p>
<a id="amail" href=""></a>
</div>
</div>
<div id="footer">
<div class="container" class="page">
<div class="footer_social">
<div class="grid">
<a href="http://www.github.com/amark/gun" target="_blank"><img src="img/icons/github.svg"></a>
<a href="https://gitter.im/amark/gun" target="_blank"><img src="img/icons/gitter.svg"></a>
<a href="https://twitter.com/databasegun" target="_blank"><img src="img/icons/twitter.svg"></a>
<a href="https://www.linkedin.com/company/gun-inc" target="_blank"><img src="img/icons/linkedin.svg"></a>
</div>
</div>
</div>
<nav>
<a href="http://gun.js.org/" target="_blank">Get Started</a>
<a href="http://gun.js.org/docs" target="_blank">Documentation</a>
<a href="http://gun.js.org/think.html">Tutorials</a>
<a href="https://github.com/amark/gun">Download</a>
</nav>
</div>
<footer>
<div class="container">
<p>Designed with ♥ by Mark Nadal, the gun team, and many very awesome contributors. Liberally licensed under <a href="https://github.com/amark/gun/wiki/package.json"> Zlib or MIT or Apache 2.0.</a></p>
</div>
</footer>
<script type="text/javascript" src="js/team.js"></script>
</body>
</html> 公司选择聘请自由职业者而不是专业网页设计公司的最大决策因素是预算。但是,实际上还有很多您可能不知道的专业人士。有了这个,这里有七个理由选择专业的网站设计公司而不是自由职业者。
1. 加深对行业的了解
技术的现实是不断变化的,这在经营企业时可能很难跟踪。这就是在所有事情上拥有一个专门的团队有很大帮助的地方。在网络开发公司的适当指导下,您和您的网站一定会跟上最新的技术和趋势。
虽然任何人都可以从事网页设计,但雇佣任何人可能不是最好的选择。设计一个有效且用户友好的网站是吸引客户和提高电子商务销售额的关键。而且通常情况下,选择更便宜的替代品往往弊大于利。网站设计是一个完整的职业,需要大量的潜在客户转换、适当的 SEO 和搜索引擎算法方面的技能和经验。
2. 吸引人的网页设计
一家优秀的网络开发公司可以为您的网站带来更大的利润,因为他们确保网站在美学上令客户满意。这也有助于与您的品牌保持一致,这也是吸引客户的重要因素。设计最终也会变老。网页设计公司的好处之一是您的设计永远不会过时。此外,与能够满足您所有特定需求的团队一起工作很重要,这正是网页设计公司可以提供的。无论客户的想法是什么,一家优秀的网页设计公司都将确保他们提供超出预期的内容,将质量和数量完美结合,并具有凝聚力和出色的网页礼仪。
3. 安全可靠的网站
专业人员将在考虑安全性的情况下构建您的网站。从一开始,他们就会为您的网站设置保护协议。一种方法涉及SSL 证书,该证书在您的网址开头显示为“https”。
将其放在您的网站上是确保您和您客户的信息安全的最佳方式。如果您的网站处理密码或信用详细信息等信息,这对您来说是必不可少的。此外,由于其安全性,Google 会将您的网站排名更高。
4. SEO友好
建立一个对 SEO 友好的网站是成功企业的基础。这可以通过将其合并到您的电子商务网页设计和您的书面内容中来完成。谷歌重视用户体验,并偏爱为其访问者提供这种体验的网站。
一个好的设计不仅能吸引访客,还能帮助他们完成客户旅程。正确使用空白、配色方案和易于阅读的字体是网页设计公司的额外好处,设计师将使用这些好处来保持访问者的可读性。
确保您的内容经过 SEO 优化也很重要。专业的网站设计公司一定会使用适当的工具填充您的内容,例如元和标题标签、焦点关键词、目标关键字和位置标记。这样做不仅可以帮助查看者了解您的业务到底提供了什么,还可以帮助搜索引擎在 SERP 中对您进行排名。有一家优秀的网络开发公司在您身边,您可以确信您的内容不仅有用且信息丰富,而且与您的访问者相关。
5.响应和速度优化的网站
您的网站是您在互联网上的第一印象。优化您的网站速度可以为您提供更好的 SEO、更好的排名,进而获得更好的投资回报率。一个无缝运行且每次都能正确加载的网站更有可能将访问者转化为忠实客户。
通过选择专业服务,您将确信您的网站将快速高效。与网页设计公司合作的好处包括使用 CDN(内容交付网络)、更好的服务器主机、优化图像大小、减少插件、最小化 JavaScript 和 CSS、网站缓存、使用数据库和 CMS 优化性能是我们网站的一部分速度优化服务,减少网页字体。
6.移动优化
移动搜索引擎优化是优化您的网站的美学和功能的过程。当您的网站针对 SEO 进行优化时,您将为访问者提供积极的体验。
在网页设计公司的帮助下,这很容易,因为他们拥有一套完整的工具和技能来为您完成这项工作。他们将确保您的网站具有响应式设计。一种使用适应性强的布局适合任何设备,包括移动设备。
7. 客户支持
在您的公司网站建立后,您的企业获得客户支持也很重要。网页设计公司的主要好处之一是,即使在网站完成后,他们也能确保看到他们的工作。与您选择自由职业者不同,您的合作伙伴关系在网站启动并运行后立即结束。
能够解决可能出现的任何问题或未来客户的需求是首要任务。有很多网站需要考虑。编辑内容、添加网站页面、更新主机,甚至定期维护都是重要的例子。有了网页设计公司,您就不必担心联系全新的设计师。您只需从同一联络点获得所需的服务。

wap2app 网页用plus.runtime.openWeb上传不了图片
wap2app 网页用plus.runtime.openWeb上传不了图片
wap2app 网页用plus.runtime.openWeb上传不了图片

iOS 上传图片 errMsg: "uploadFile:fail 12"
errMsg: "uploadFile:fail 12"
Http_Status错误422。
这个问题有没有大哥遇见过 iOS上传图片
errMsg: "uploadFile:fail 12"
Http_Status错误422。
这个问题有没有大哥遇见过 iOS上传图片
关于vue3 的onload获取页面信息
vue3好像这块已经没有onload的了,所以如果跳转页面要获取url参数则如下
//语法糖写法
<script setup>
  const props = defineProps({
    nid: String,
  })
  console.log(props);
</script>
//常规写法
export default defineComponent({
setup(props) {
console.log(props);
}
})vue3好像这块已经没有onload的了,所以如果跳转页面要获取url参数则如下
//语法糖写法
<script setup>
  const props = defineProps({
    nid: String,
  })
  console.log(props);
</script>
//常规写法
export default defineComponent({
setup(props) {
console.log(props);
}
})5天的工作用1天搞定,FirstUI组件库用三招帮你实现,看完马上能用
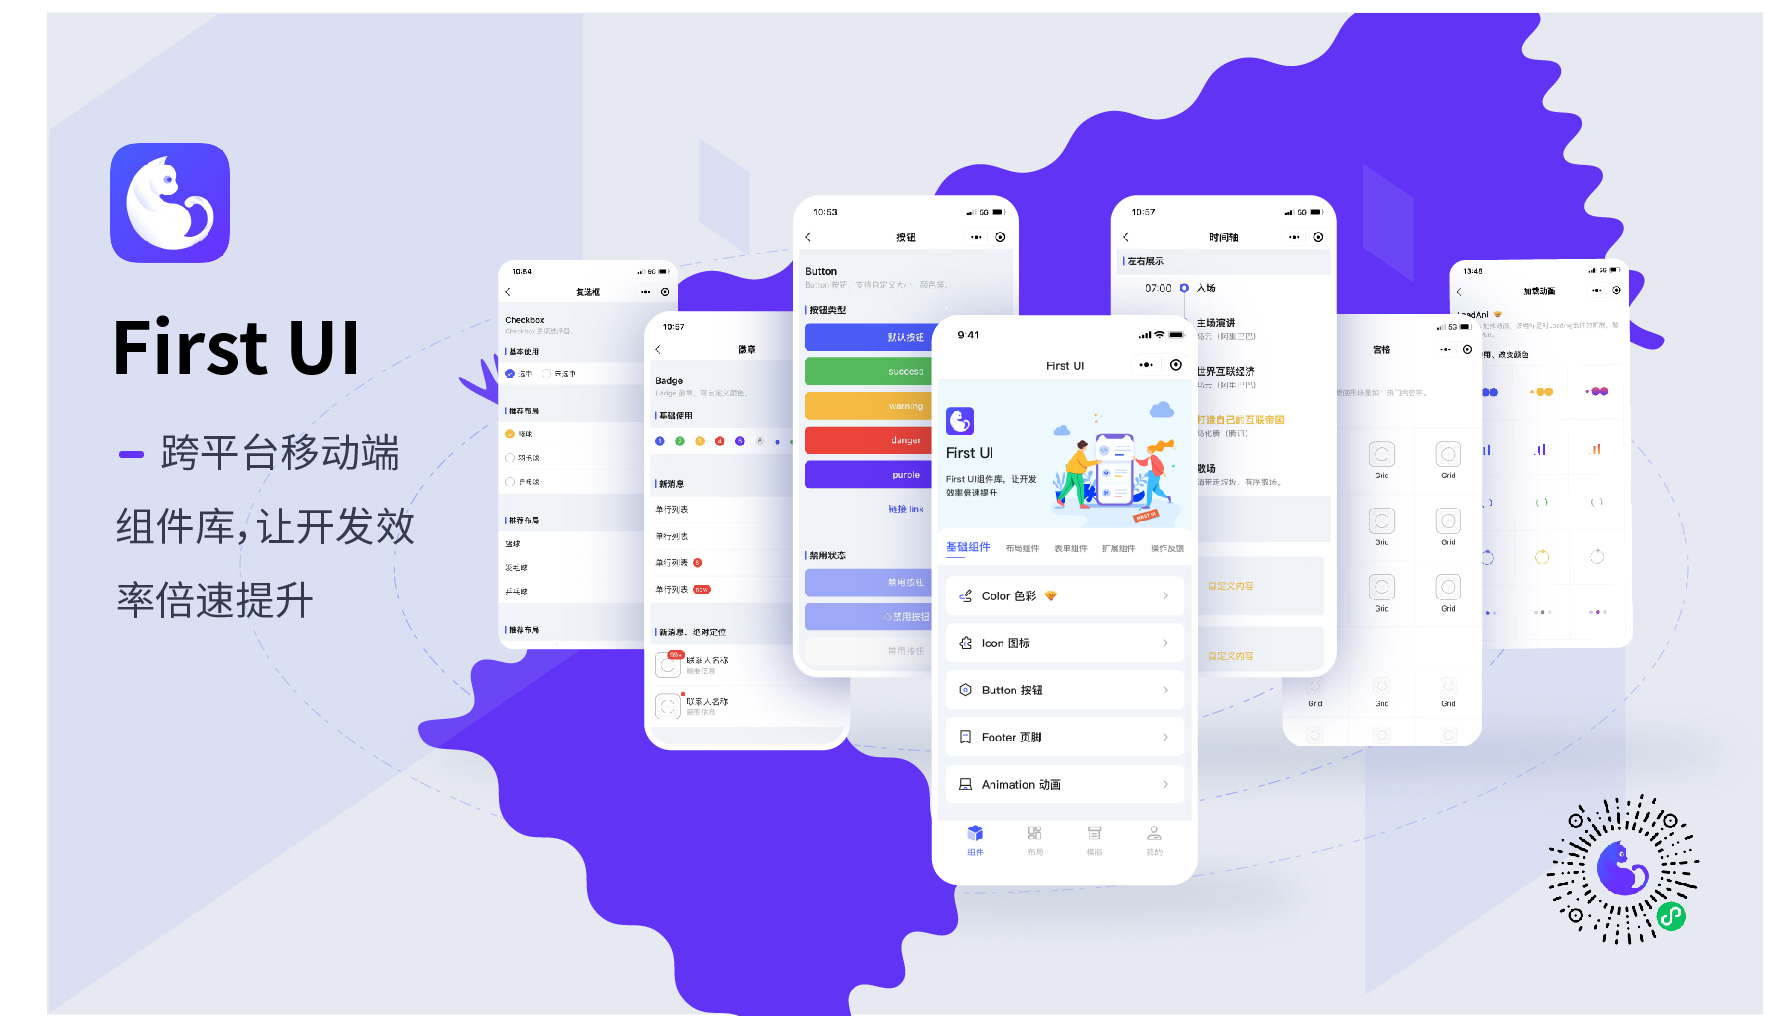
FirstUI(https://www.firstui.cn/)是一套超高性能、超高颜值的移动端UI综合解决方案,包含业内顶尖的组件库、强大的功能库、丰富精美的模板库,提供uni-app(完美支持nvue)、微信小程序版本,兼顾高效率与高性能,让您的app、小程序开发获得百倍提质提速!
如果你要开发APP或者各平台的小程序,用上FirstUI组件库,绝对拯救你的时间,提升工作体验!
FirstUI官网:https://www.firstui.cn/
FirstUI社区:https://forum.firstui.cn/
FirstUI uni-app版:
文档地址: https://doc.firstui.cn
github: https://github.com/FirstUI/FirstUI (欢迎star :-D)
gitee: https://gitee.com/firstUI/FirstUI (欢迎star :-D)
uniapp插件市场FirstUI:https://ext.dcloud.net.cn/plugin?id=7646
FirstUI 微信小程序版:
文档地址: https://wxdoc.firstui.cn
github: https://github.com/FirstUI/FirstUI-weixin (欢迎star :-D)
gitee: https://gitee.com/firstUI/FirstUI (欢迎star :-D)
一、丰富的组件库
FirstUI目前上线了超过120款实打实的独立组件,覆盖了日常项目95%使用场景,处于业内绝对领跑地位!同时每一款组件都是经过精雕细琢,精美高效。而且许多组件都是FirstUI所独创,比如滑块拼图类验证组件、视频上传组件等等,非常实用。
下面给大家详细列一下我们的组件库,让大家感受下FirstUI匠心与诚意。
为控制篇幅,下面只放了部分组件的截图。更推荐大家直接搜索小程序"FirstUI组件库",实际体验,让产品来“说话”。
1、基础组件(7款)
Color 色彩, Text 文本, Icon 图标, Button 按钮, Footer 页脚, Animation 动画, StatusBar 状态栏

2、布局组件(6款)
Layout 栅格布局, Grid 宫格, Panel 面板, Preview 表单预览, List 列表, Card 卡片

3、表单组件(19款)
Calendar 日历, Cascader 级联选择器, Picker 选择器, DatePicker 日期时间选择器, Slider 滑块选择器, Form 表单校验, FormItem 表单项, Select 选择器, Input 输入框, InputNumber 数字输入框, Label 标签, Radio 单选框, Checkbox 复选框, Switch 开关, Textarea 多行输入框, Rate 评分, Upload 图片上传, UploadVideo 视频上传, SearchBar 搜索栏

4、操作反馈类组件(14款)
ActionSheet 上拉菜单, Toast 轻提示, Backdrop 遮罩层, Dialog 对话框, DropdownMenu 下拉菜单, DropdownList 下拉菜单, Modal 模态框, Gallery 画廊, Landscape 压屏窗, Loading 加载, loadAni 加载动画, Spin 旋转动画, Message 消息提示, SwipeAction 滑动菜单

5、导航组件(17款)
NavBar 导航栏, Pagination 分页器, BubbleBox 气泡框, SegmentedControl 分段器, Tabbar 标签栏, BottomNavbar 底部导航栏, Tabs 标签页, IndexList 索引列表, NoticeBar 通告栏, Sticky 吸顶容器, Steps 步骤条, Fab 浮动按钮, Drawer 抽屉, BottomPopup 底部弹出层, TopPopup 顶部弹出层, TimeAxis 时间轴, Vtabs 纵向选项卡

6、数据组件(13款)
Badge 徽章, Alert 警告框, Avatar 头像, Tag 标签, DataTag 标签选择, Progress 进度条, Collapse 折叠面板, Circle 圆形进度条, CountDown 倒计时, Divider 分割线, LoadMore 加载更多, Empty 缺省页, Skeleton 骨架屏

7、扩展组件(24款)
ShareSheet 分享面板, Result 结果页, FilterBar 筛选栏, SingleInput 单输入框, DigitalRoller 数字滚轮, DigitalKeyboard 数字键盘, LicensePlate 车牌号键盘, SwiperDot 轮播图指示点, CopyText 长按复制, CubicBezier 贝塞尔曲线, ImageCropper 图片裁剪, Drag 拖拽排序, SlideVerify 滑动验证, RotateVerify 旋转验证, SliderCaptcha 滑块拼图验证, PuzzleVerify 滑块拼图验证, OverflowHidden 内容超出隐藏, Timer 计时器, CountdownVerify 验证码倒计时, Lazyload 图片懒加载, Waterfall 瀑布流, Table 表格, Backtop 回到顶部, SafeArea 底部安全区域

8、画布组件(4款)
Poster 分享海报, Qrcode 二维码, Barcode 条形码, Autograph 手写签名

二、强大的功能库
前端开发除了对丰富组件的需求外,还需要功能库的加持,FirstUI也给用户提供了一系统强大的功能库。
1、Clipboard 复制文本
复制文本,主要针对H5做兼容。
2、Validator 表单验证
表单验证,提供了常用的表单校验方法,同时还支持传入自定义校验方法。
3、Request 网络请求
对网络请求做好很好的封装,支持Promise,还可以在发起请求和请求响应之前进行拦截。
4、Utils 工具类
这是个宝藏,提供了非常多的数据处理工具。包含:英文首字母大写; 把连续出现多次的字母字符串进行压缩; 等待多少毫秒再执行,同步阻塞; 去左右空格; 去所有空格; 替换所有相同字符串; 格式化手机号码; 金额格式化,保留两位小数; 日期时间格式化(参数详细说明如下方所示); RGB颜色转十六进制颜色; 十六进制颜色转RGB颜色; 唯一标识,随机数; 获取uuid; 简单的数组合并去重; 获取日期时间段; 获取Url参数,返回一个对象; 函数防抖; 函数节流等
三、精美的布局和模板库
项目开发中会有一些常见的场景,可以由组件向上封装,提供更加高效便捷的布局和模板,FirstUI提供了以下布局和模板库,大大提升了开发效率也带来了更加舒服的视觉体验!
1、Layout 布局内容
列表 LIST, 索引列表 INDEX LIST, 宫格 GRID, 卡片 CARD, 瀑布流 WATERFALL FLOW, 顶部选项卡 TOP TAB, 垂直选项卡 VERTICAL TAB, 新闻列表 NEWS LIST, 商品列表 PRODUCT LIST, 提交订单栏 SUBMIT BAR, 商品导航栏 GOODS BAR, 聊天栏 CHAT BAR, 滚动消息 ROLL NEWS, 卡片轮播 CARD SWIPER, 地图 MAP, 横向滚动 ROLLHORIZONTAL


2、模板(5套)
模板和成套系统是FirstUI后一阶段工作的重心,目前FirstUI推出的模板有5套(LoginA 登录模板 A; LoginB 登录模板 B; LoginC 登录模板 C; LoginD 登录模板 D; Portal 门户模板; ),后续会再逐步推出其他模板产品出来。


看完可以用起来了,FirstUI组件库,期待与你相逢!
FirstUI官网:https://www.firstui.cn/
FirstUI社区:https://forum.firstui.cn/
FirstUI uni-app版:
文档地址: https://doc.firstui.cn
github: https://github.com/FirstUI/FirstUI (欢迎star :-D)
gitee: https://gitee.com/firstUI/FirstUI (欢迎star :-D)
uniapp插件市场FirstUI:https://ext.dcloud.net.cn/plugin?id=7646
FirstUI 微信小程序版:
文档地址: https://wxdoc.firstui.cn
github: https://github.com/FirstUI/FirstUI-weixin (欢迎star :-D)
gitee: https://gitee.com/firstUI/FirstUI (欢迎star :-D)
FirstUI(https://www.firstui.cn/)是一套超高性能、超高颜值的移动端UI综合解决方案,包含业内顶尖的组件库、强大的功能库、丰富精美的模板库,提供uni-app(完美支持nvue)、微信小程序版本,兼顾高效率与高性能,让您的app、小程序开发获得百倍提质提速!
如果你要开发APP或者各平台的小程序,用上FirstUI组件库,绝对拯救你的时间,提升工作体验!
FirstUI官网:https://www.firstui.cn/
FirstUI社区:https://forum.firstui.cn/
FirstUI uni-app版:
文档地址: https://doc.firstui.cn
github: https://github.com/FirstUI/FirstUI (欢迎star :-D)
gitee: https://gitee.com/firstUI/FirstUI (欢迎star :-D)
uniapp插件市场FirstUI:https://ext.dcloud.net.cn/plugin?id=7646
FirstUI 微信小程序版:
文档地址: https://wxdoc.firstui.cn
github: https://github.com/FirstUI/FirstUI-weixin (欢迎star :-D)
gitee: https://gitee.com/firstUI/FirstUI (欢迎star :-D)
一、丰富的组件库
FirstUI目前上线了超过120款实打实的独立组件,覆盖了日常项目95%使用场景,处于业内绝对领跑地位!同时每一款组件都是经过精雕细琢,精美高效。而且许多组件都是FirstUI所独创,比如滑块拼图类验证组件、视频上传组件等等,非常实用。
下面给大家详细列一下我们的组件库,让大家感受下FirstUI匠心与诚意。
为控制篇幅,下面只放了部分组件的截图。更推荐大家直接搜索小程序"FirstUI组件库",实际体验,让产品来“说话”。
1、基础组件(7款)
Color 色彩, Text 文本, Icon 图标, Button 按钮, Footer 页脚, Animation 动画, StatusBar 状态栏
2、布局组件(6款)
Layout 栅格布局, Grid 宫格, Panel 面板, Preview 表单预览, List 列表, Card 卡片
3、表单组件(19款)
Calendar 日历, Cascader 级联选择器, Picker 选择器, DatePicker 日期时间选择器, Slider 滑块选择器, Form 表单校验, FormItem 表单项, Select 选择器, Input 输入框, InputNumber 数字输入框, Label 标签, Radio 单选框, Checkbox 复选框, Switch 开关, Textarea 多行输入框, Rate 评分, Upload 图片上传, UploadVideo 视频上传, SearchBar 搜索栏
4、操作反馈类组件(14款)
ActionSheet 上拉菜单, Toast 轻提示, Backdrop 遮罩层, Dialog 对话框, DropdownMenu 下拉菜单, DropdownList 下拉菜单, Modal 模态框, Gallery 画廊, Landscape 压屏窗, Loading 加载, loadAni 加载动画, Spin 旋转动画, Message 消息提示, SwipeAction 滑动菜单
5、导航组件(17款)
NavBar 导航栏, Pagination 分页器, BubbleBox 气泡框, SegmentedControl 分段器, Tabbar 标签栏, BottomNavbar 底部导航栏, Tabs 标签页, IndexList 索引列表, NoticeBar 通告栏, Sticky 吸顶容器, Steps 步骤条, Fab 浮动按钮, Drawer 抽屉, BottomPopup 底部弹出层, TopPopup 顶部弹出层, TimeAxis 时间轴, Vtabs 纵向选项卡
6、数据组件(13款)
Badge 徽章, Alert 警告框, Avatar 头像, Tag 标签, DataTag 标签选择, Progress 进度条, Collapse 折叠面板, Circle 圆形进度条, CountDown 倒计时, Divider 分割线, LoadMore 加载更多, Empty 缺省页, Skeleton 骨架屏
7、扩展组件(24款)
ShareSheet 分享面板, Result 结果页, FilterBar 筛选栏, SingleInput 单输入框, DigitalRoller 数字滚轮, DigitalKeyboard 数字键盘, LicensePlate 车牌号键盘, SwiperDot 轮播图指示点, CopyText 长按复制, CubicBezier 贝塞尔曲线, ImageCropper 图片裁剪, Drag 拖拽排序, SlideVerify 滑动验证, RotateVerify 旋转验证, SliderCaptcha 滑块拼图验证, PuzzleVerify 滑块拼图验证, OverflowHidden 内容超出隐藏, Timer 计时器, CountdownVerify 验证码倒计时, Lazyload 图片懒加载, Waterfall 瀑布流, Table 表格, Backtop 回到顶部, SafeArea 底部安全区域
8、画布组件(4款)
Poster 分享海报, Qrcode 二维码, Barcode 条形码, Autograph 手写签名
二、强大的功能库
前端开发除了对丰富组件的需求外,还需要功能库的加持,FirstUI也给用户提供了一系统强大的功能库。
1、Clipboard 复制文本
复制文本,主要针对H5做兼容。
2、Validator 表单验证
表单验证,提供了常用的表单校验方法,同时还支持传入自定义校验方法。
3、Request 网络请求
对网络请求做好很好的封装,支持Promise,还可以在发起请求和请求响应之前进行拦截。
4、Utils 工具类
这是个宝藏,提供了非常多的数据处理工具。包含:英文首字母大写; 把连续出现多次的字母字符串进行压缩; 等待多少毫秒再执行,同步阻塞; 去左右空格; 去所有空格; 替换所有相同字符串; 格式化手机号码; 金额格式化,保留两位小数; 日期时间格式化(参数详细说明如下方所示); RGB颜色转十六进制颜色; 十六进制颜色转RGB颜色; 唯一标识,随机数; 获取uuid; 简单的数组合并去重; 获取日期时间段; 获取Url参数,返回一个对象; 函数防抖; 函数节流等
三、精美的布局和模板库
项目开发中会有一些常见的场景,可以由组件向上封装,提供更加高效便捷的布局和模板,FirstUI提供了以下布局和模板库,大大提升了开发效率也带来了更加舒服的视觉体验!
1、Layout 布局内容
列表 LIST, 索引列表 INDEX LIST, 宫格 GRID, 卡片 CARD, 瀑布流 WATERFALL FLOW, 顶部选项卡 TOP TAB, 垂直选项卡 VERTICAL TAB, 新闻列表 NEWS LIST, 商品列表 PRODUCT LIST, 提交订单栏 SUBMIT BAR, 商品导航栏 GOODS BAR, 聊天栏 CHAT BAR, 滚动消息 ROLL NEWS, 卡片轮播 CARD SWIPER, 地图 MAP, 横向滚动 ROLLHORIZONTAL
2、模板(5套)
模板和成套系统是FirstUI后一阶段工作的重心,目前FirstUI推出的模板有5套(LoginA 登录模板 A; LoginB 登录模板 B; LoginC 登录模板 C; LoginD 登录模板 D; Portal 门户模板; ),后续会再逐步推出其他模板产品出来。
看完可以用起来了,FirstUI组件库,期待与你相逢!
FirstUI官网:https://www.firstui.cn/
FirstUI社区:https://forum.firstui.cn/
FirstUI uni-app版:
文档地址: https://doc.firstui.cn
github: https://github.com/FirstUI/FirstUI (欢迎star :-D)
gitee: https://gitee.com/firstUI/FirstUI (欢迎star :-D)
uniapp插件市场FirstUI:https://ext.dcloud.net.cn/plugin?id=7646
FirstUI 微信小程序版:
文档地址: https://wxdoc.firstui.cn
github: https://github.com/FirstUI/FirstUI-weixin (欢迎star :-D)
gitee: https://gitee.com/firstUI/FirstUI (欢迎star :-D)
uniapp vue3语音播发广播动画小组件
在实战项目中孵化的一些小组件分享出来供大家学习使用:语音播发广播动画小组件
vue3支持全端语音播发广播动画组件

组件使用
<view class="test">
    <dengzy-broadcast
    :size='5'
    :space='10'
    :whMultiple='15'/>
    <text>你说的是啥</text>
</view>
属性说明
| 参数 | 类型 | 默认值 | 可选值 | 说明 |
|---|---|---|---|---|
| num | Number | 3 | 条线数量 | |
| direction | String | left | left/right/top/bottom | 条线方向 |
| size | Number | 10 | 线条粗细大小 | |
| whMultiple | Number | 20 | 线条宽高度倍数 | |
| space | Number | 25 | 线条间距 | |
| color | String | #cccccc | #000000/black | 线条颜色 |
| activeColor | String | #000000 | #000000/black | 线条激活颜色 |
| animation | Boolean | true | true/false | 激活动画 |
| timer | Number | 300 | 动画间隔时间,单位毫秒 |
在实战项目中孵化的一些小组件分享出来供大家学习使用:语音播发广播动画小组件
vue3支持全端语音播发广播动画组件
组件使用
<view class="test">
    <dengzy-broadcast
    :size='5'
    :space='10'
    :whMultiple='15'/>
    <text>你说的是啥</text>
</view>
属性说明
| 参数 | 类型 | 默认值 | 可选值 | 说明 |
|---|---|---|---|---|
| num | Number | 3 | 条线数量 | |
| direction | String | left | left/right/top/bottom | 条线方向 |
| size | Number | 10 | 线条粗细大小 | |
| whMultiple | Number | 20 | 线条宽高度倍数 | |
| space | Number | 25 | 线条间距 | |
| color | String | #cccccc | #000000/black | 线条颜色 |
| activeColor | String | #000000 | #000000/black | 线条激活颜色 |
| animation | Boolean | true | true/false | 激活动画 |
| timer | Number | 300 | 动画间隔时间,单位毫秒 |
WebView与原生双向通信、传值、js注入、设置获取UserAgent(桌面网站)、支持设置plus、vue、nvue里的WebView、原生侧滑返回
WebView与原生双向通信、传值、js注入、设置获取UserAgent(桌面网站)、支持设置plus、vue、nvue里的WebView、原生侧滑返回:https://ext.dcloud.net.cn/plugin?id=9832
WebView与原生双向通信、传值、js注入、设置获取UserAgent(桌面网站)、支持设置plus、vue、nvue里的WebView、原生侧滑返回:https://ext.dcloud.net.cn/plugin?id=9832
收起阅读 »