最近想发布ipa文件到appstore的时候,发现在app store填写资料的时候,需要xcode或其他mac电脑的软件来上传ipa文件,还需要多种尺寸的ios app的截屏。
这可是难为我们windows电脑的开发者了。
最后,我发现并不需要mac电脑也可以上架的,可以使用香蕉云编来实现。
下面是我上架appstore的经验分享:
先登录苹果开发者平台,点进去app store connect的app管理
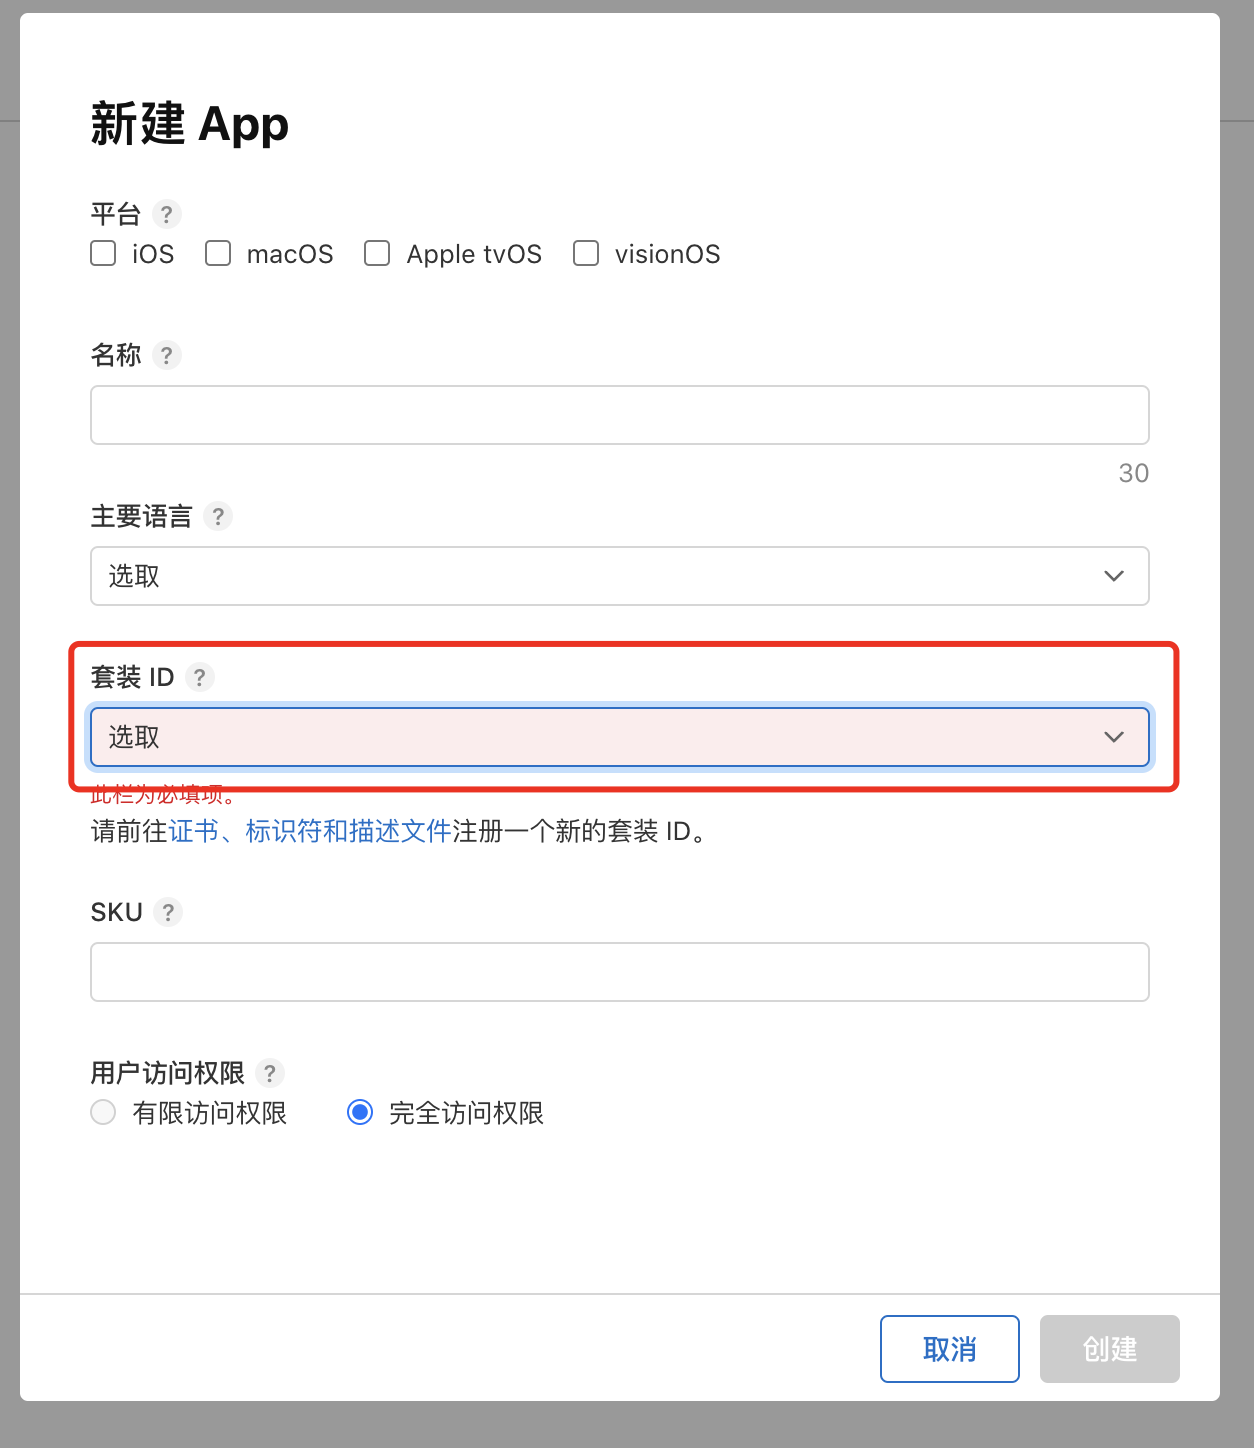
新建一个app(假如你还没创建才需要创建),如下图,新建app的时候,套装ID这一项是最重要的,因为代表应用的ID,需要跟我们在hbuilderx填写的appId一模一样才行。
创建完后,你就可以见到app的列表界面有这个app了,如下:
点击app的名字,进去就开始上架了
其中进去第一个界面需要提供屏幕截屏,需要提供很多ios设备的截屏,你可以使用香蕉云编来合成这些截屏。
https://www.yunedit.com/jietu
然后在后面,还需要上传ipa到构建版本,如下图所示:
这里win电脑安装不了xcode这些ide,因此使用香蕉云编来上传:
https://www.yunedit.com/ipasend
进入香蕉云编,提供ipa和平台账号这些信息,就可以上传了: